Login, if you are not logged in already. You can login here: https://webbabyshower.com/login/
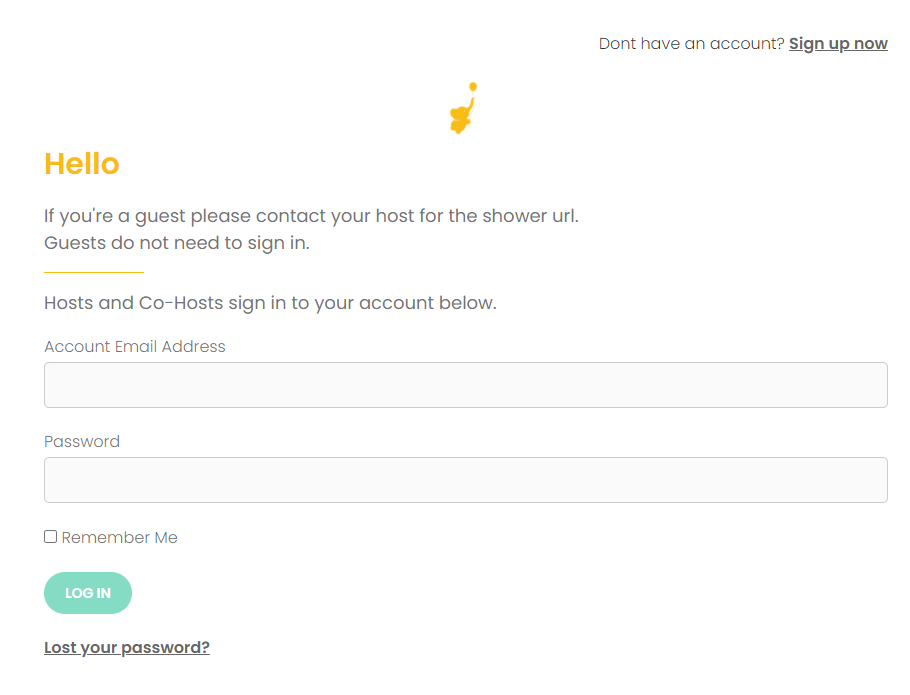
Table of contents:
Frequently Asked Questions
(Click here to return to the Table of Contents)
Can I get the video call link ahead of time?
No. The video call link will be available after you start the video call.
How many people can join the video call?
There can be up to 100 people on the video call at a time.
Is there a time limit for the video call?
Video calls are limited to 3 hours per video call.
Can I test the video call before my shower?
Yes! You can do as many test calls as you need.
Start a Video Party Call
(Click here to return to the Table of Contents)
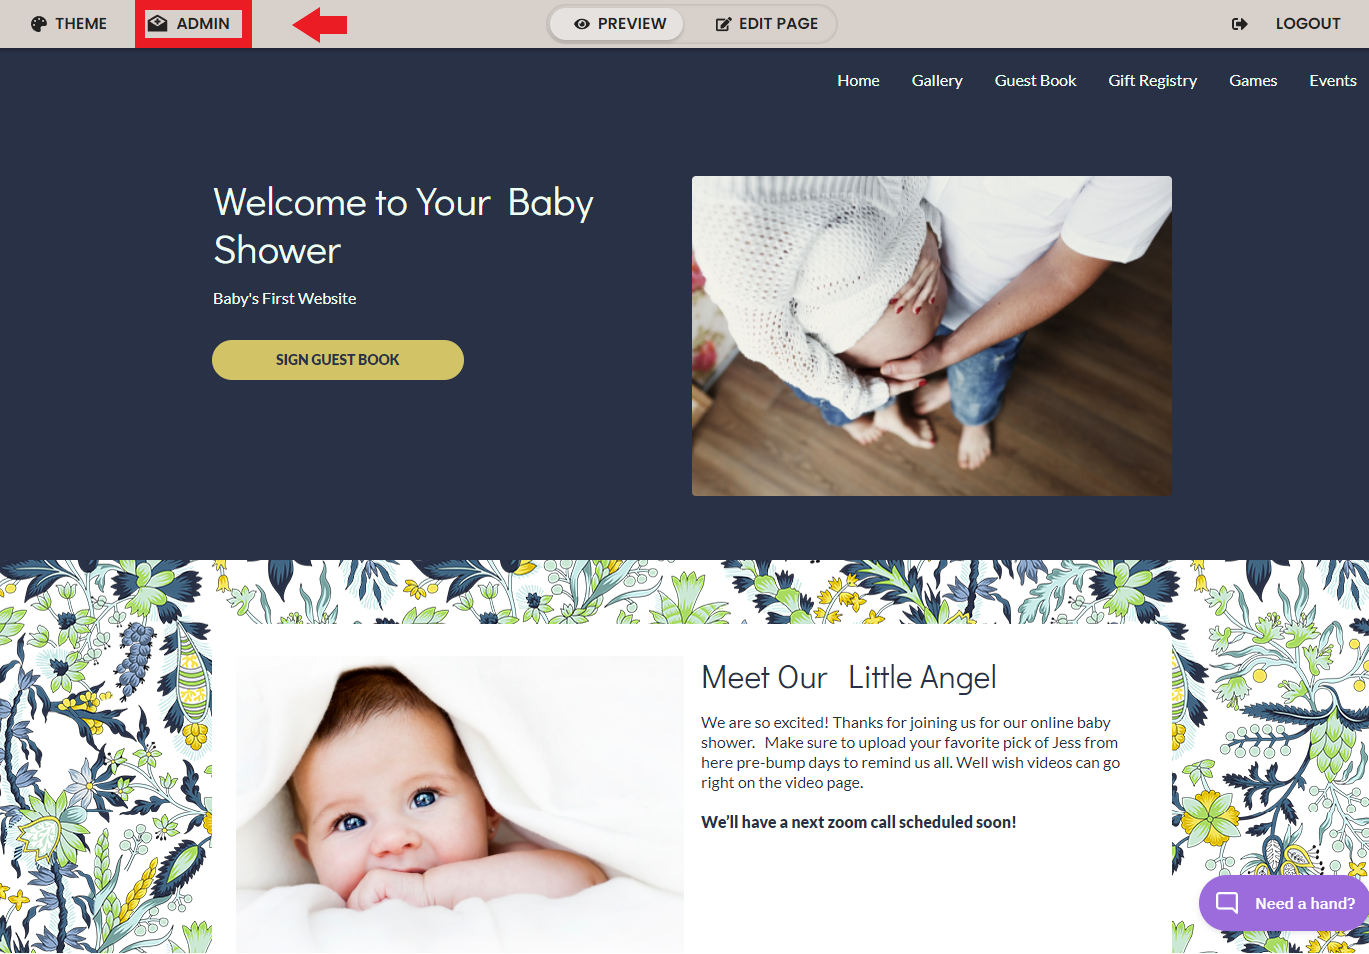
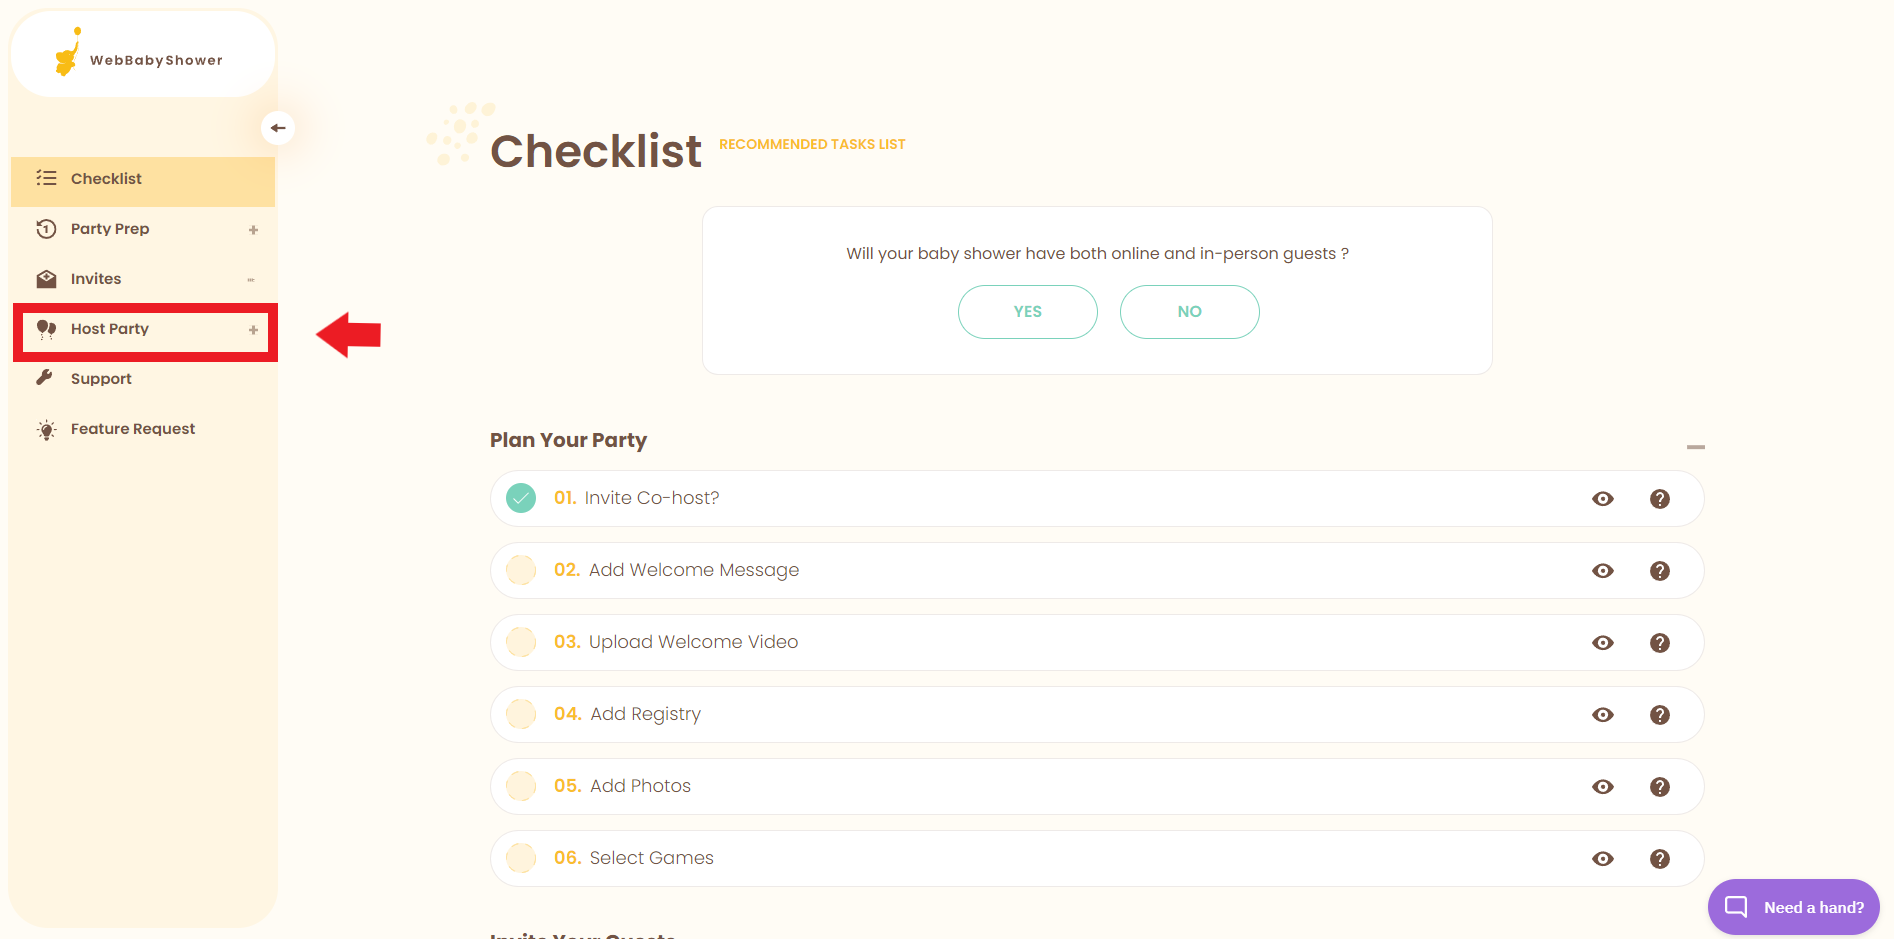
1. Go to your Admin settings.
2. On the Admin page, click on the plus symbol next to (+) Host Party.
3. Select Video Party Call.
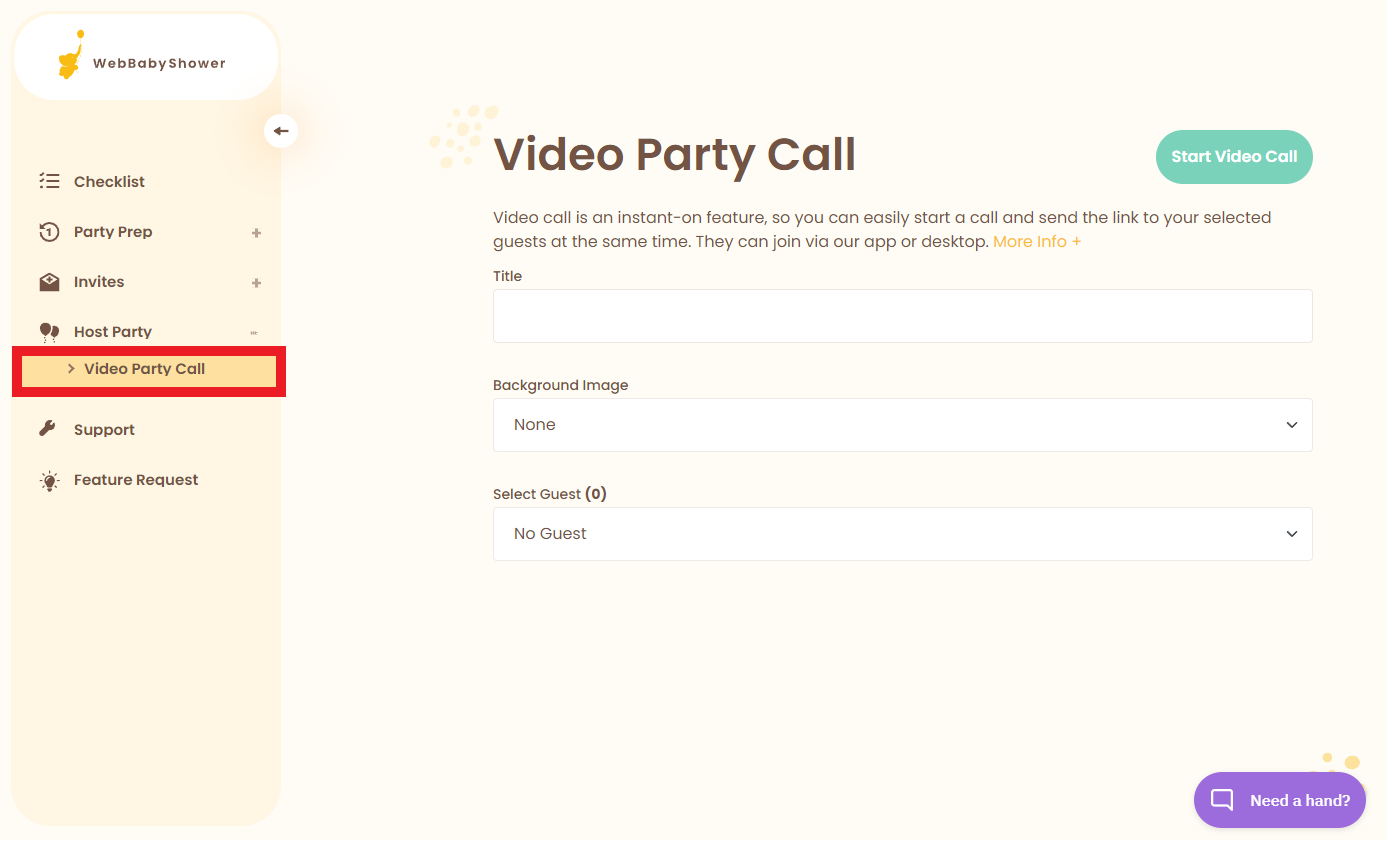
3. On the Video Party Call page, enter the title of the video call. This is only for your reference.
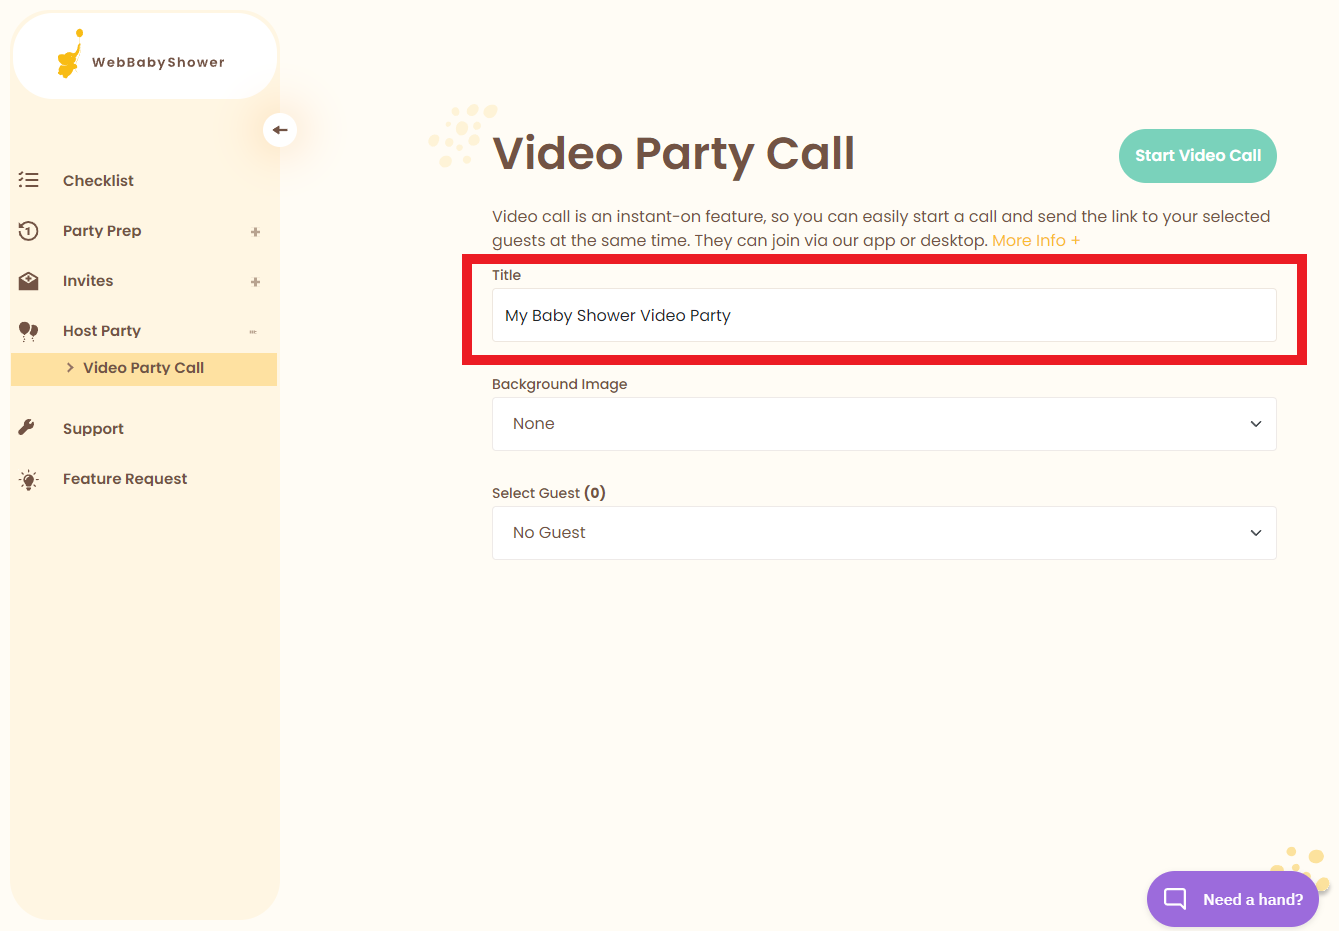
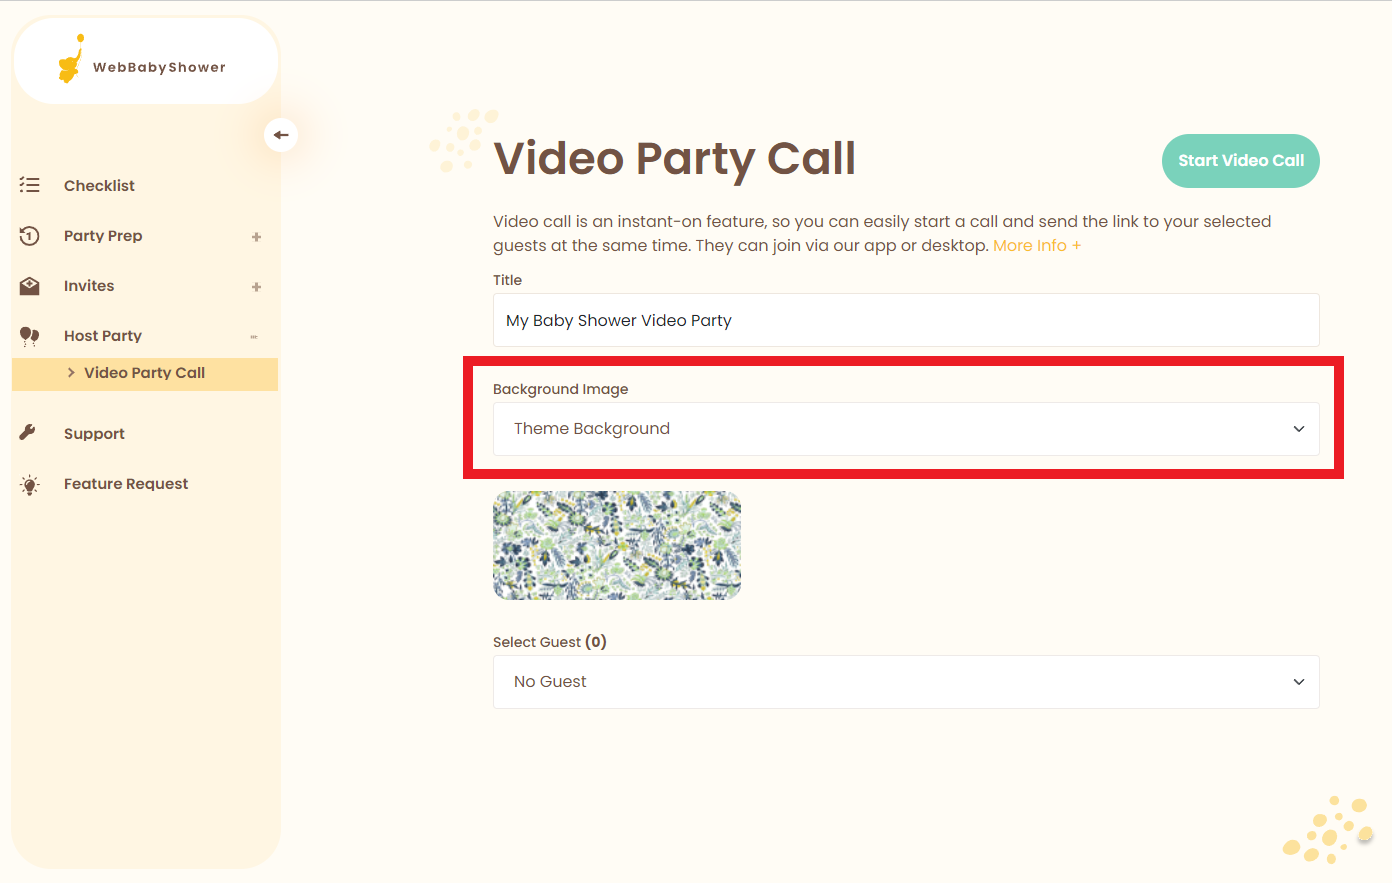
4. Select a background image. This will be shown as the background of your video call page.
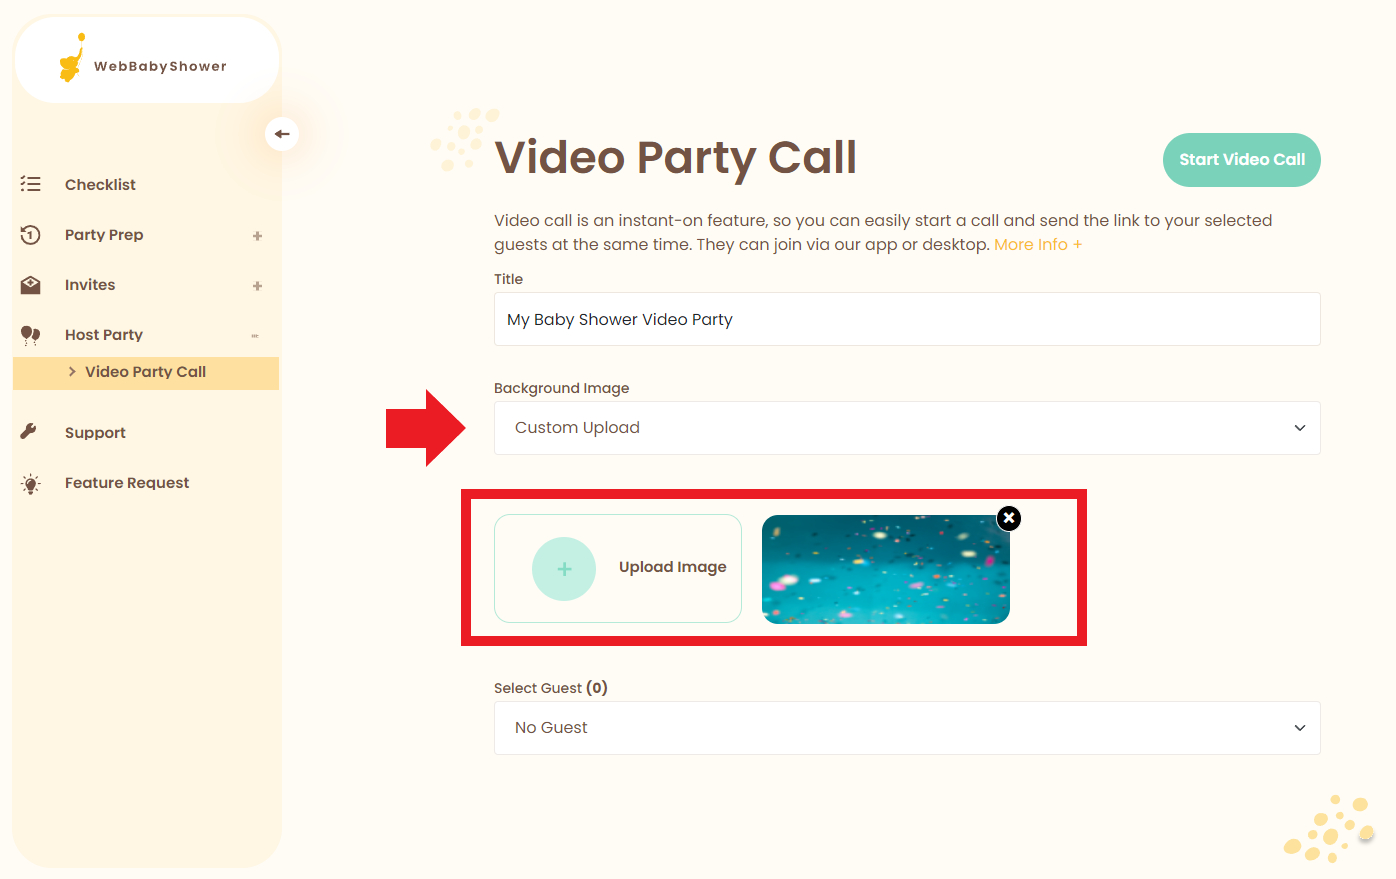
On the Video Party Call setup page, by default, no background is selected but you have an option to select your Baby Shower Theme as the video call background image or upload a custom background image.
To select your Baby Shower Theme:
To upload a custom background image:
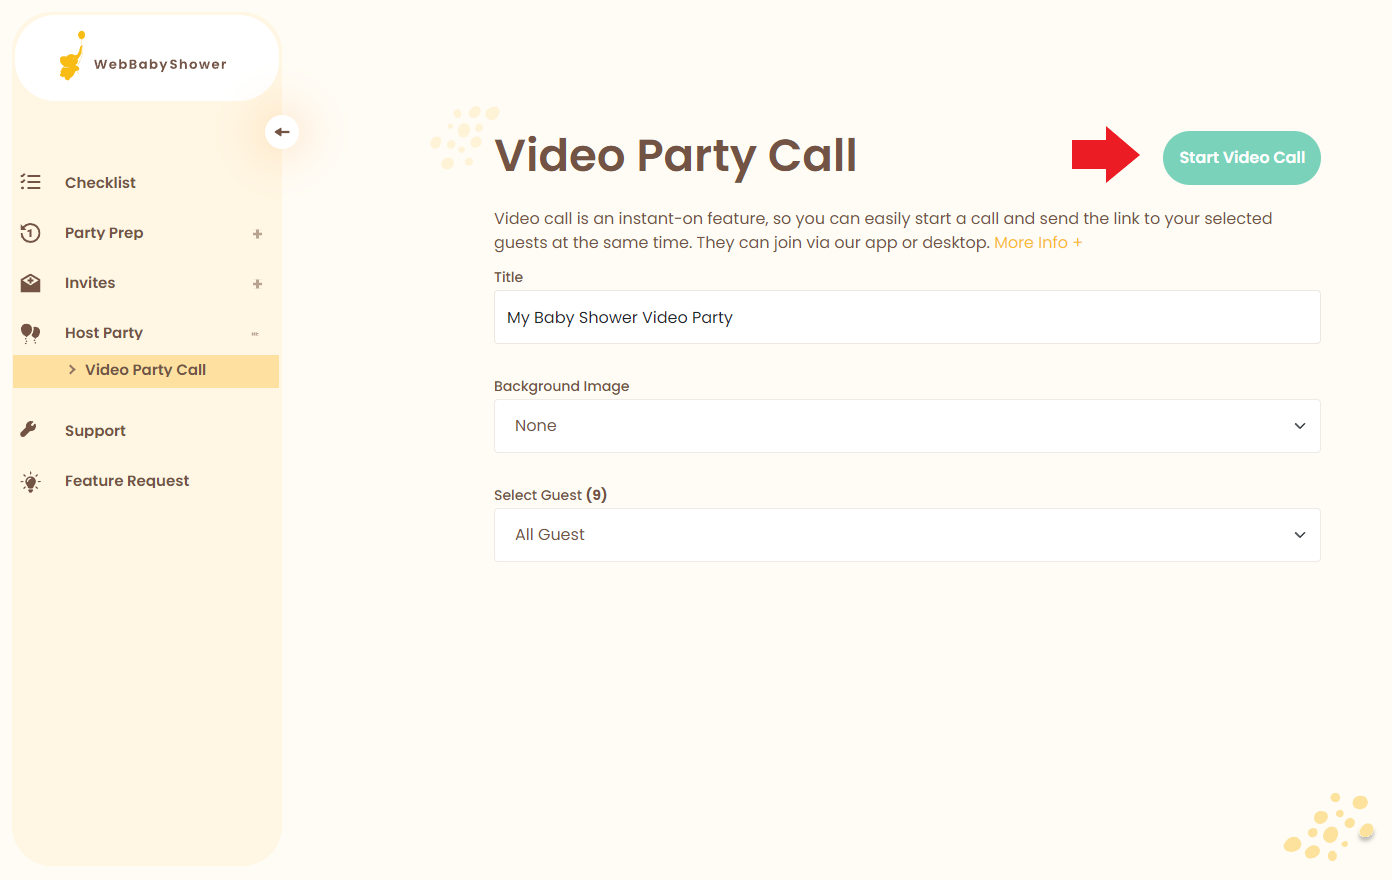
5. Select guests.
The selected guests will receive an email with the link for the video call.
There are three options you can pick from:
All Guests - All the emails you added to your guest list will receive a video call invite
Specific Guests - All the emails will be listed and you can check or uncheck each of them
No Guest - Once you start the video, it will not send out any invites

6. Click the Start Video Call button.
You will then be asked to confirm to start the video.
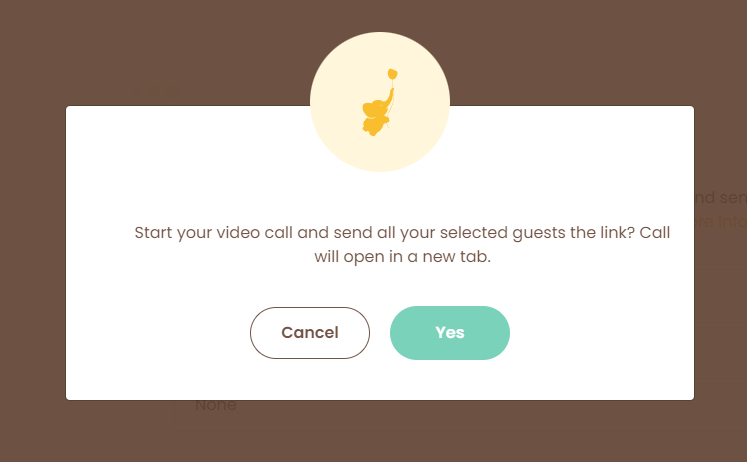
7. Click Yes and the video call will start and open in a new tab.
At the same time, all the guests you selected (if any) from the previous step will receive an email invitation to join the video call.
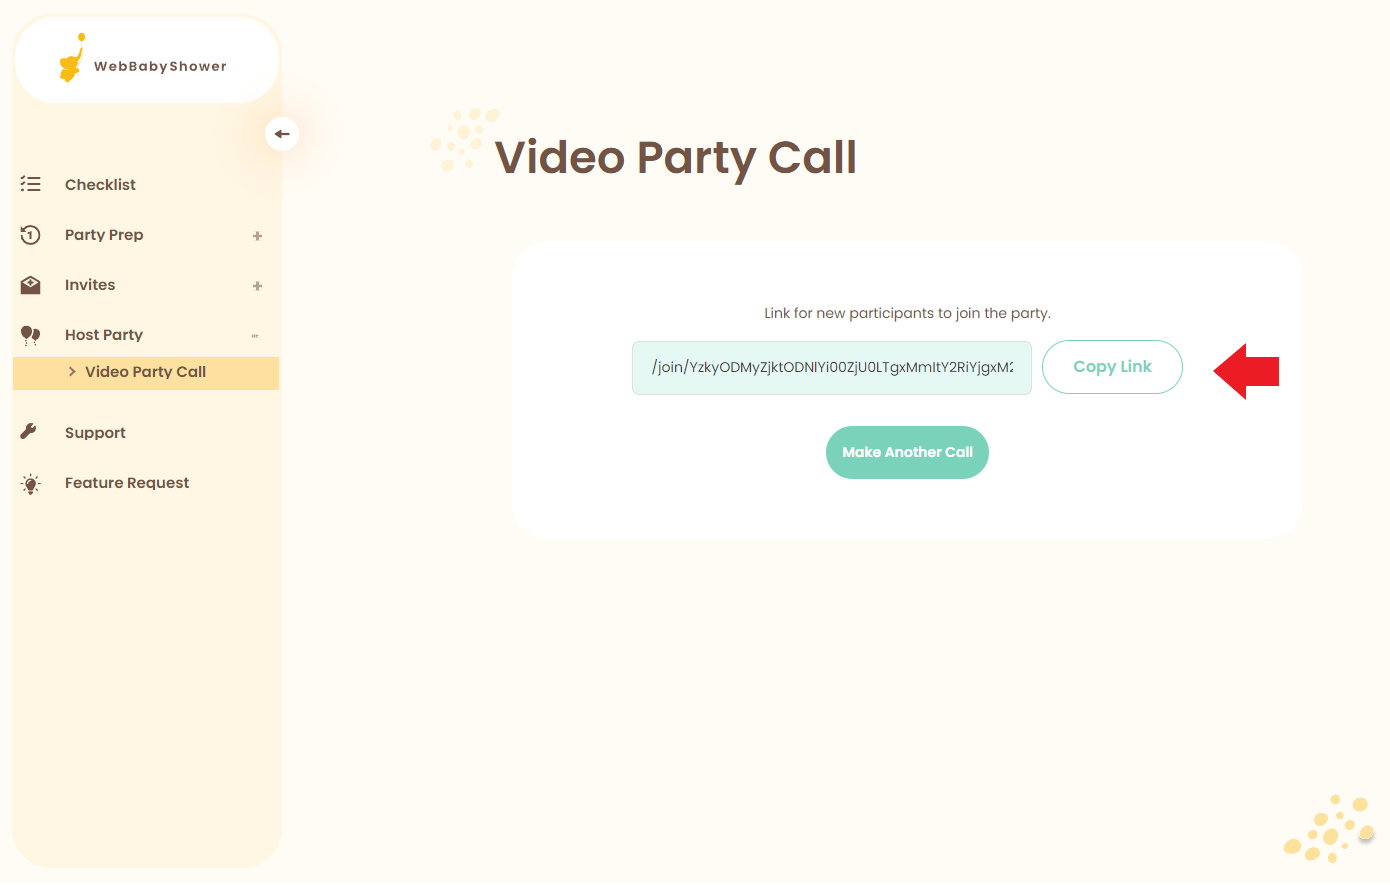
If you want to get the link to the video, go back to your Admin Settings tab where you started the call. You have the option to copy the link or make another call.
Please note that you can only host one video call at a time. If you click Make Another Call on this page, the previous call will end automatically.
Now you can start to chat with your guests, play games, share your screen, and more!

Share your Screen
(Click here to return to the Table of Contents)
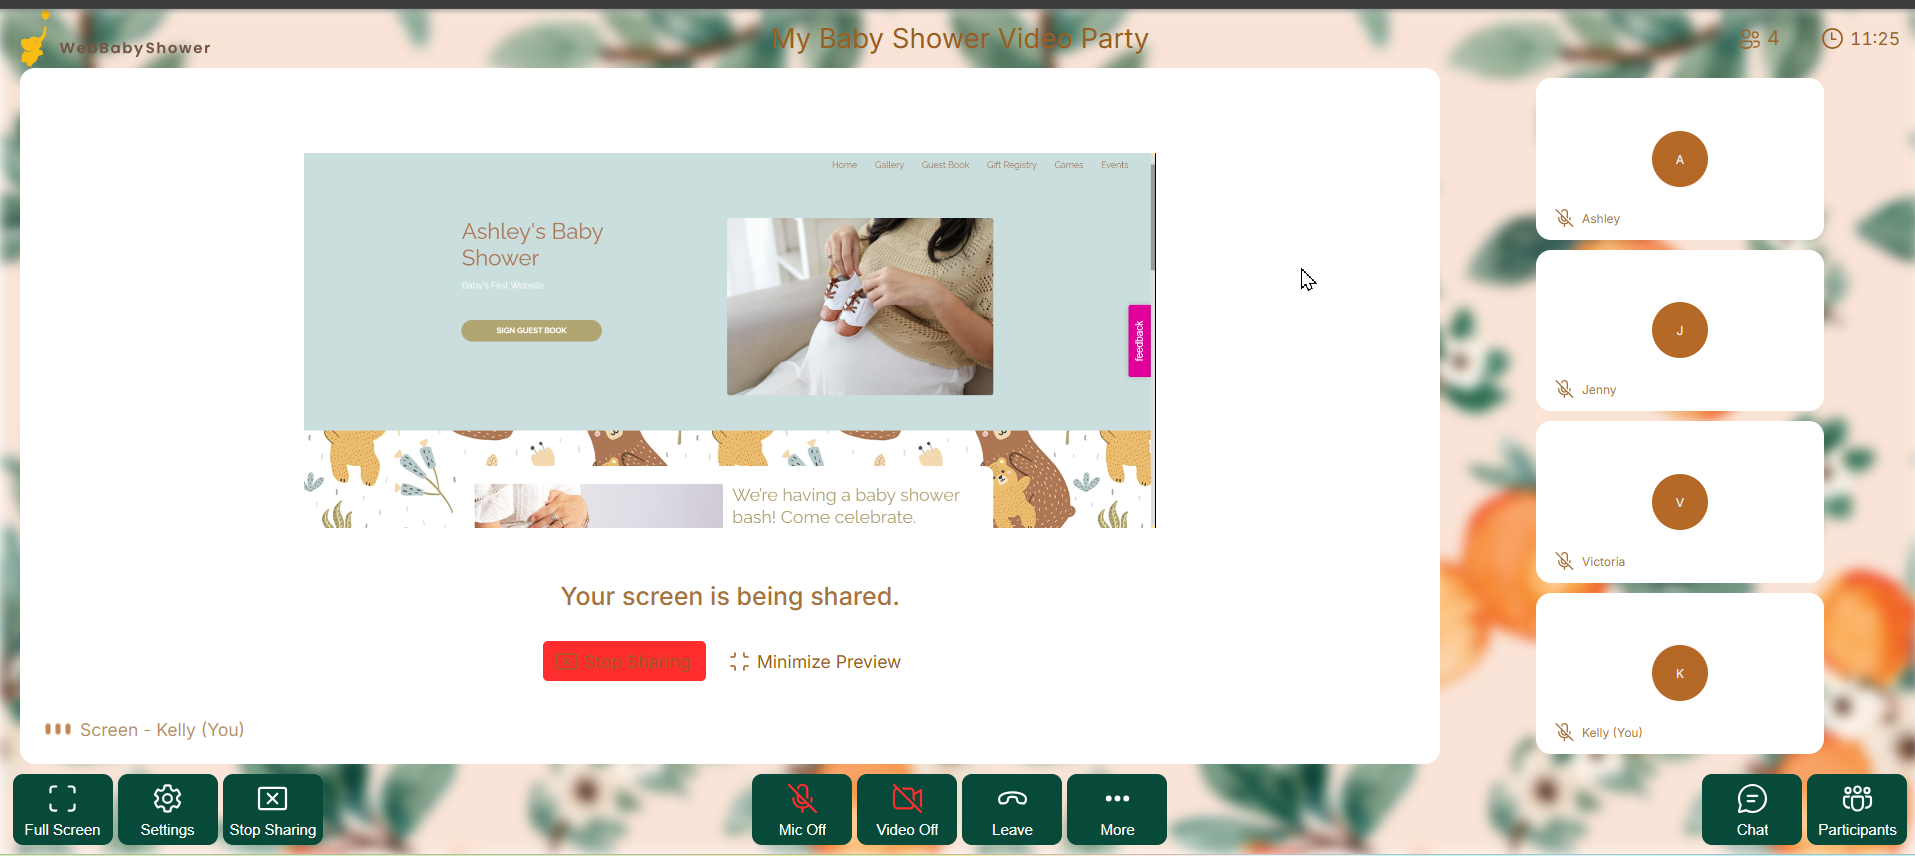
The share screen feature can be used for playing the slide-based games
1. To share your screen, click on the ellipsis icon from the bottom menu bar of the video call page and select Share Your Screen.
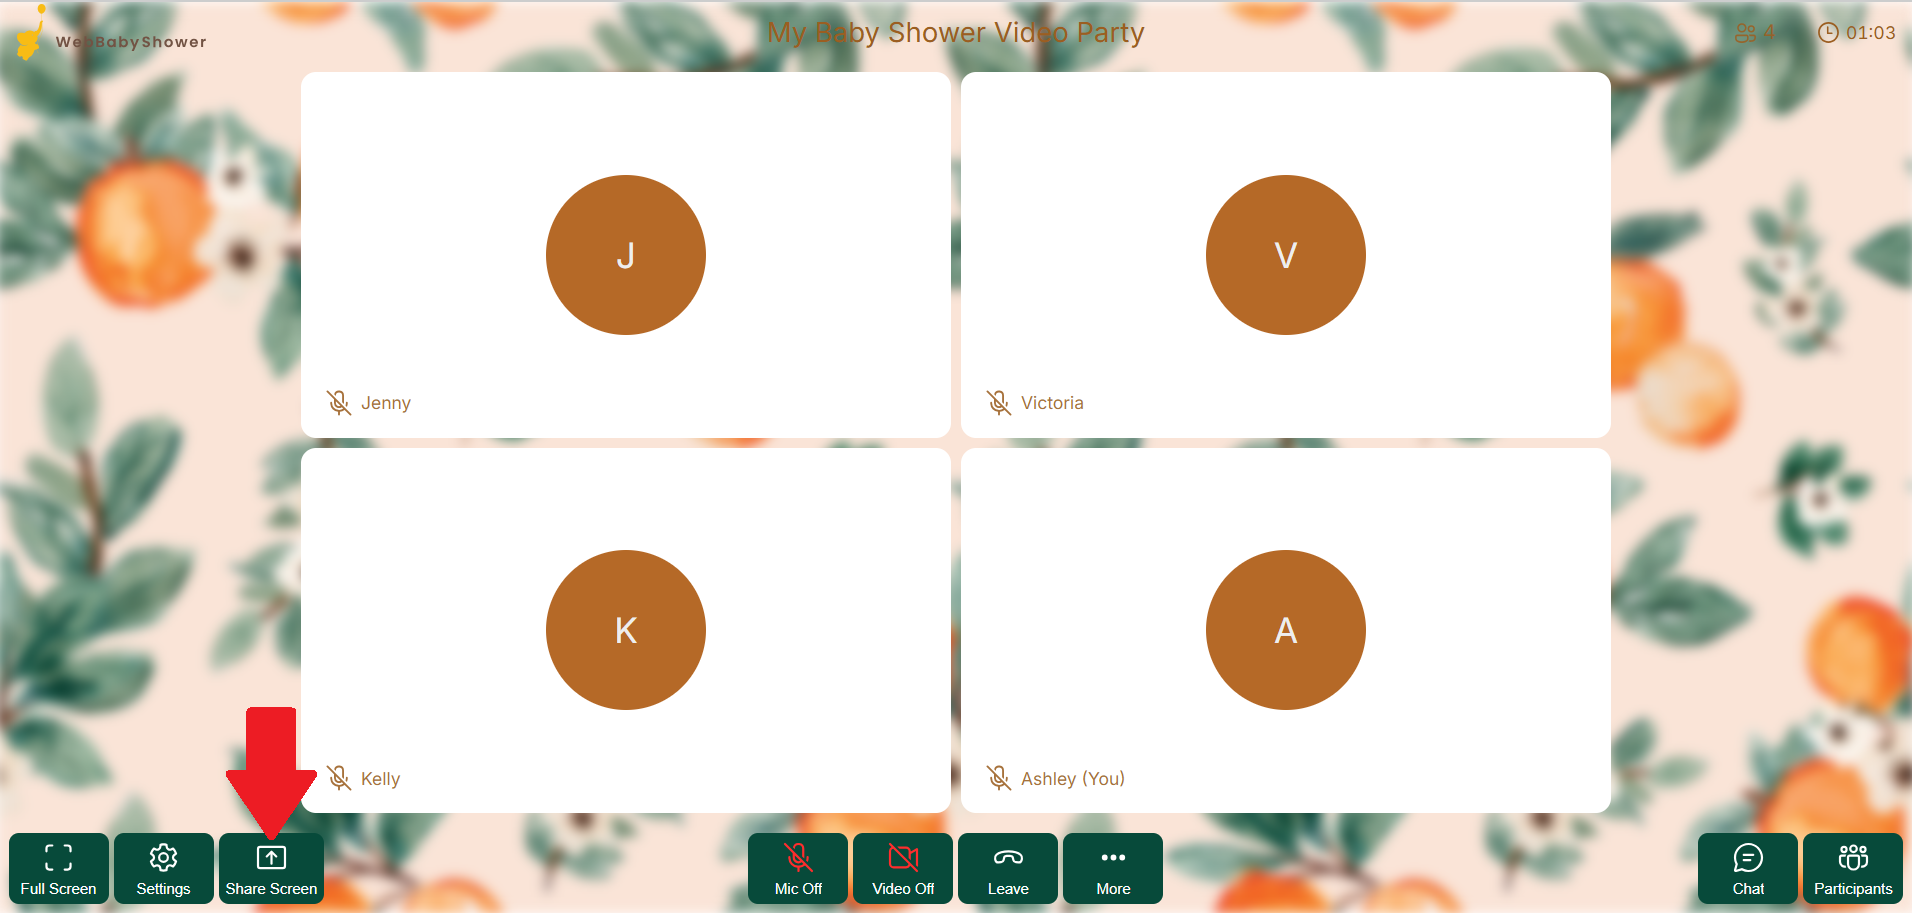
2. Your browser will ask you whether to share your whole screen, a window, or a tab. Choose which one you want to share and click on Share.
Send Messages
(Click here to return to the Table of Contents)
You can also send messages that are visible to everyone in the call. Here are the steps to do that:
1. On the bottom menu bar, click on the ellipses and click Messages.
The Chat Box will show up on the right-hand side of the video page and you can start sending messages to everyone.
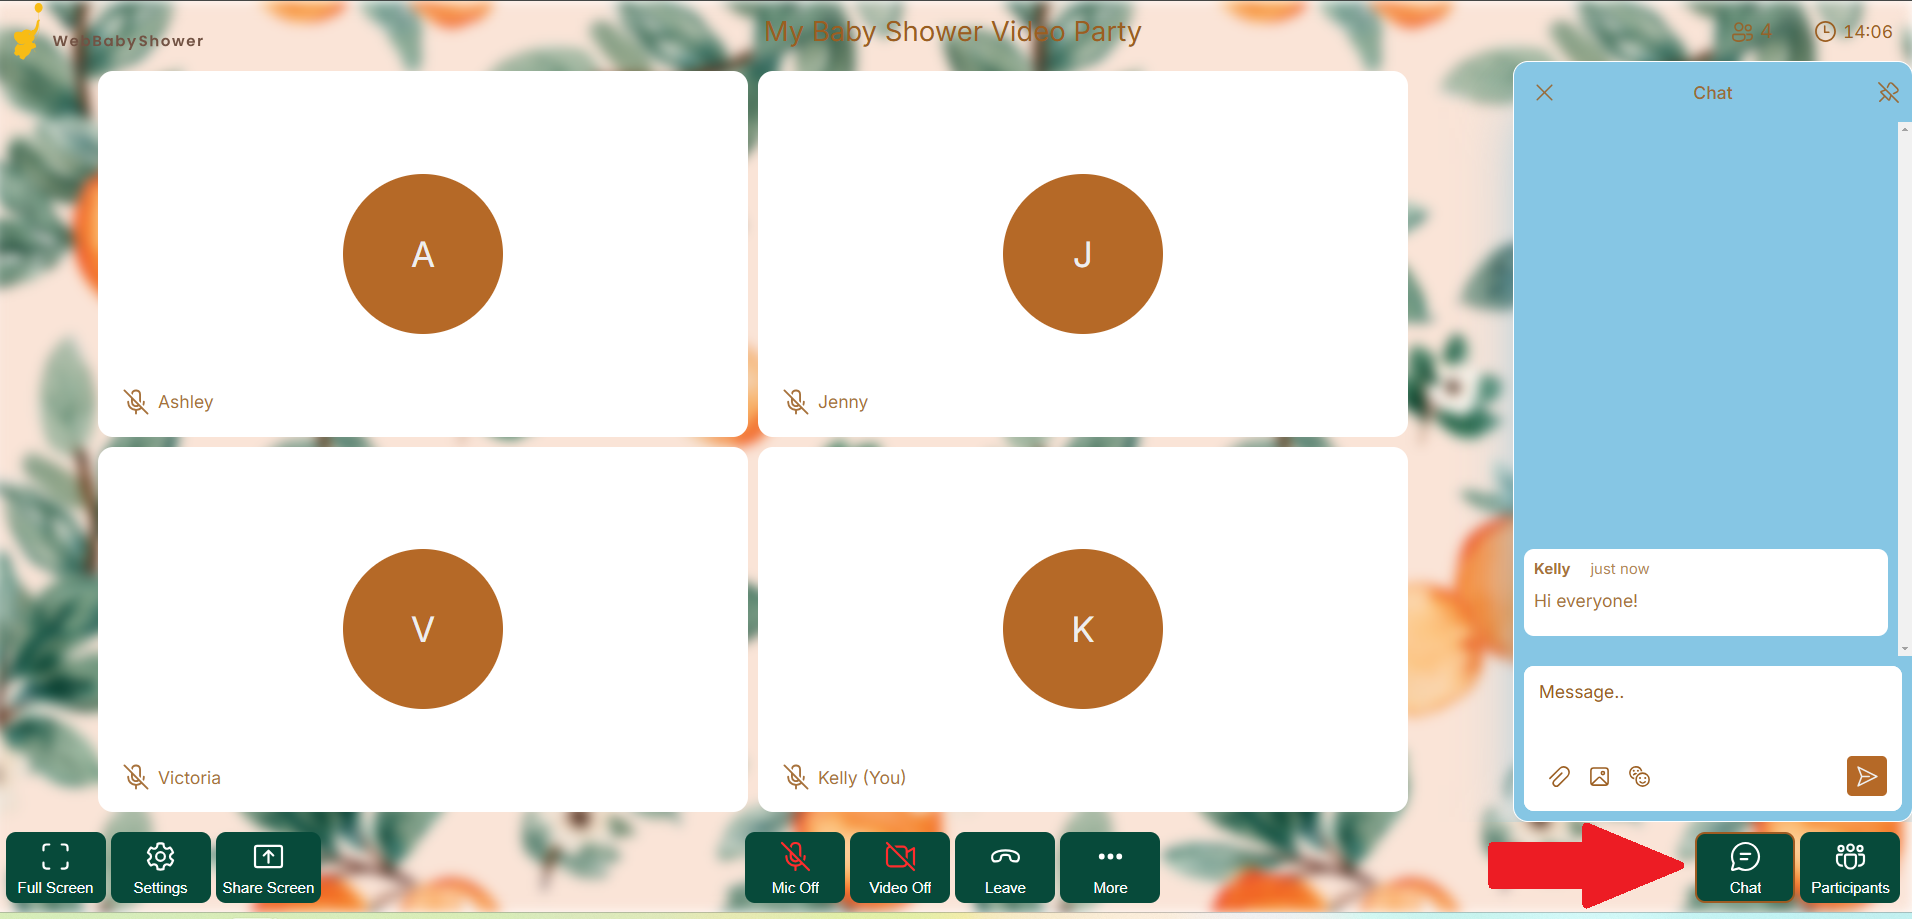
2. To close the Chat Box, click the X icon in the upper right corner or click on the Chat icon once again to toggle to display or hide it.
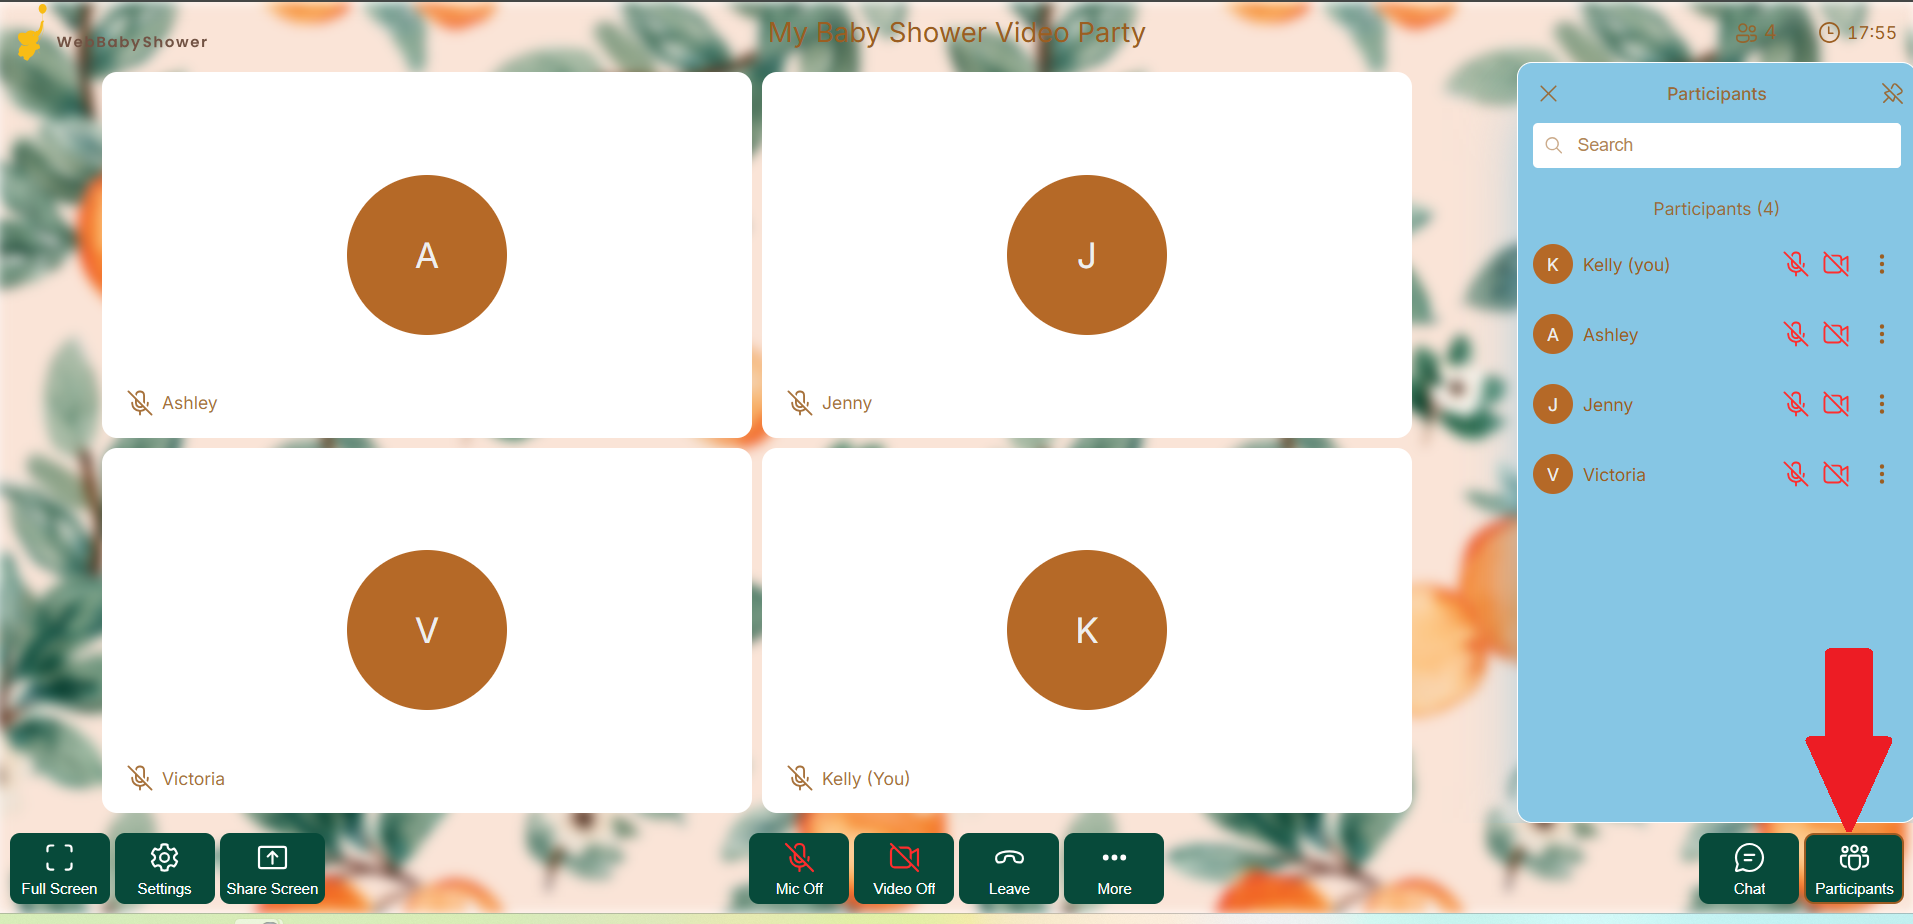
View All Participants
(Click here to return to the Table of Contents)
1. To see all participants, click on the ellipsis from the bottom menu bar, then select Manage Participants
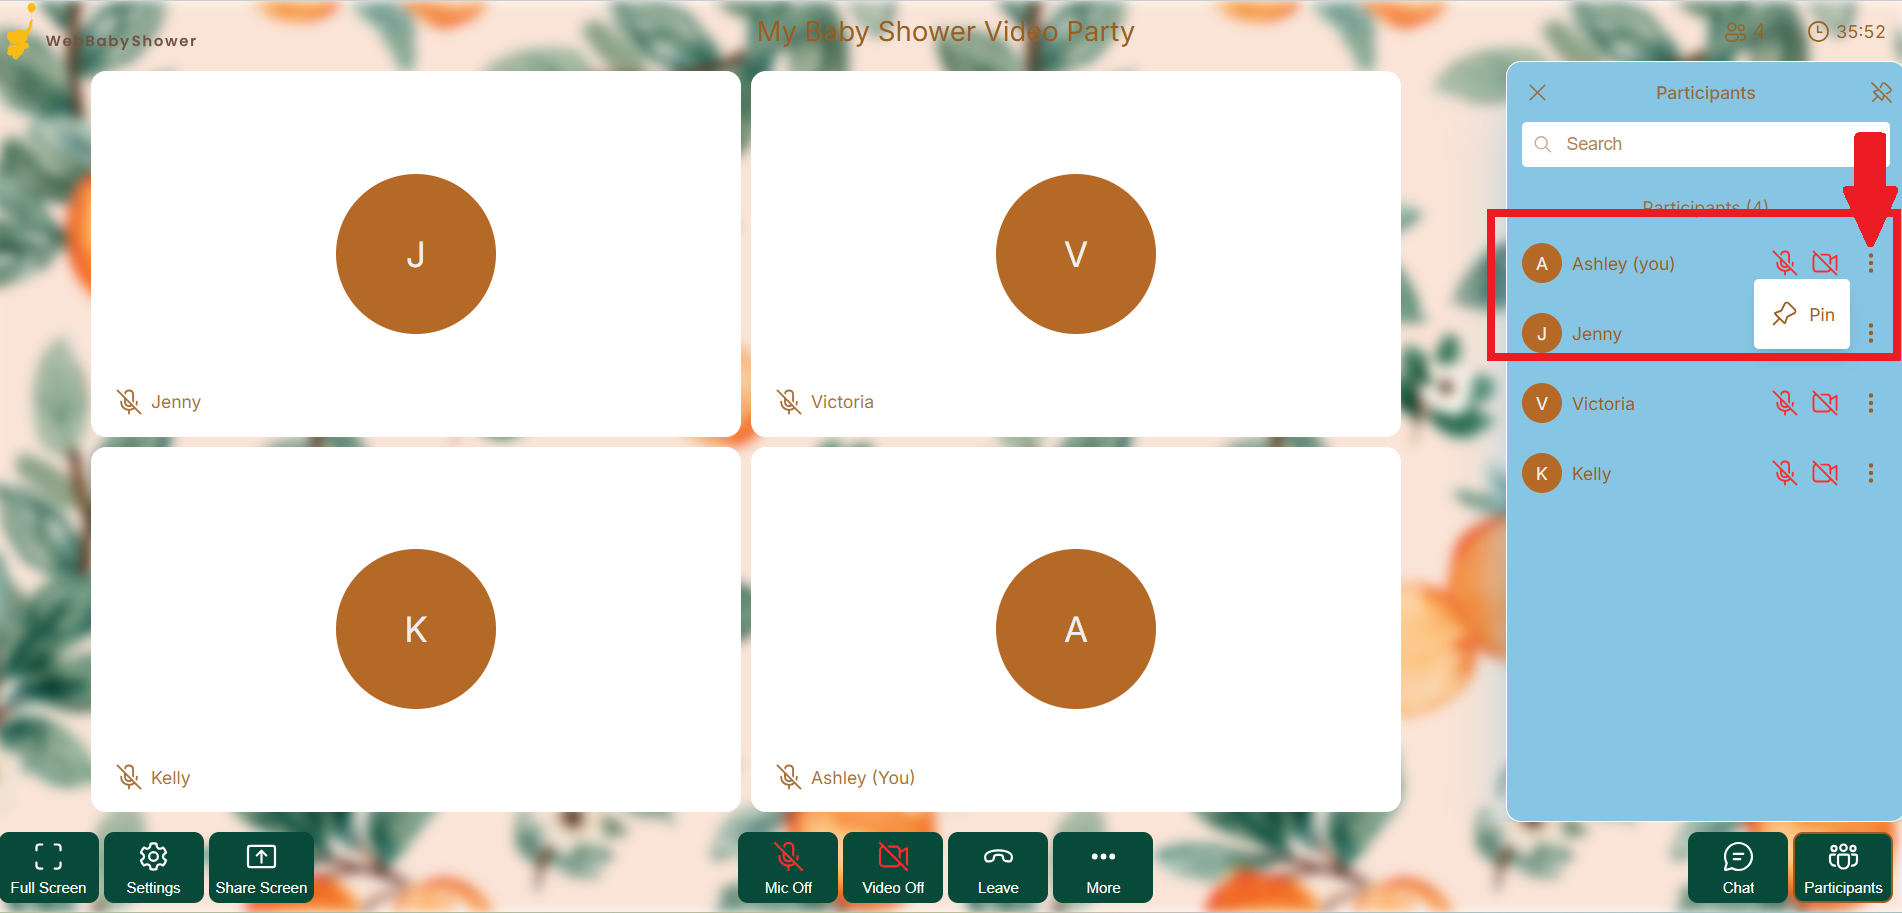
Make a participant's video larger than the rest
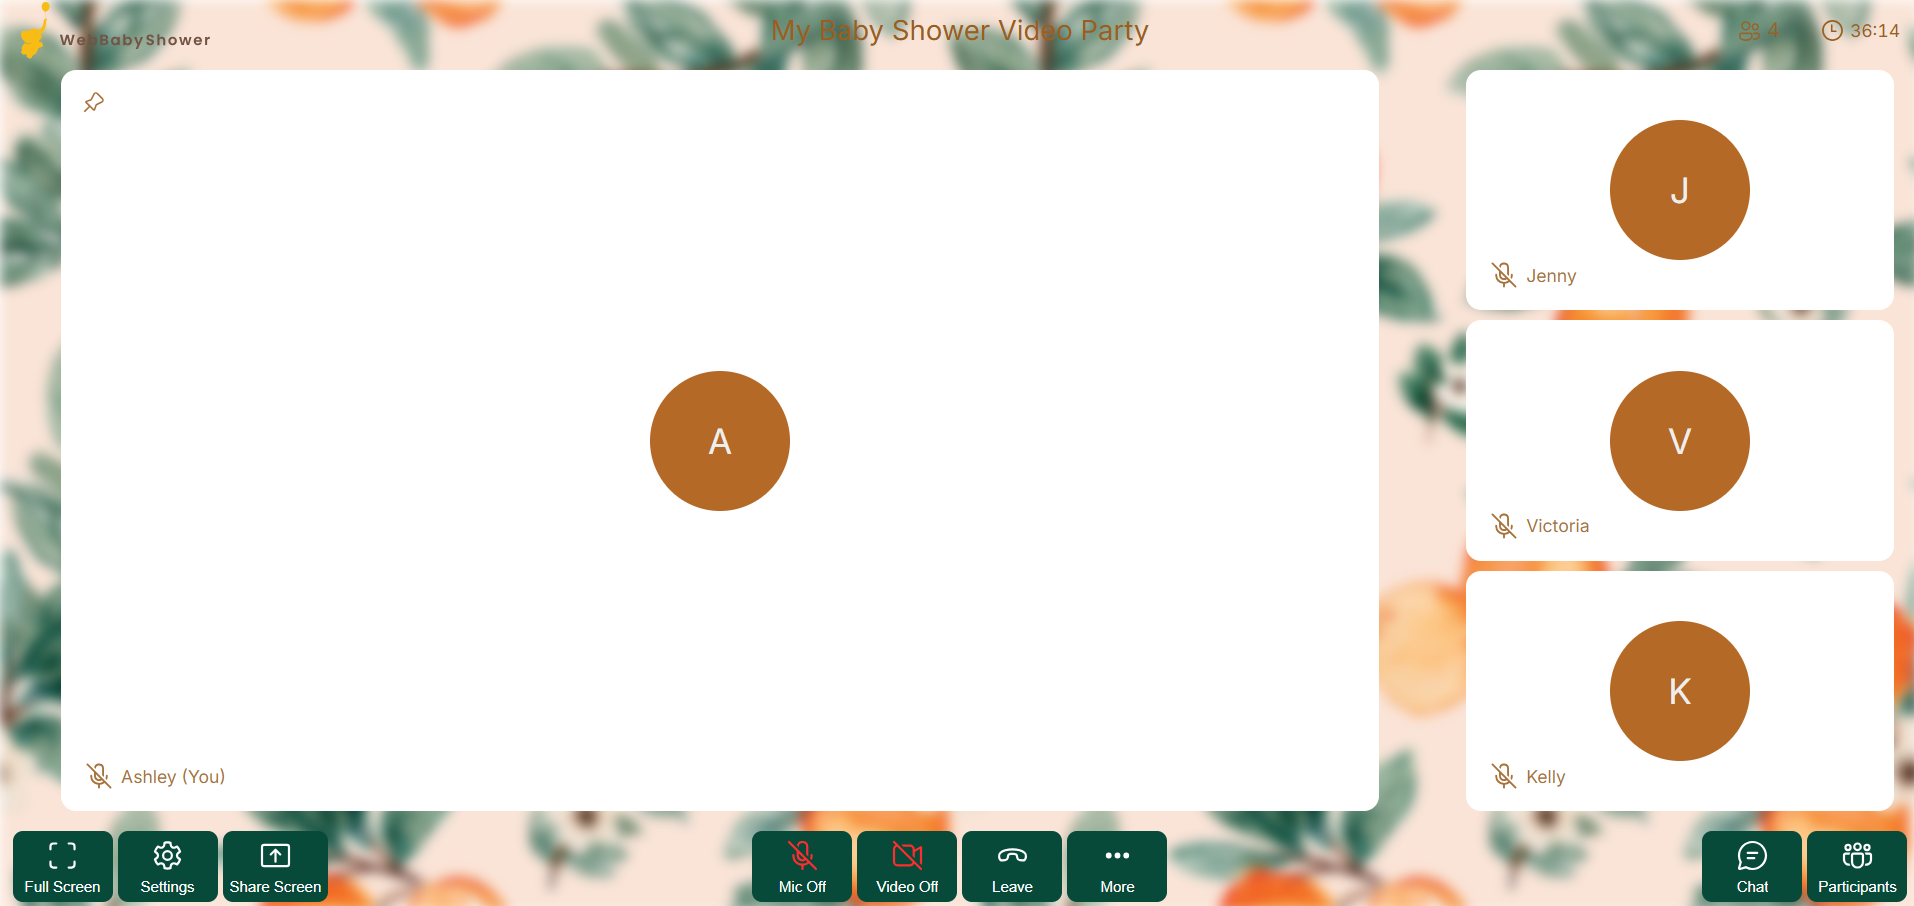
You can make a participant's video larger than the rest by "pinning" them.
1. To pin, on the participants list, click on the ellipsis right next to the name, and select Pin.
This is how it looks like when someone is "pinned".
Leave the Call
(Click here to return to the Table of Contents)
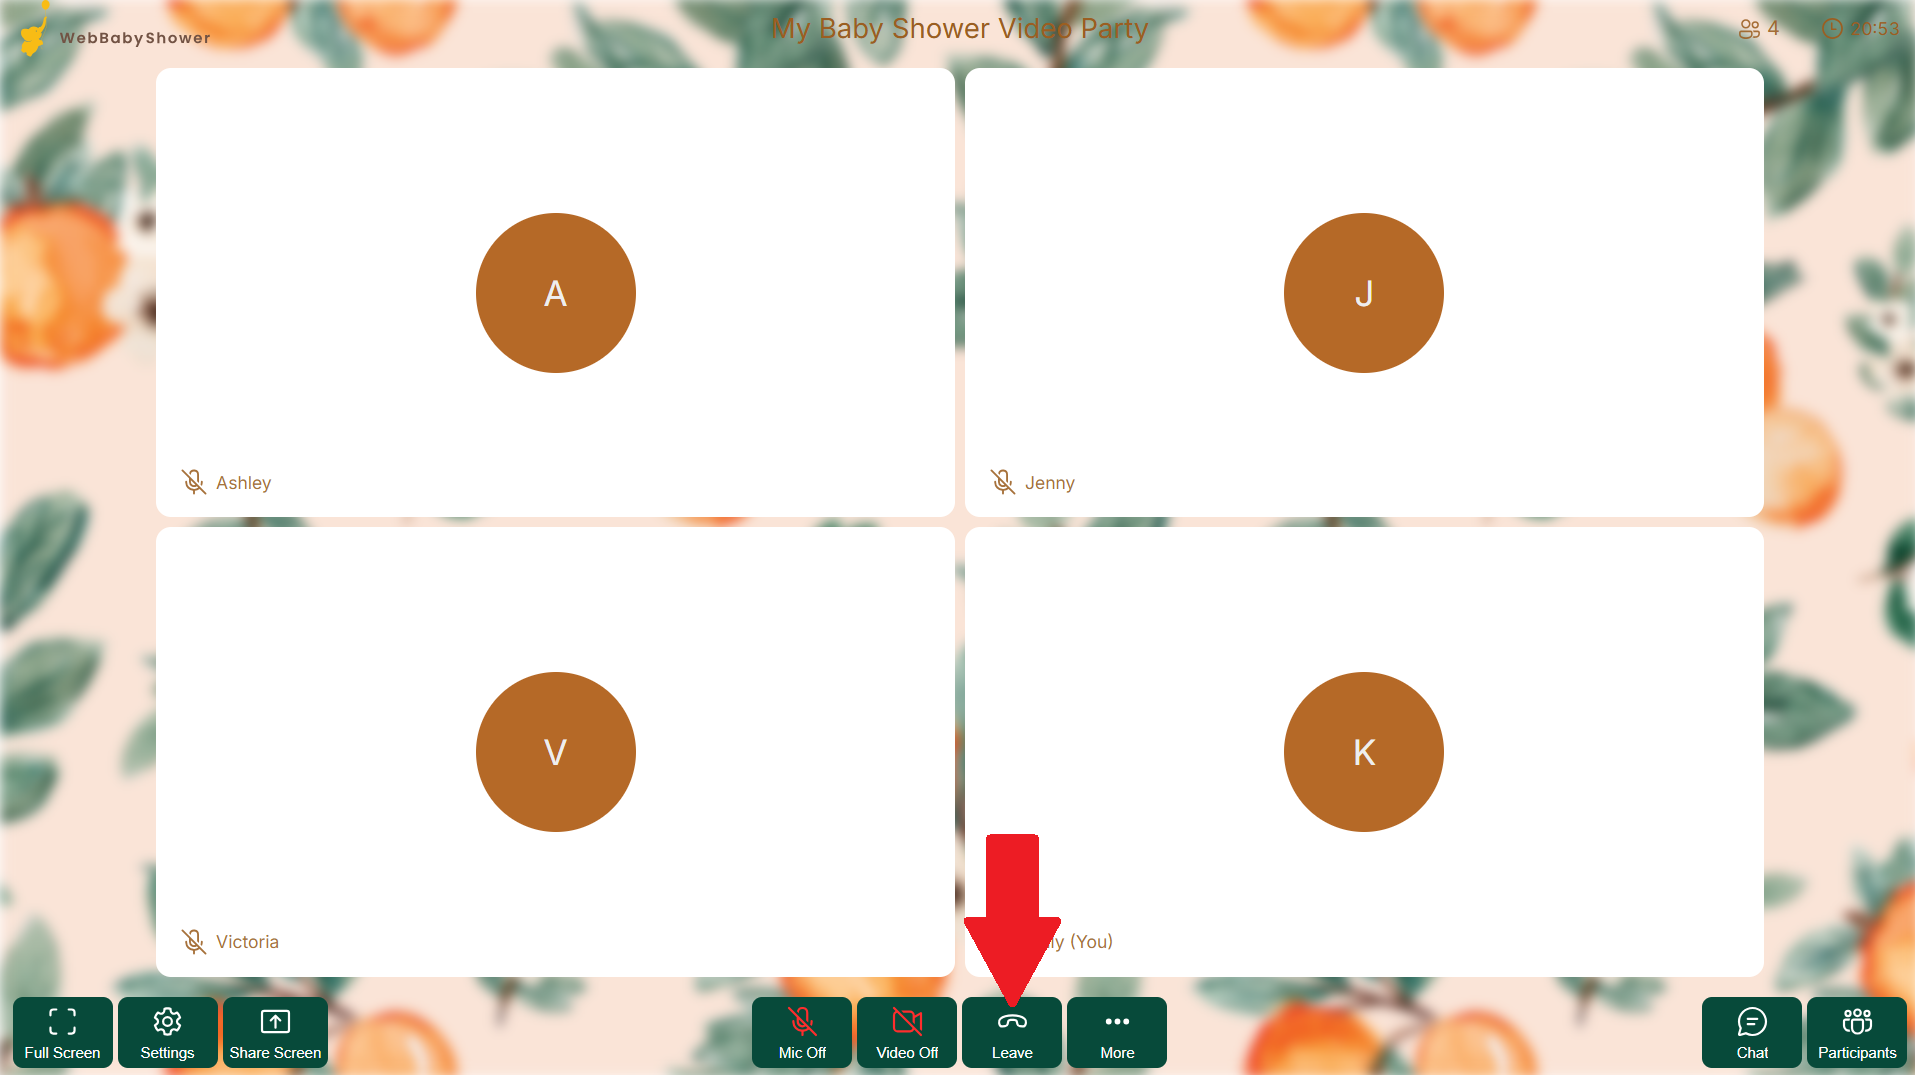
1. To leave the call, click on the ellipsis from the bottom menu bar and click on Leave Call
Troubleshoot Video Call
(Click here to return to the Table of Contents)
Problem: The video call page doesn't open in a new tab.
1. Open your browser settings and turn on the settings for pop-ups and redirects.
2. Reload the page and start a new video call for the settings to take effect.
Problem: No camera or microphone access
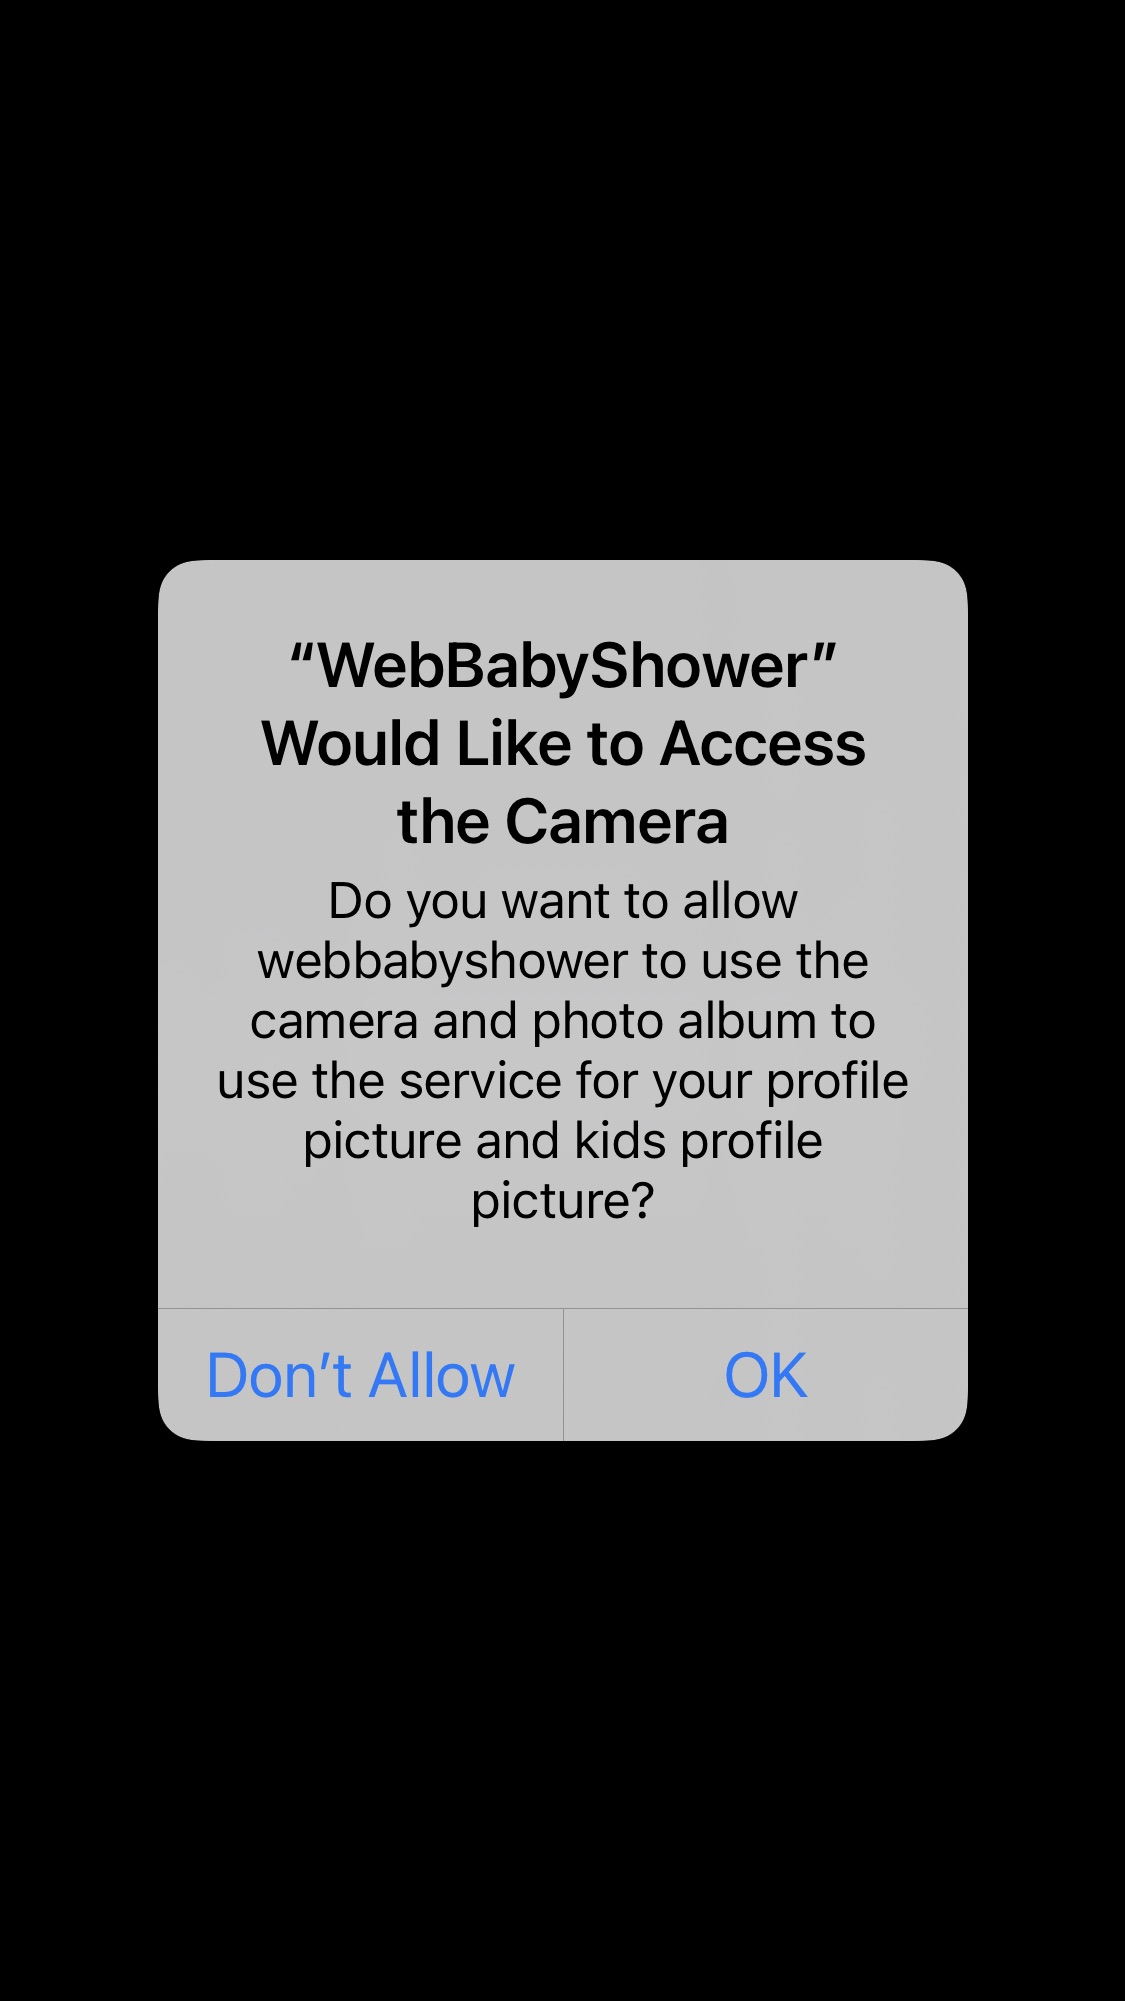
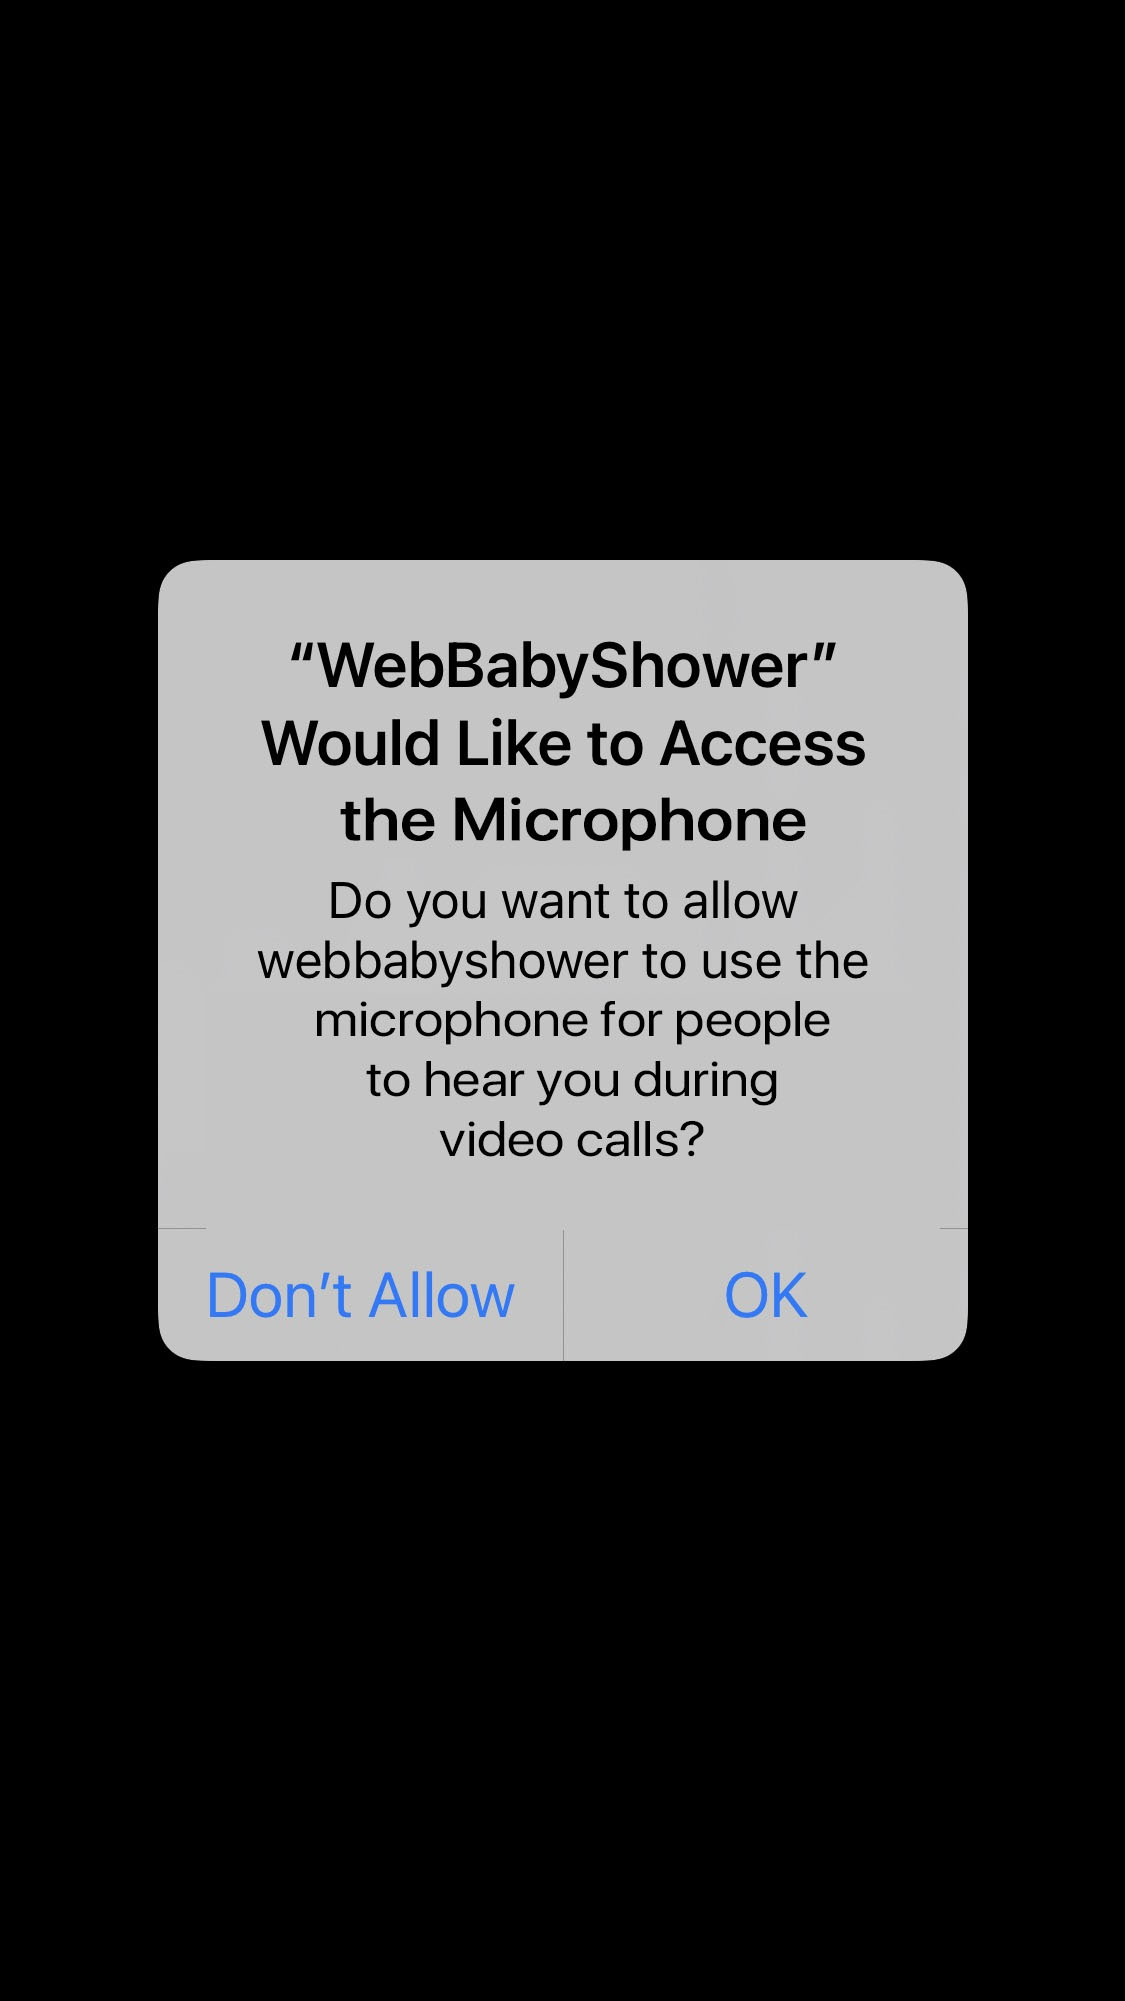
When you first join a video call, your browser will prompt you to Allow or Block the use of your microphone and camera. Click Allow on both prompts. If you're not prompted by your browser, you can manually give these permissions by going to your browser permission settings directly.
On Google Chrome desktop:
1. Click on the lock icon beside the address bar to show permission settings
Toggle on the camera and microphone to give permission.
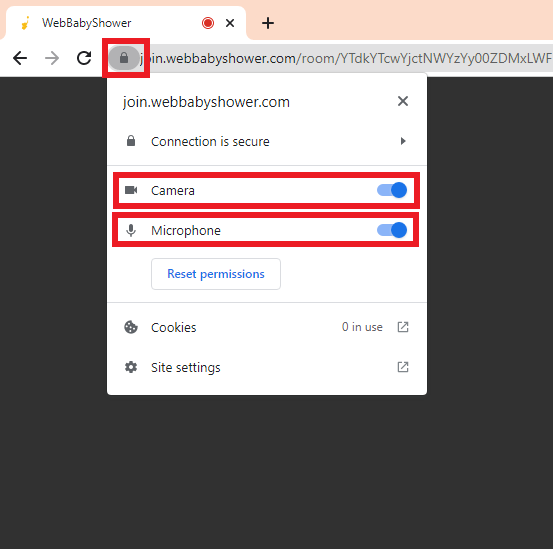
2. Reload the page for the changes to take effect
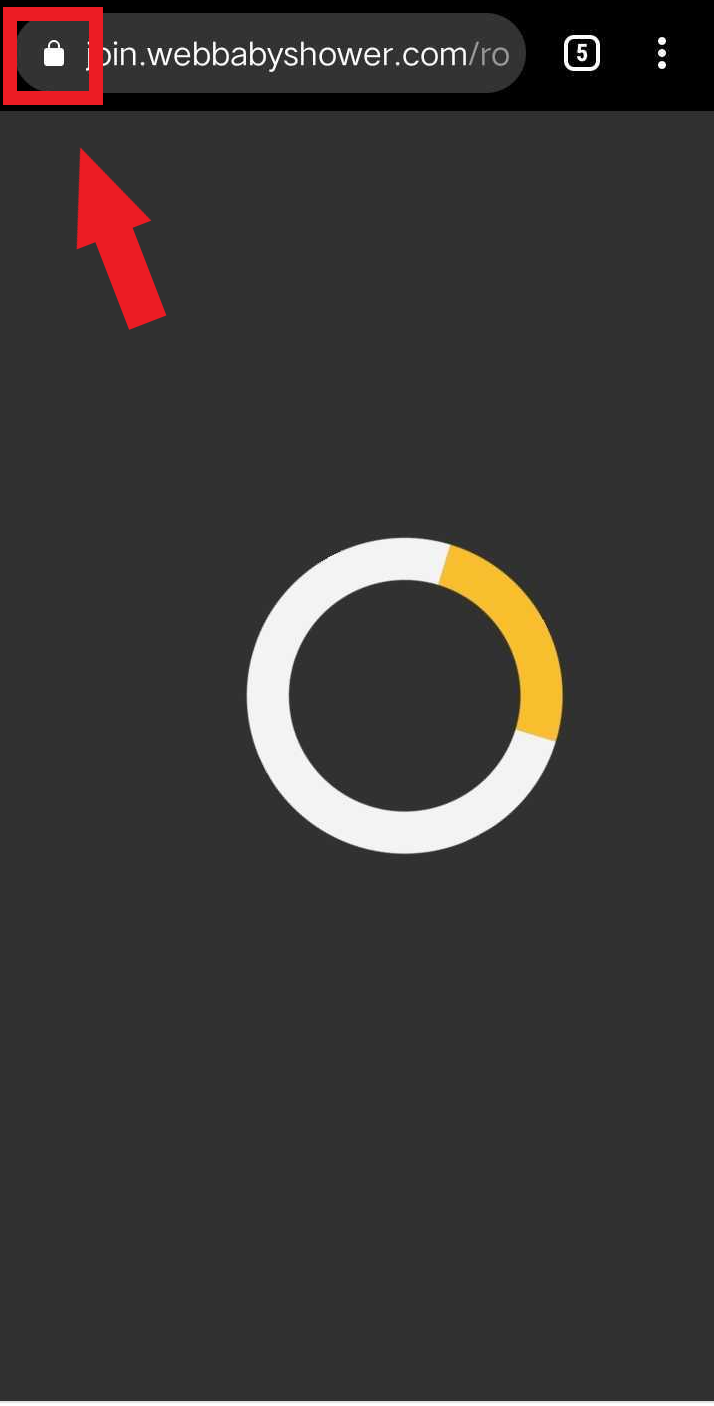
On Google Chrome mobile:
When you join a video call in a mobile browser, you will be prompted to allow access for camera and microphone.
If you did not get any prompts, you can set the permission settings directly with the steps below.
1. Click on the lock icon on the left-hand side corner of the browser's address bar.
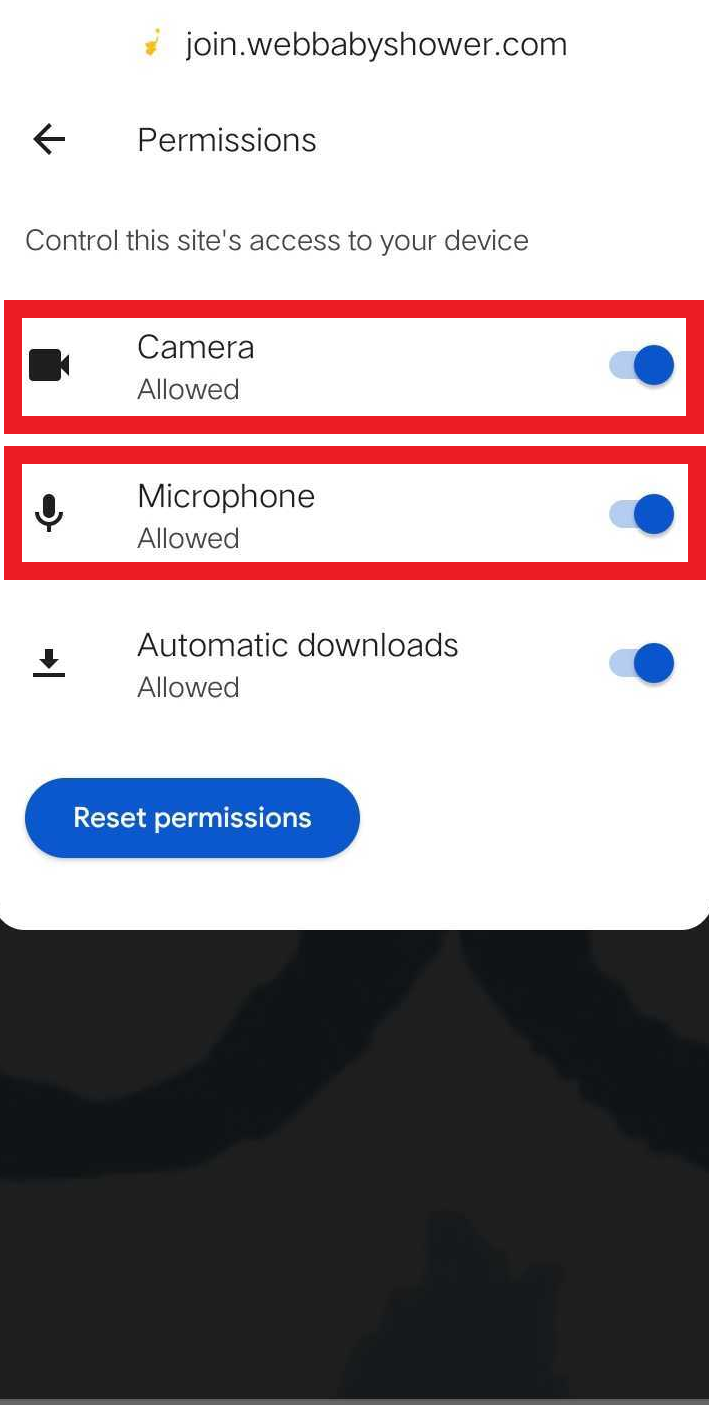
2. Click on Permissions

3. Toggle to allow access to the Microphone and Camera
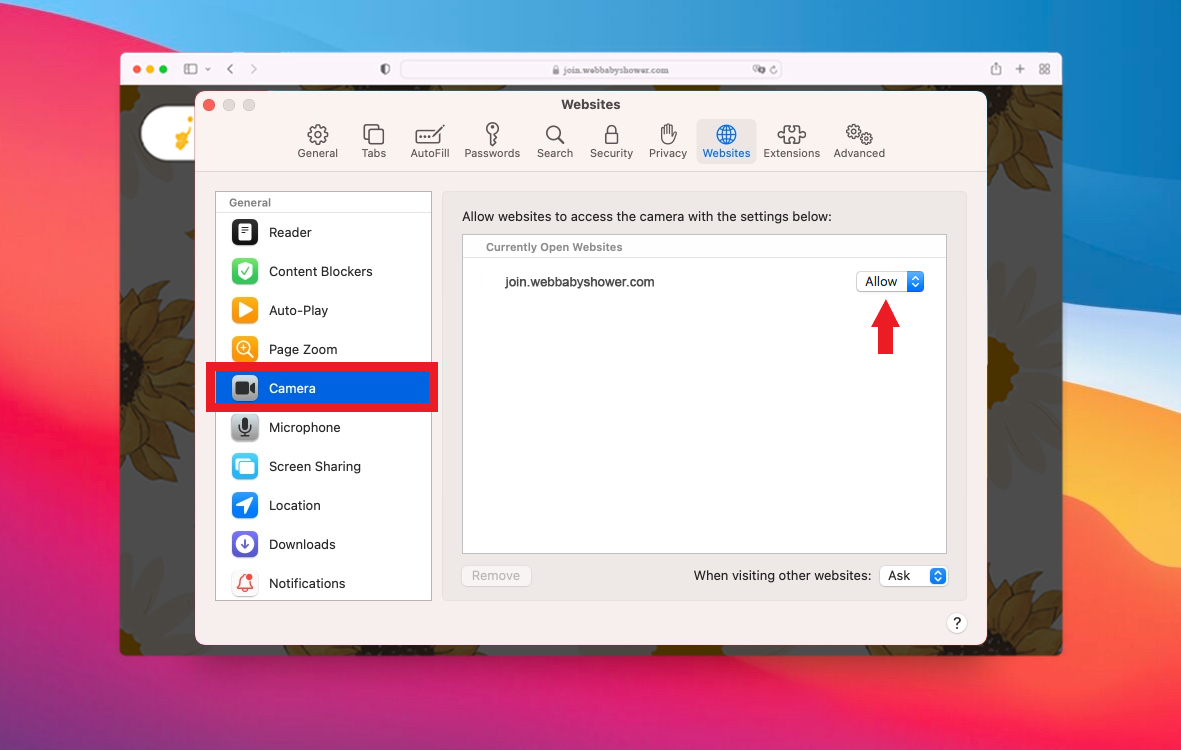
On Safari browser desktop:
1. Click on the word Safari on the top left menu bar of your browser while you're on the video call page and click Preferences
2. It will open your settings and click on Websites.
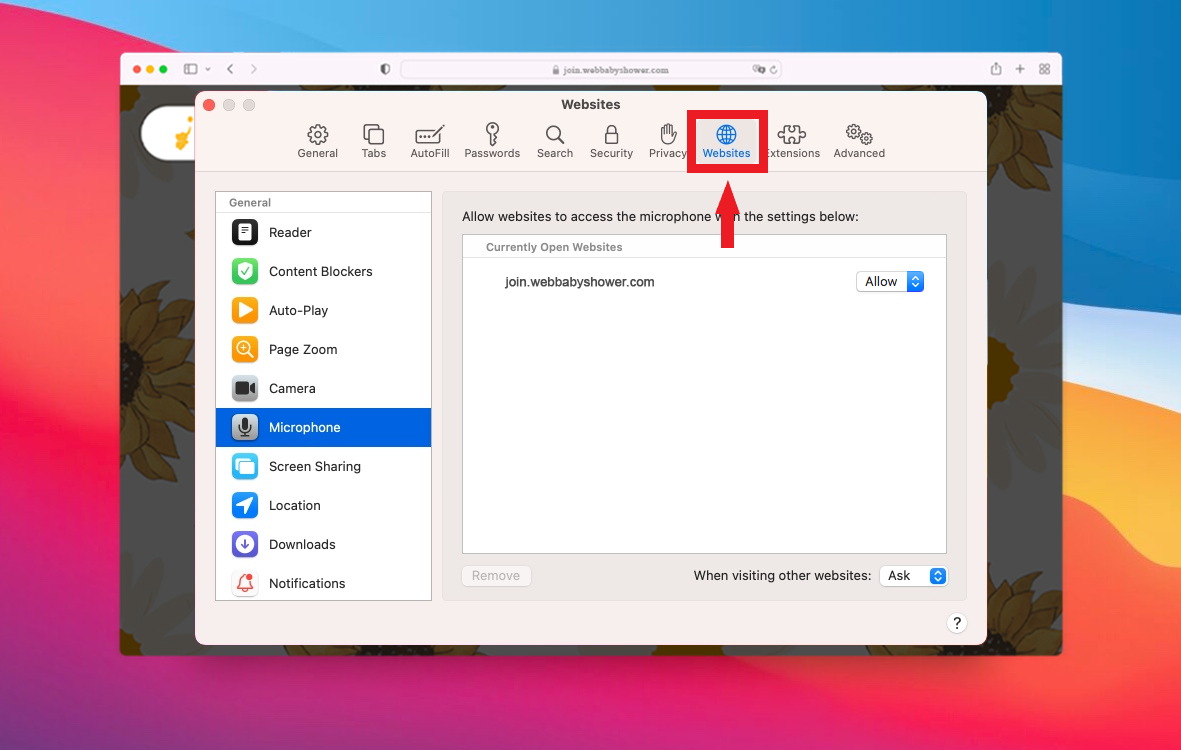
In this window, set the permission settings for your camera and microphone to Allow for the WebBabyShower site.
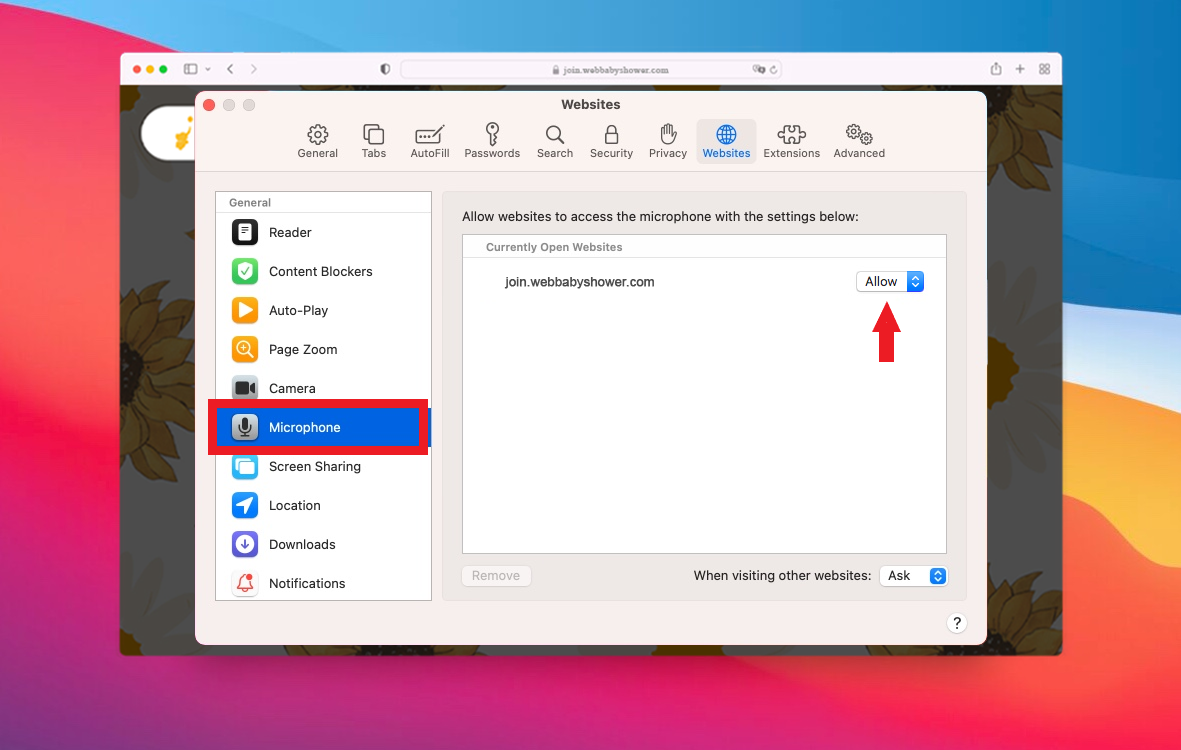
3. Reload the page for the changes to take effect
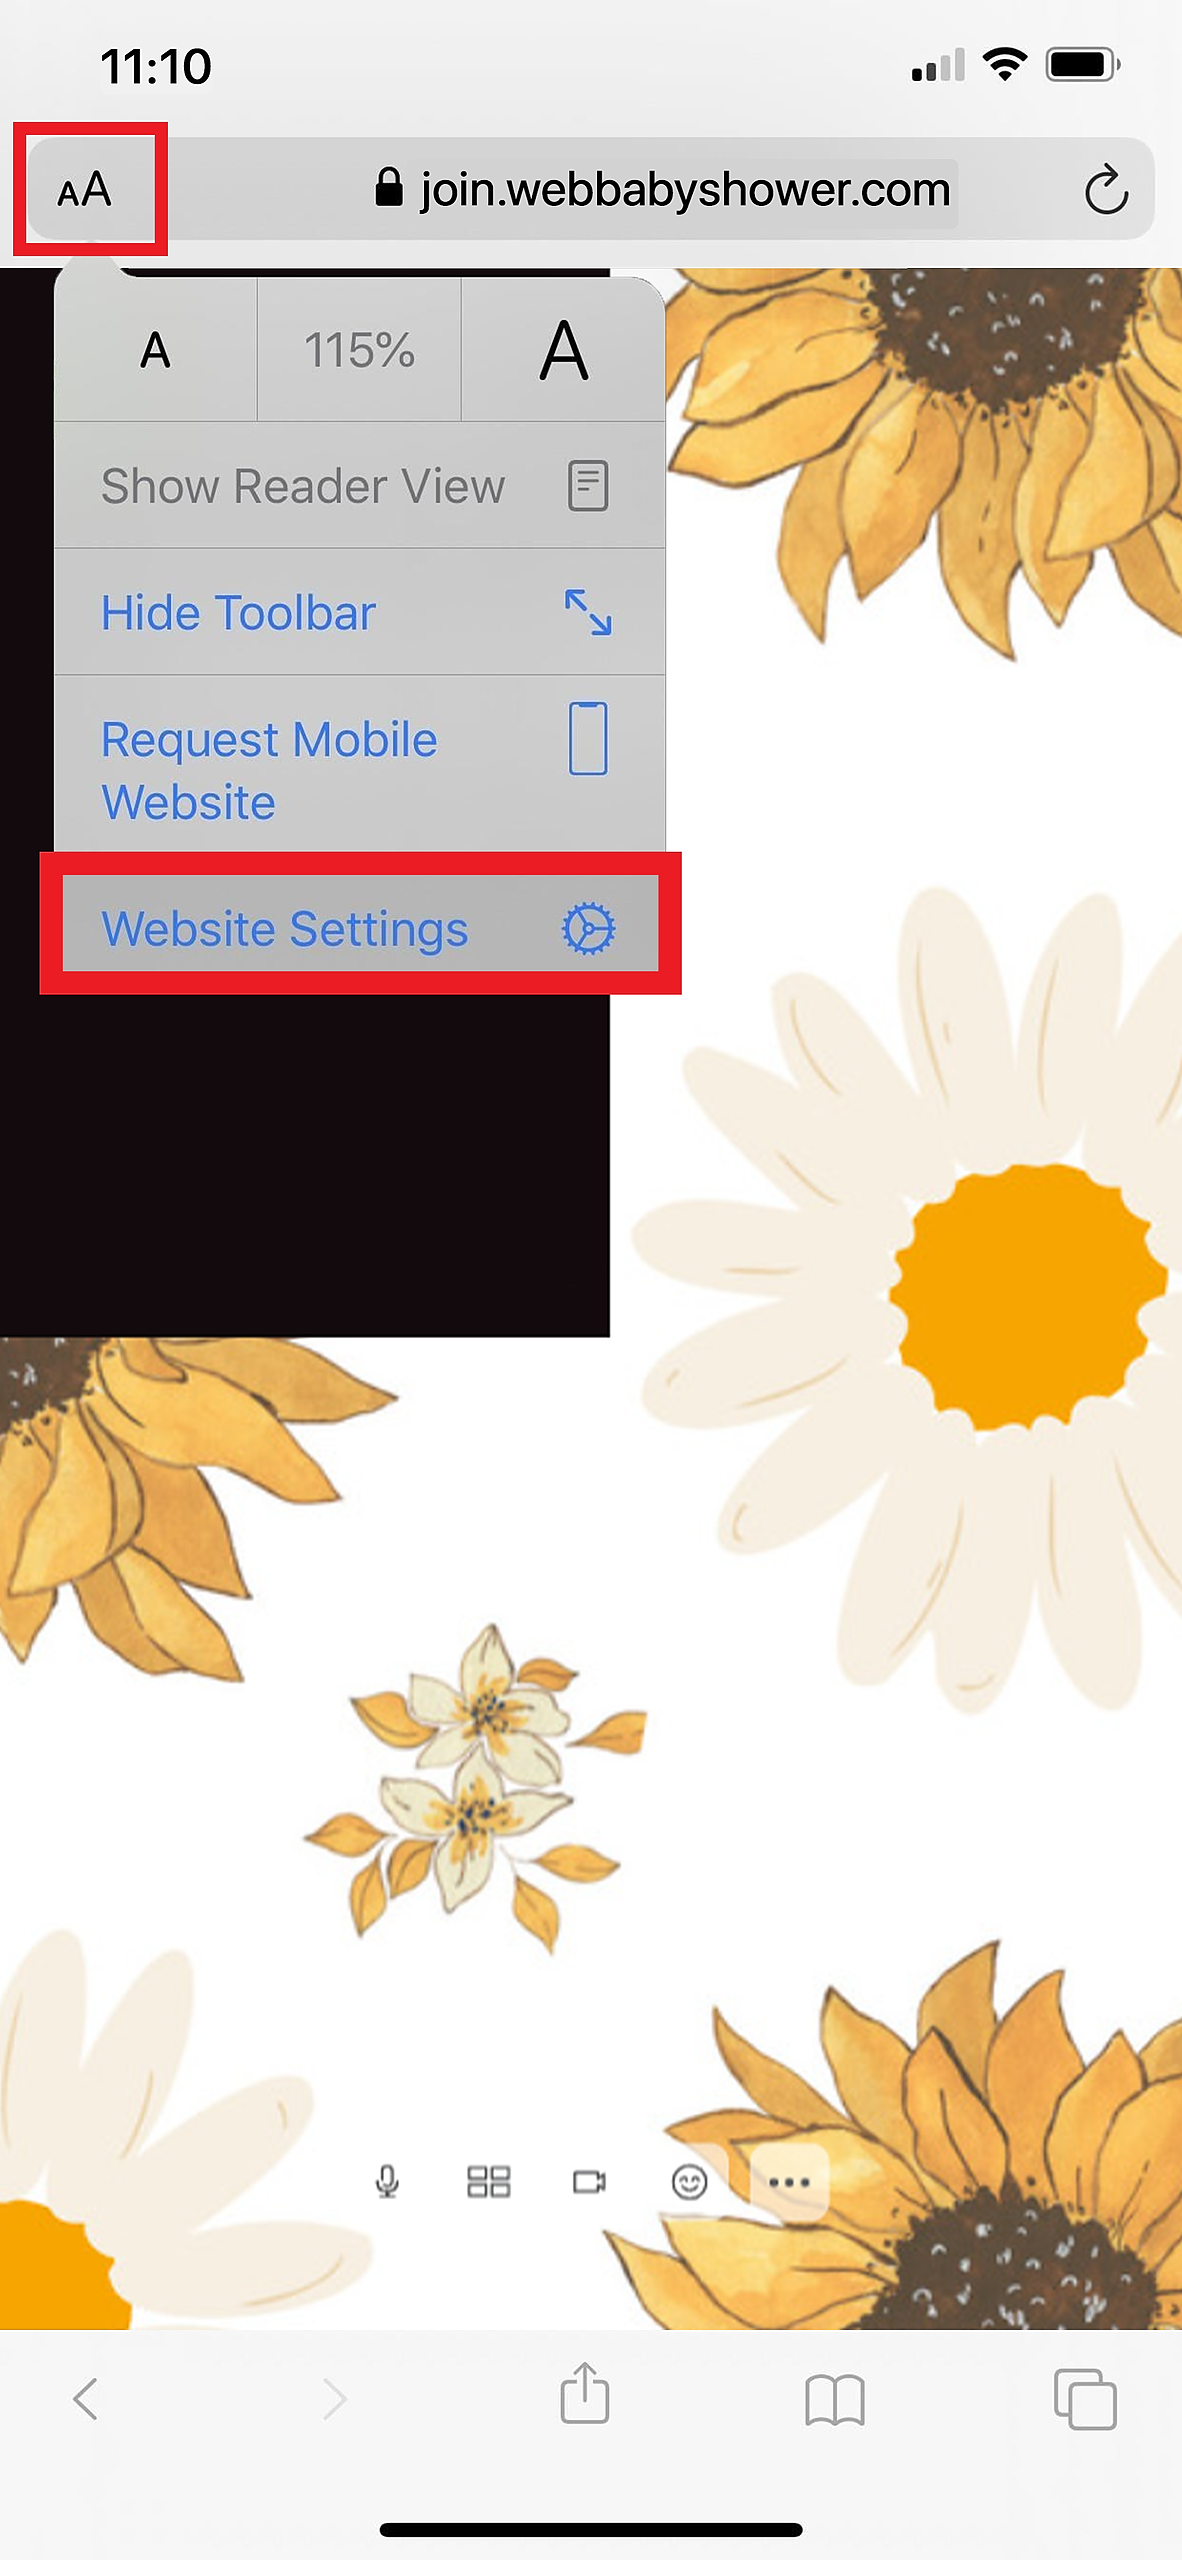
On Safari browser on an iPhone:
1. Open your browser settings by clicking on the left-hand side corner of the address bar.
Click on Website Settings.
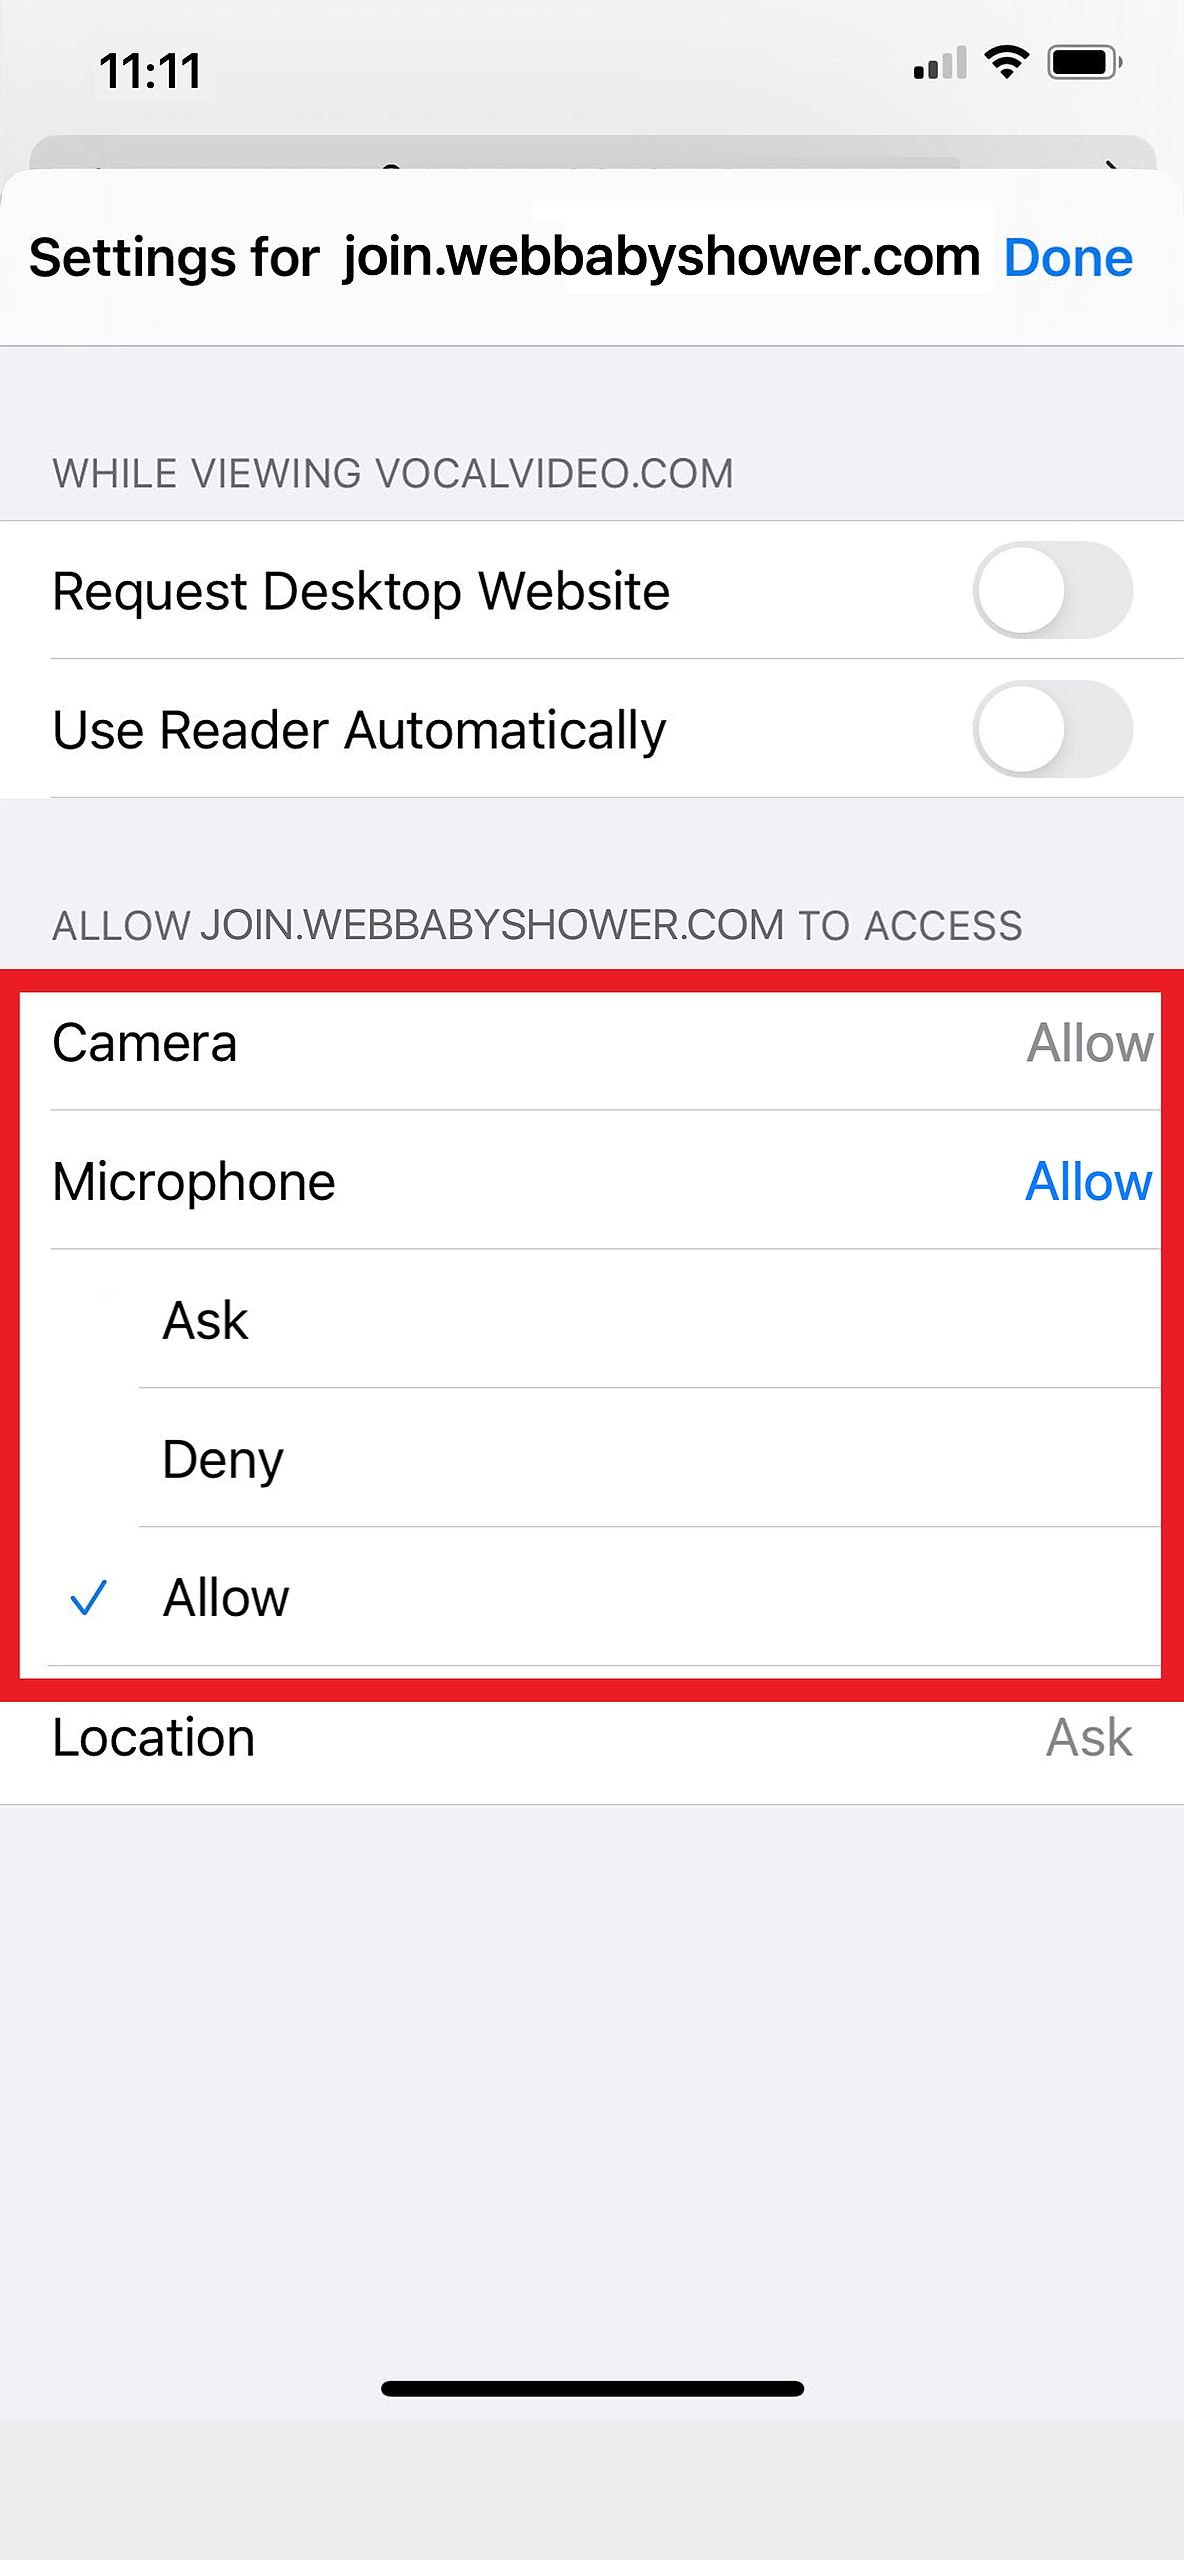
2. Allow access to your camera and microphone.
If you have any further questions or need further assistance, feel free to reach out to our support team.