No Emails? You can also include guests without having their email! Just invite them into the mobile app, and watch your email list be created for you -> Learn How.
Table of Contents
Creating a New Invite Template
Creating a New Guest List and Adding Your Guest's Emails
Sending Your Created Invites
Sharing Your Invite Link Without Email
Tracking RSVPs
(We highly recommend all your guests join the app, read how to invite guests into the mobile app with no emails! )
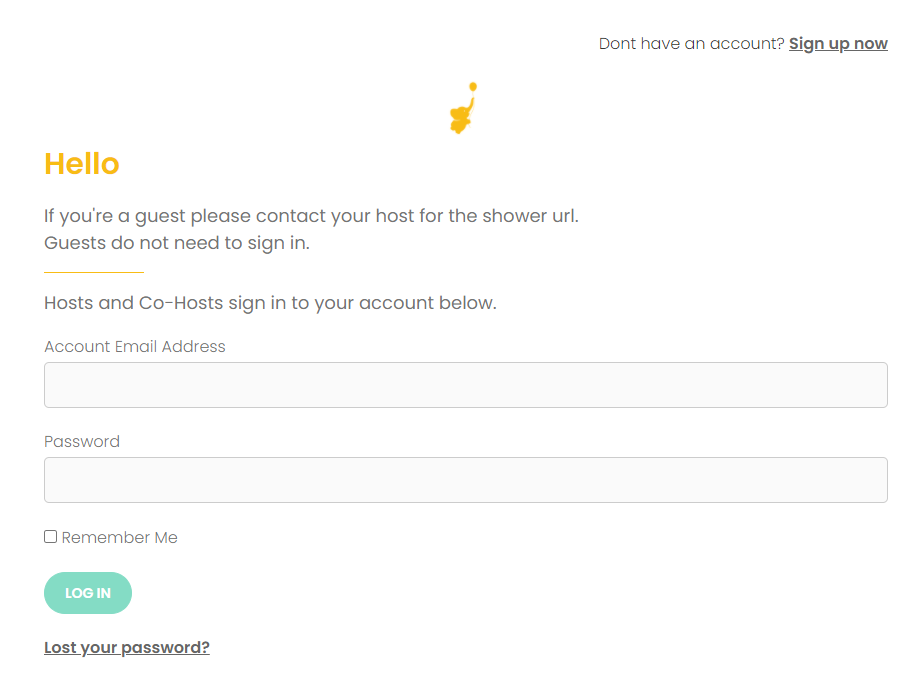
Login, If you are not logged in yet. https://webbabyshower.com/login/
Creating a New Invite Template
Check out our guide here for Template ideas!
(Click here to return to the Table of Contents)
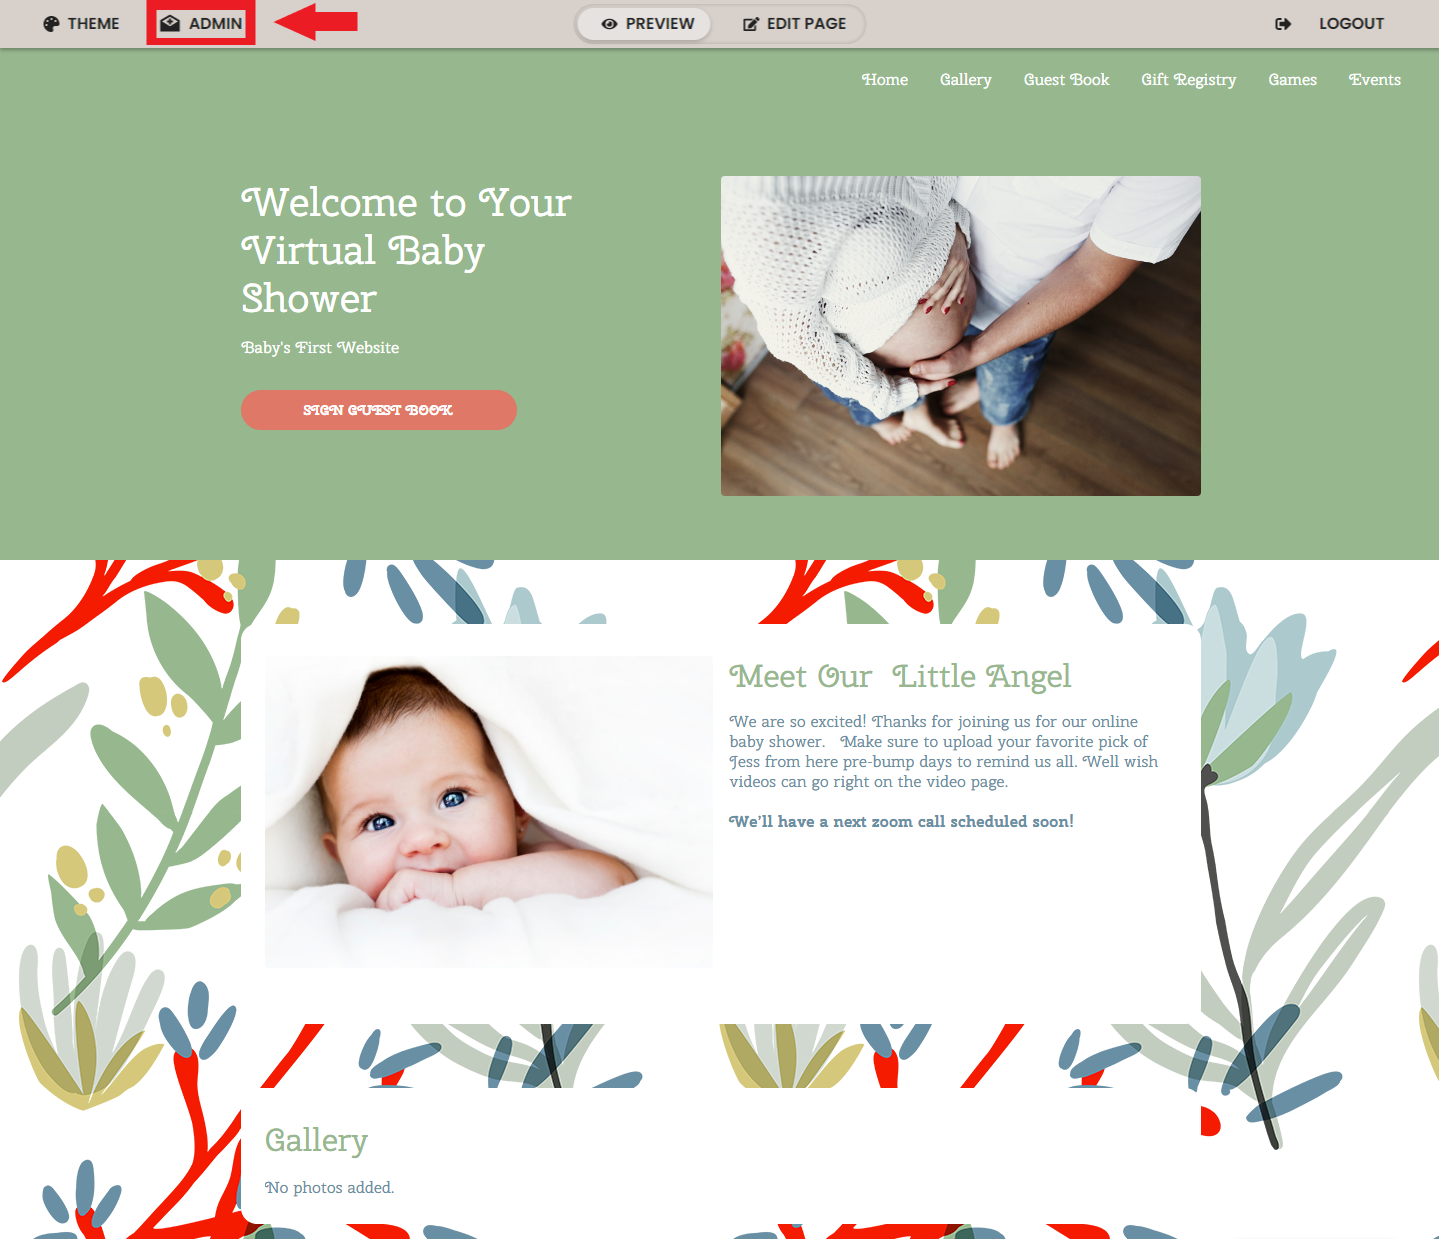
1. Go to Admin Settings.
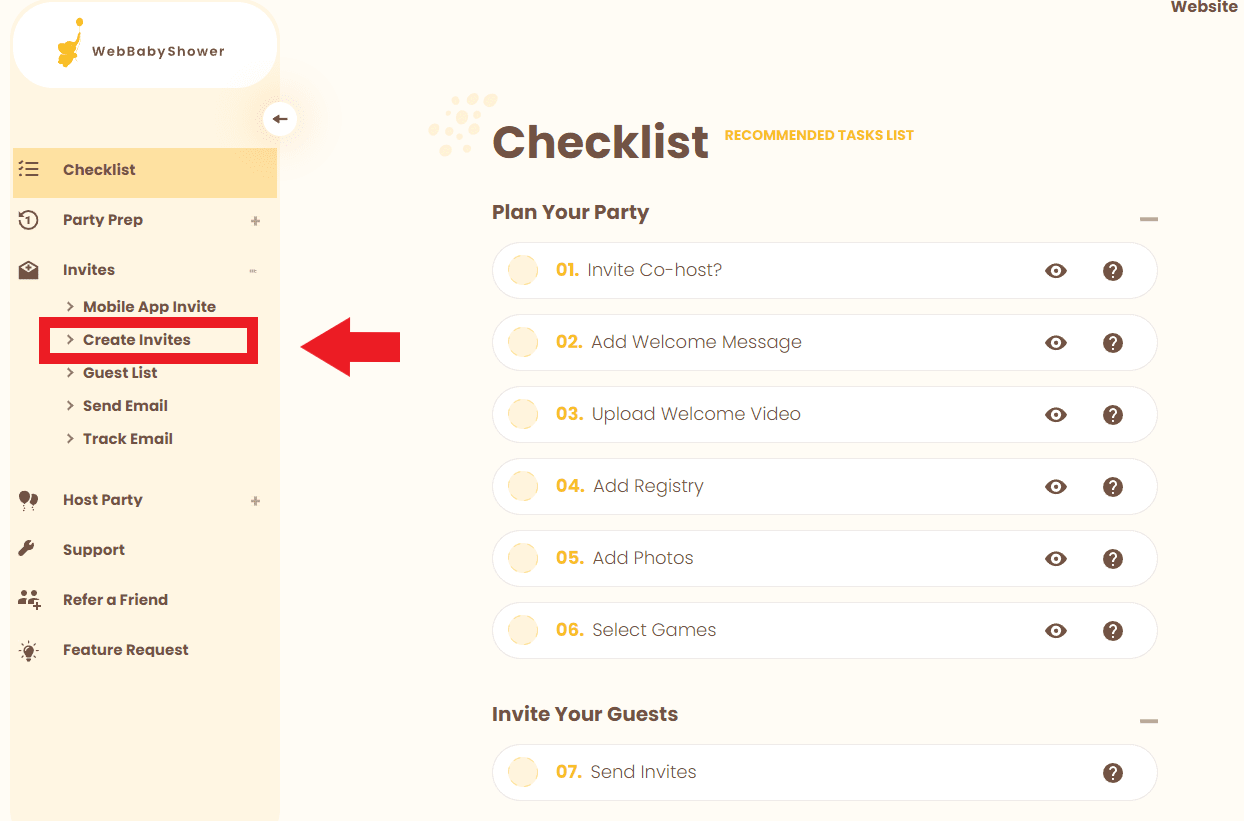
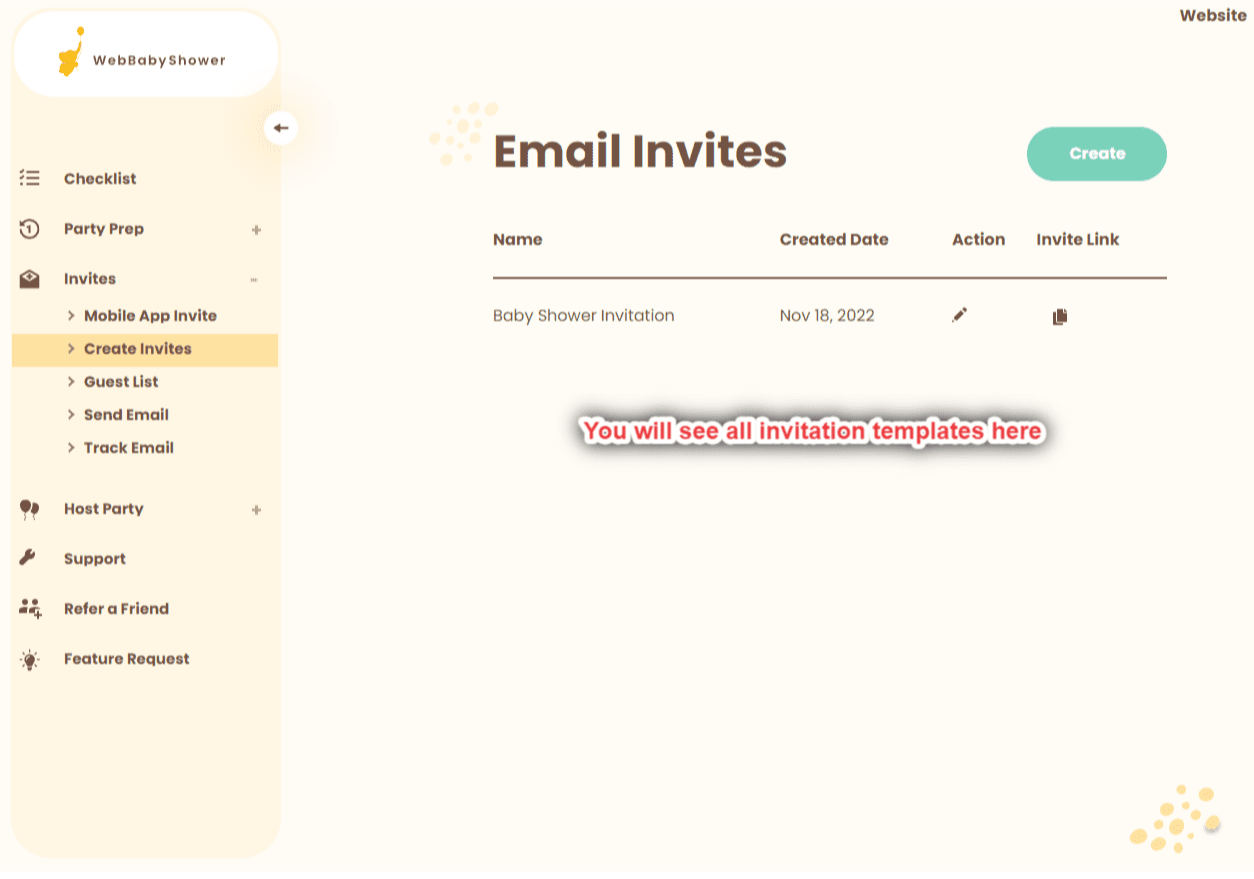
2. Go to Create Invites by clicking the plus (+) sign next to Invites.
Admin Settings > Invites (+) > Create Invites
3. Click the Create button to create a new invite template.

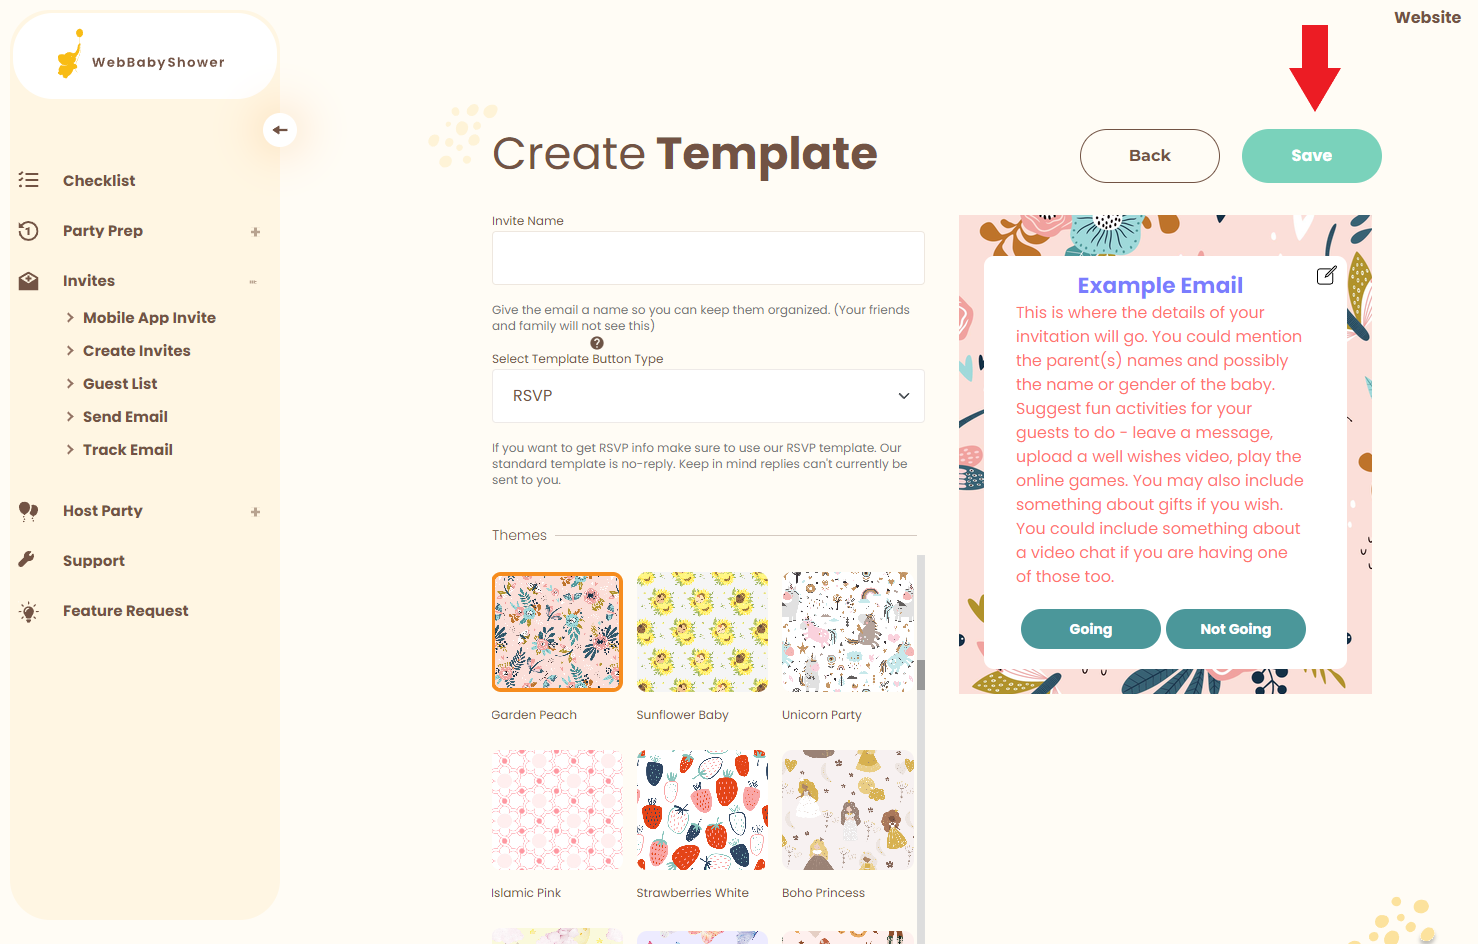
4. Name your new invite template.
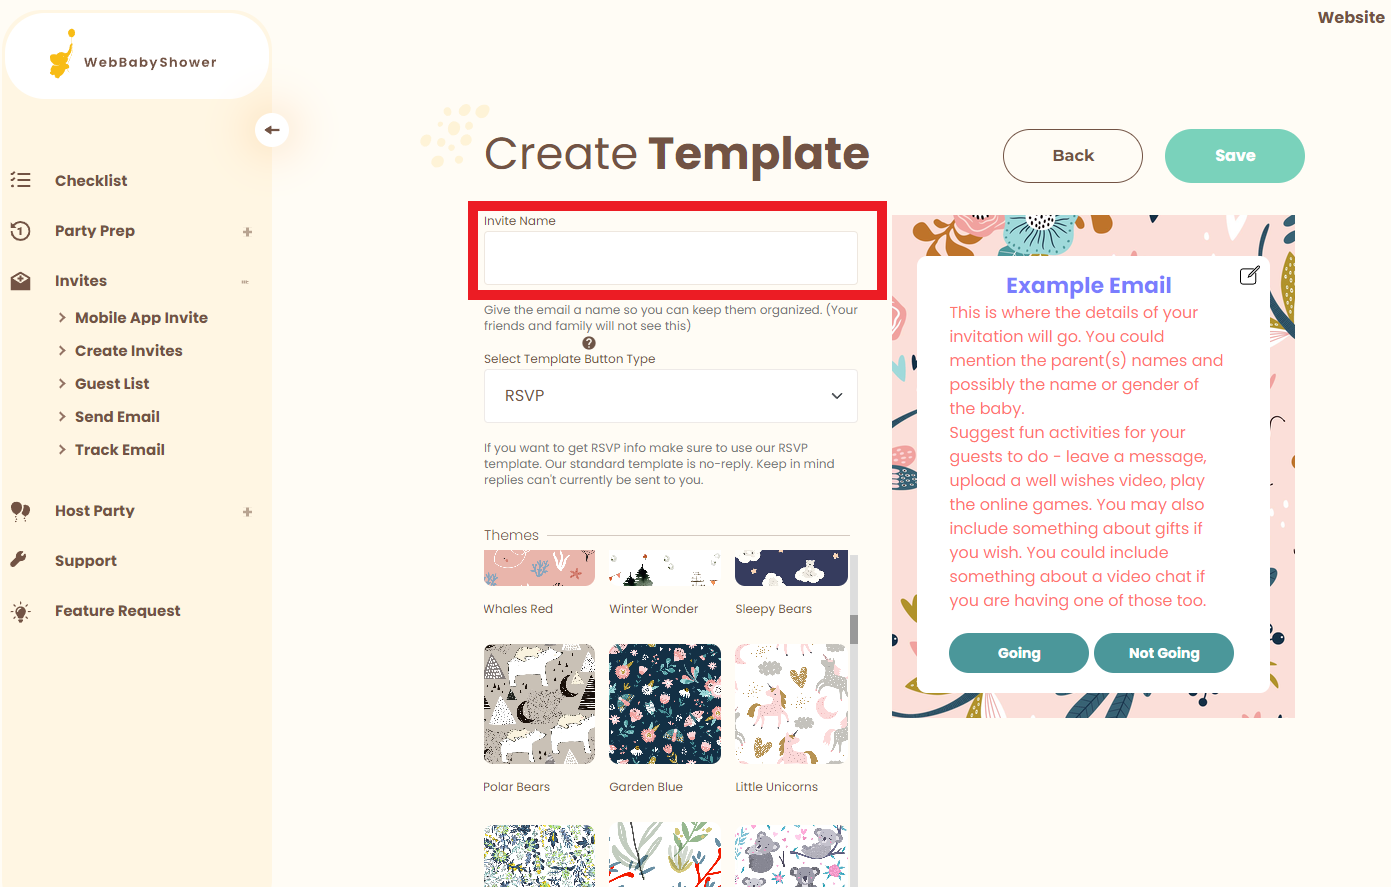
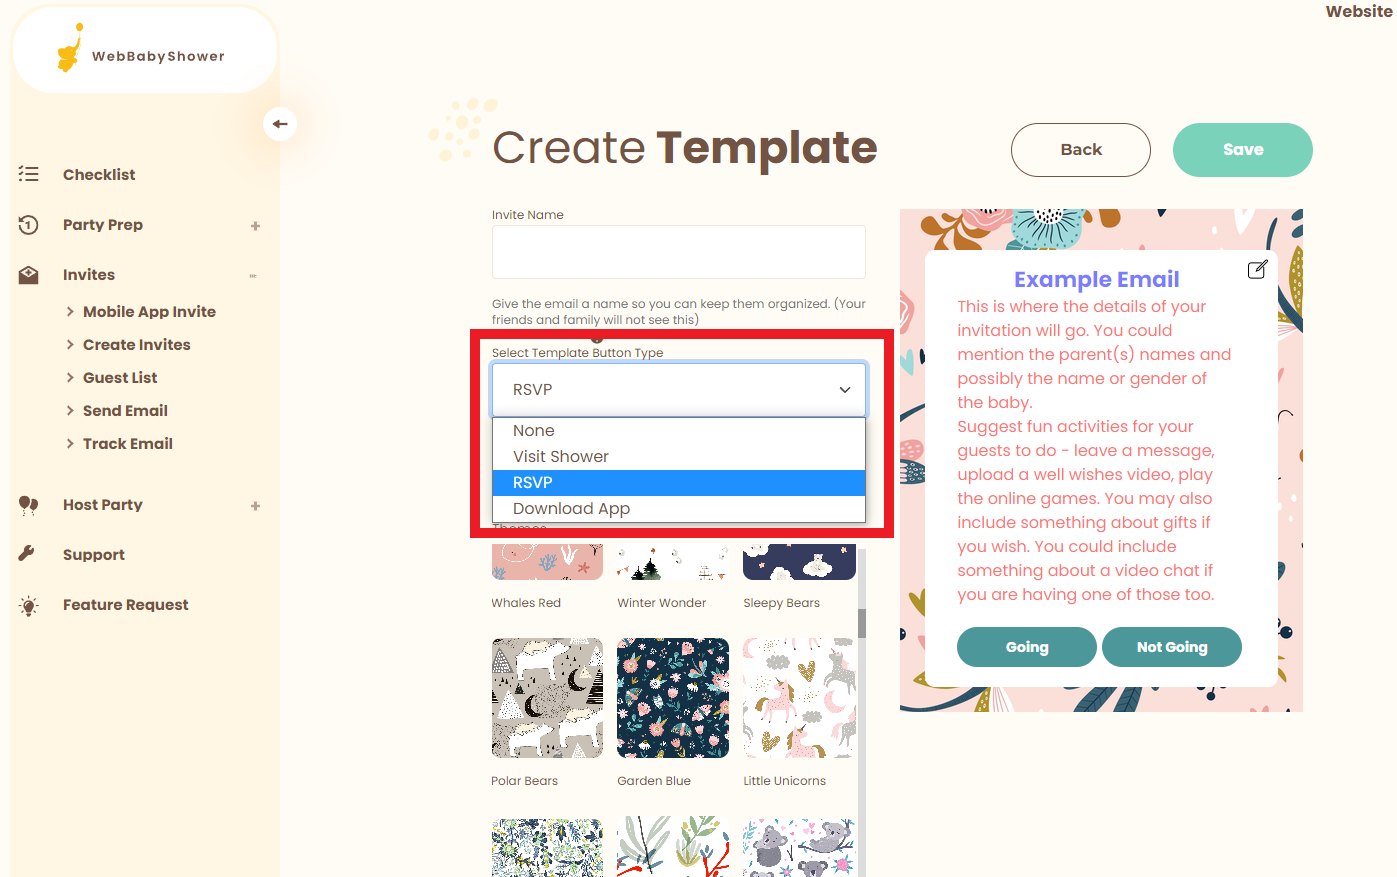
5. Choose your Template Button Type.
None will not have a button for your guests to interact with.
Visit Shower will allow your guests to click a button to visit your shower page directly
RSVP will allow your guests to choose if they're either going or not going. These buttons will also bring them to your shower page.
Download App will allow your guests to open the mobile app invite page and copy the shower code they'll need to enter when they sign up for the app.
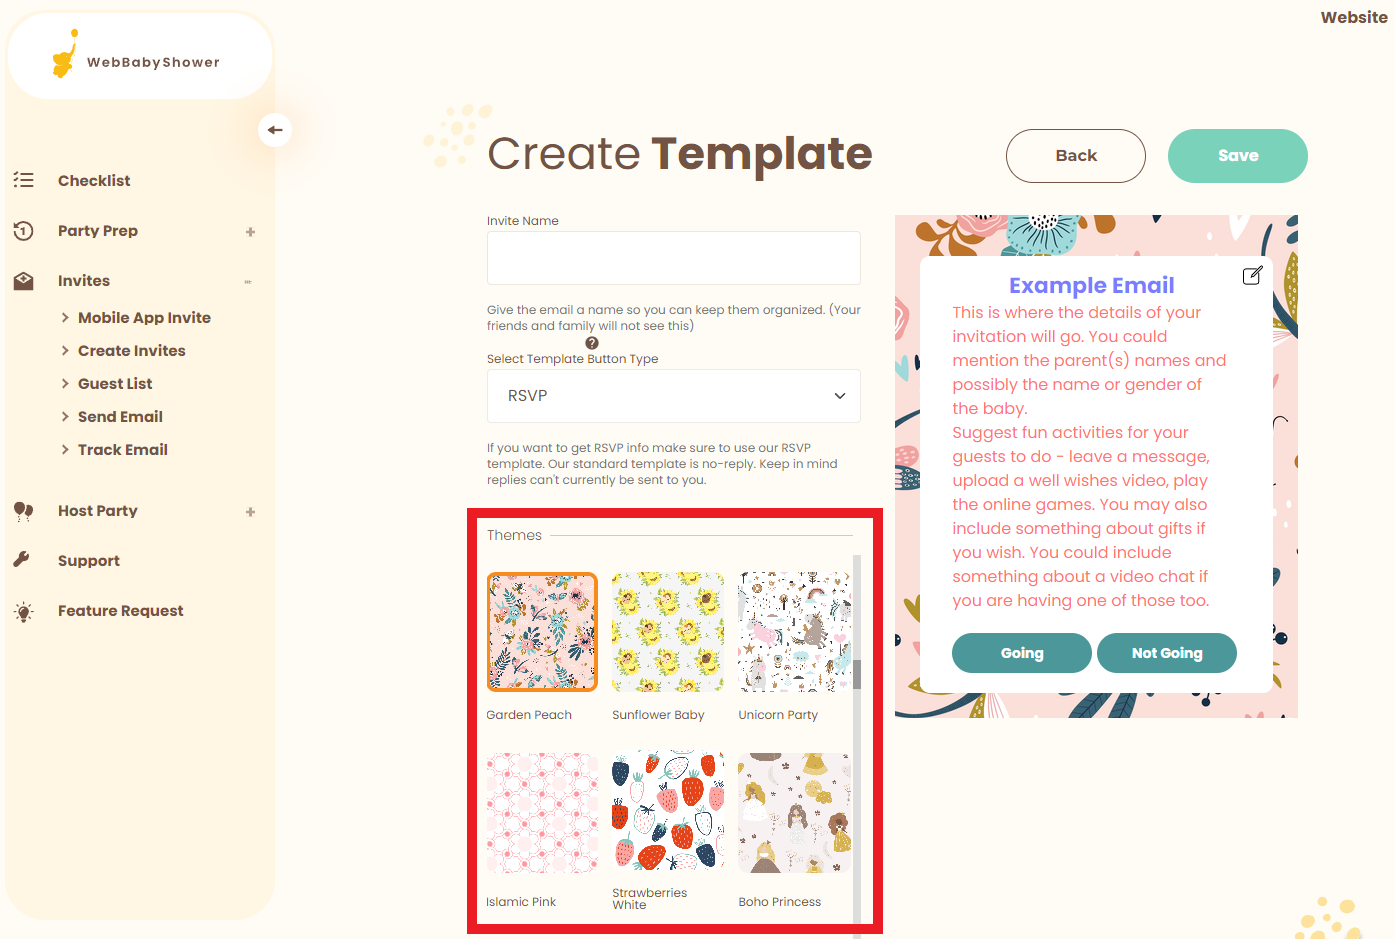
6. Select your Theme.
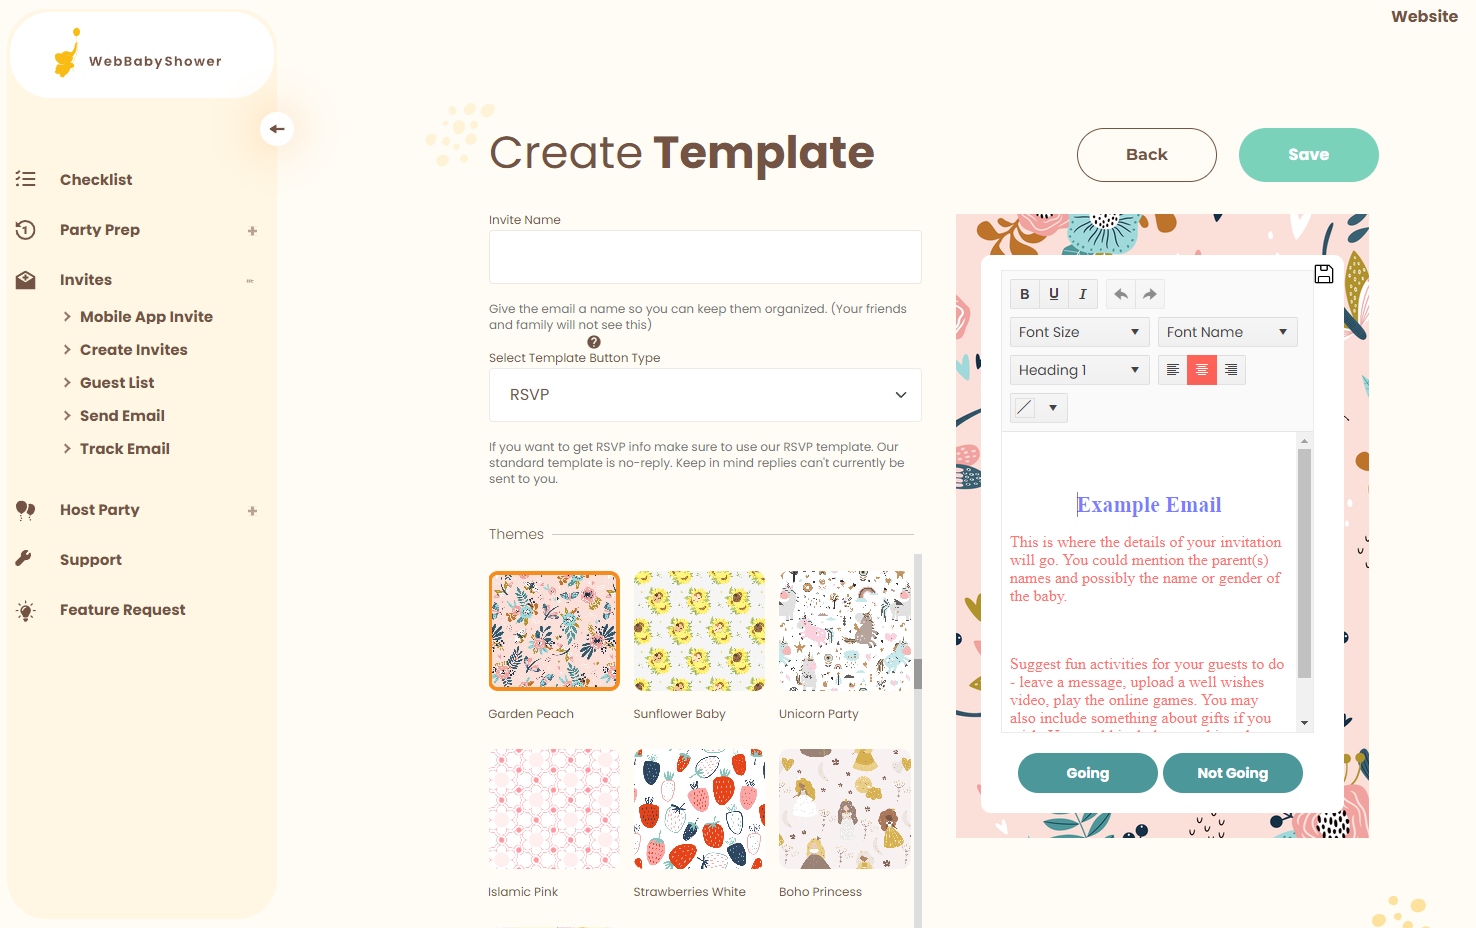
7. Edit your Invitation Content.
To edit, first, click the Edit icon at the upper right-hand corner of the invitation template.

Now, you can start editing the content of the invitation.
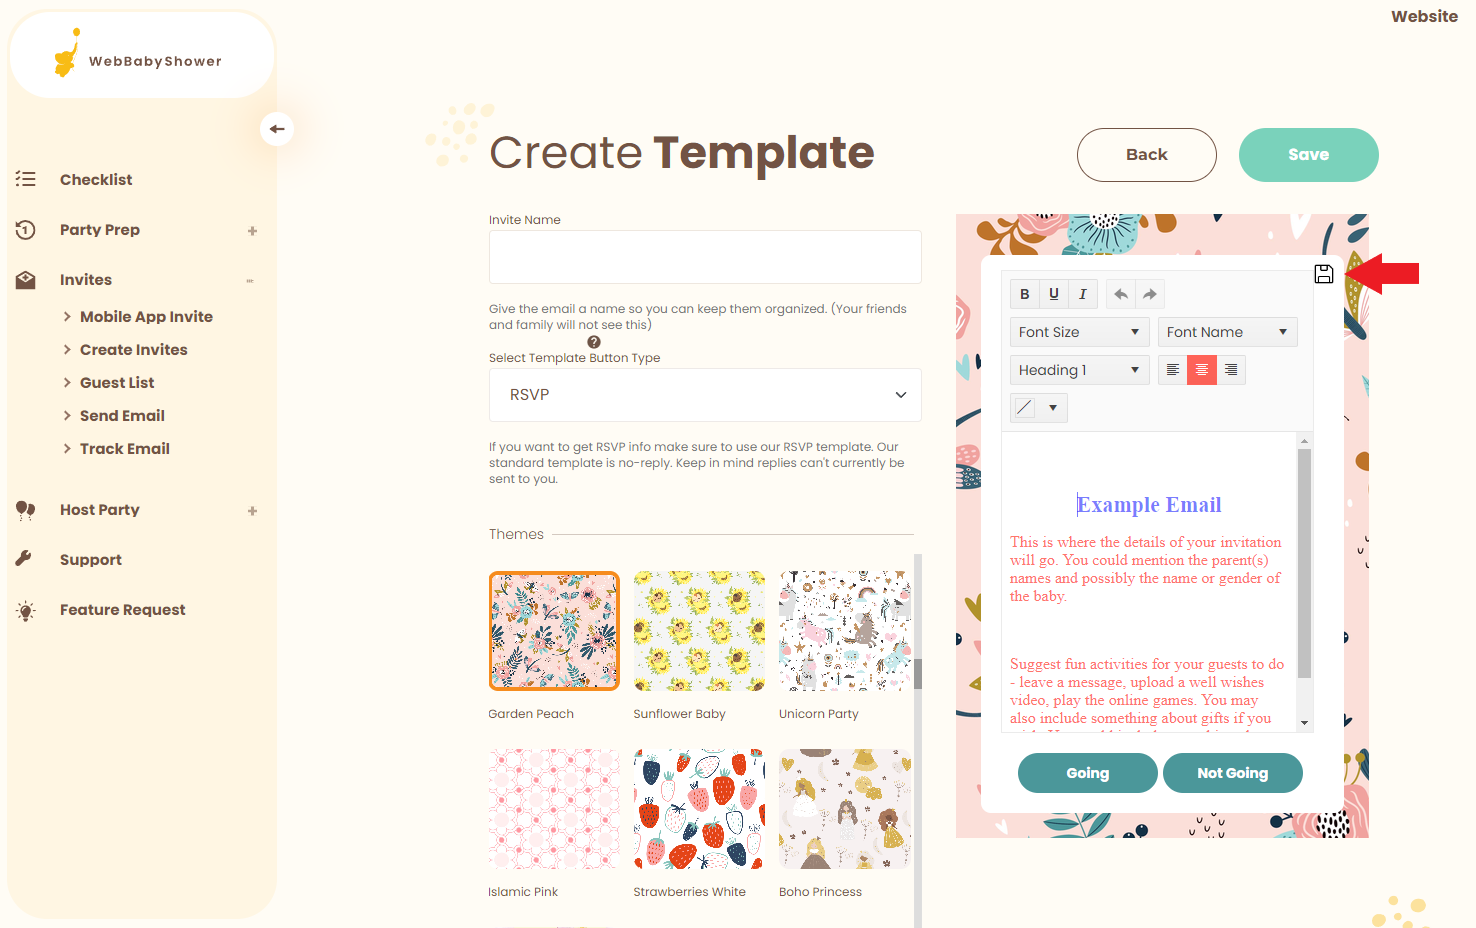
8. Click the Save icon button to save the content of your invitation.
9. Don't forget to click the green SAVE button once you're done!
10. Once you save your invite, if you want to edit your already created invite, you can click on the invite's title to access that invite again.
Creating a New Guest List and Adding Your Guest's Emails
(Click here to return to the Table of Contents)
1. Go to the top menu bar and click the Admin button in the left-hand corner.
Top menu bar> Admin

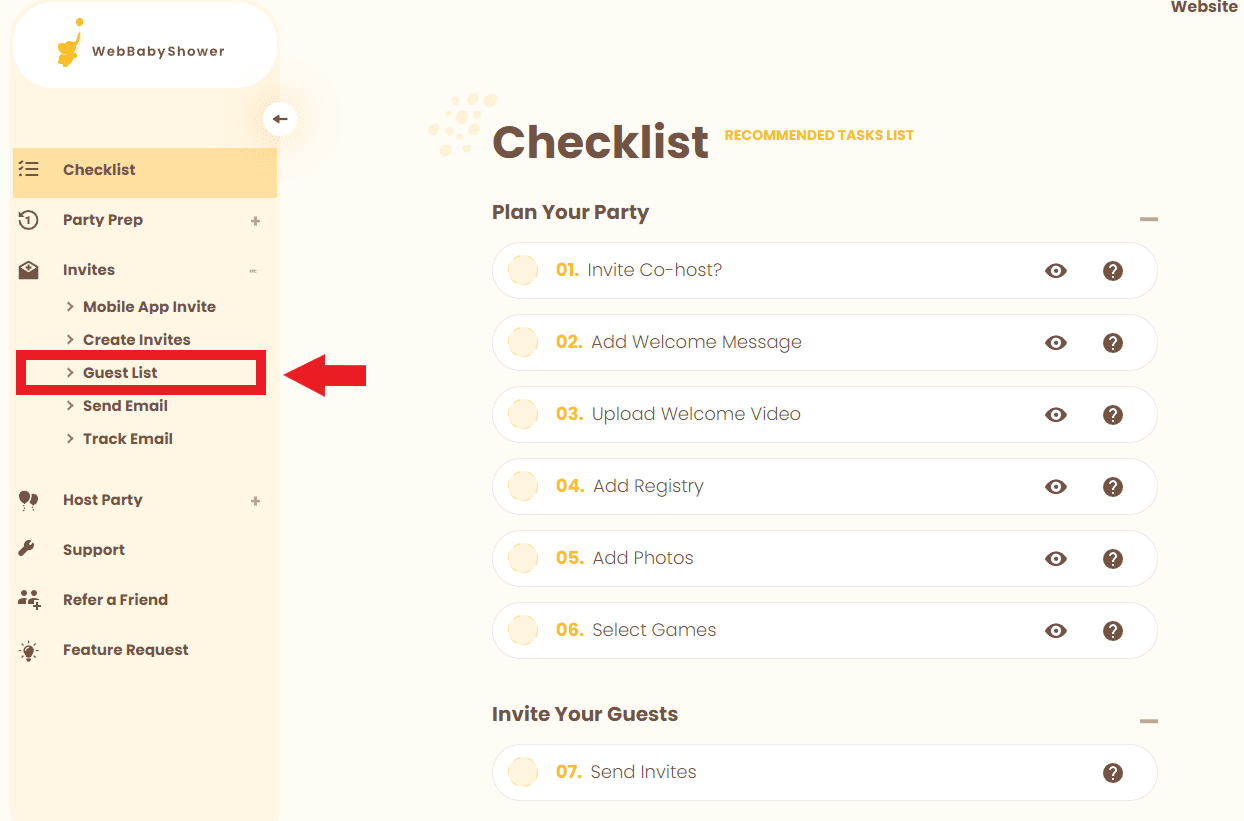
2. Go to Guest List by clicking the plus (+) sign next to Invites.
Admin Settings > Invites (+) > Guest Lists
3. Title your guest list within the box Create New List, click Create List when done.
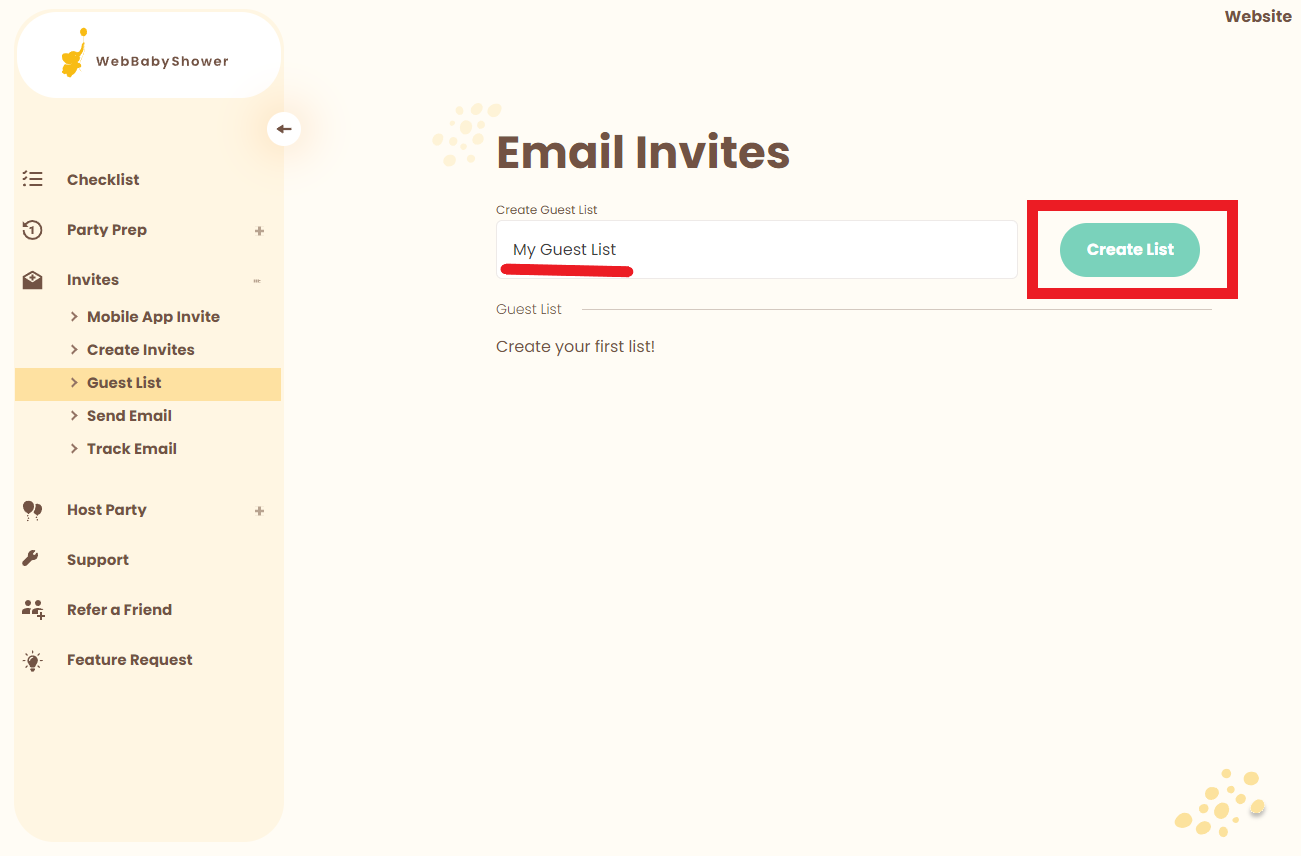
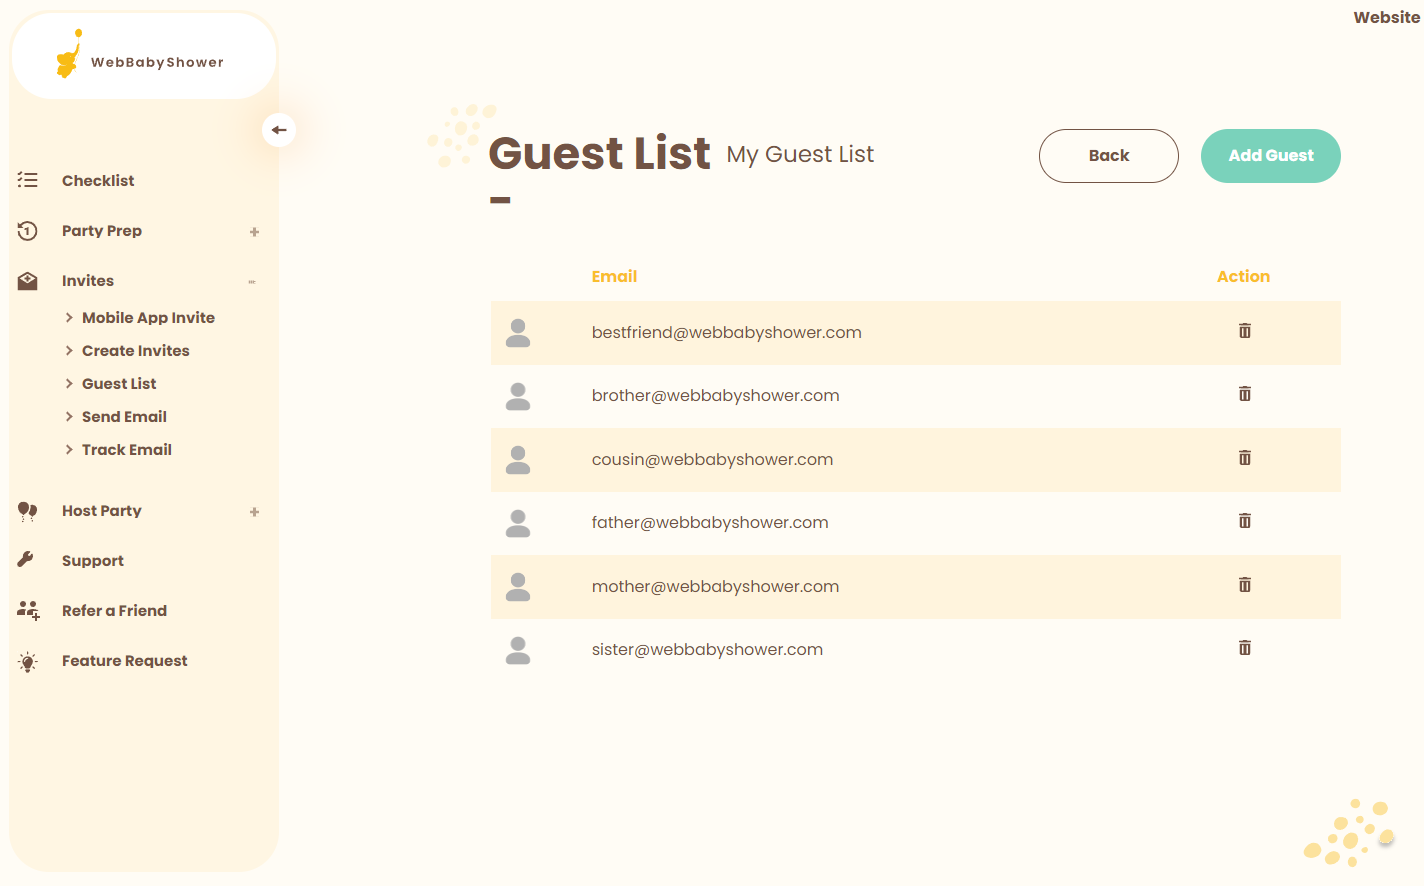
4. Locate your newly created list under the Guest List area.
Guest List > Name of the new list

6. Click on your new guestlist. Once you click on your created guestlist, click on Add Guest to add your guest's emails.
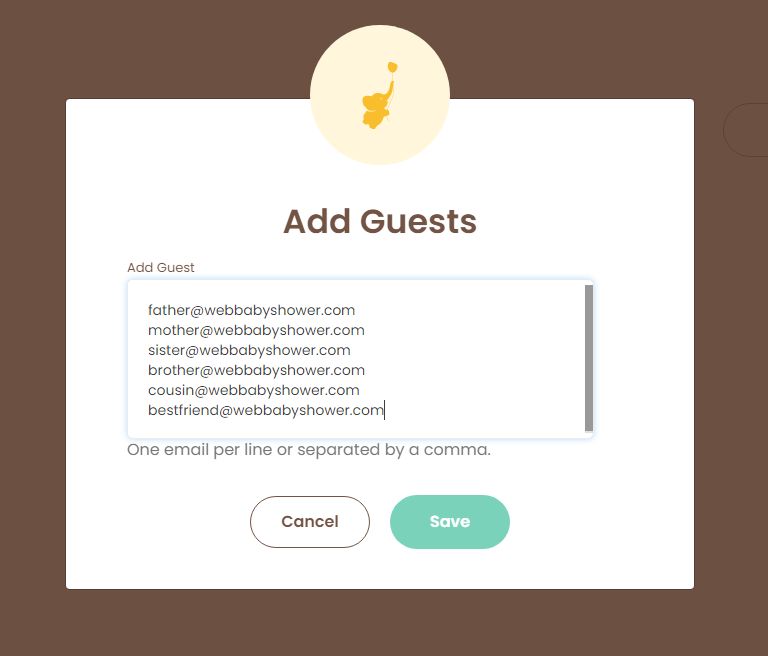
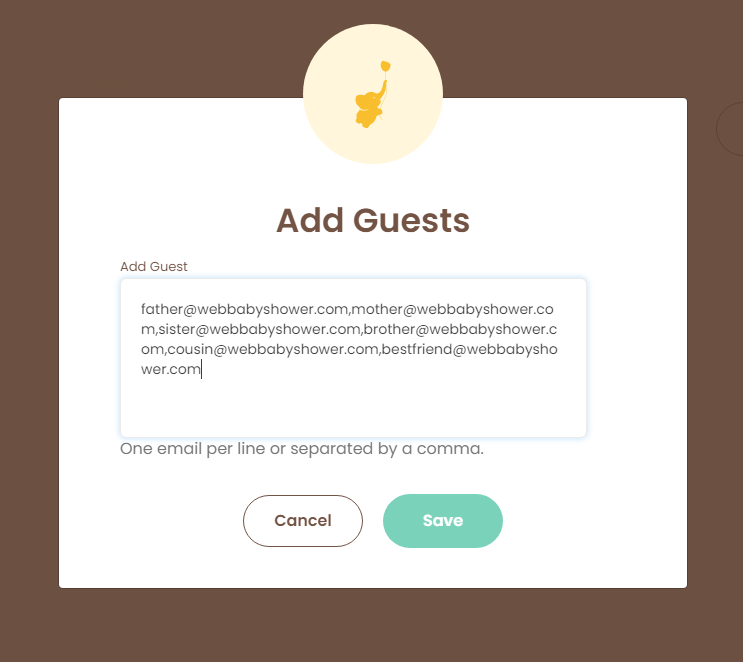
There are two ways you can add their addresses, we have provided examples, please see the following:
Emails per line:
Emails separated by commas:
7. Once you are finished, click Save and your new guestlist is created!
Sending Your Created Invites
(Click here to return to the Table of Contents)
Don't forget! You can also Send Yourself a Test Invitation before you send your final invites!
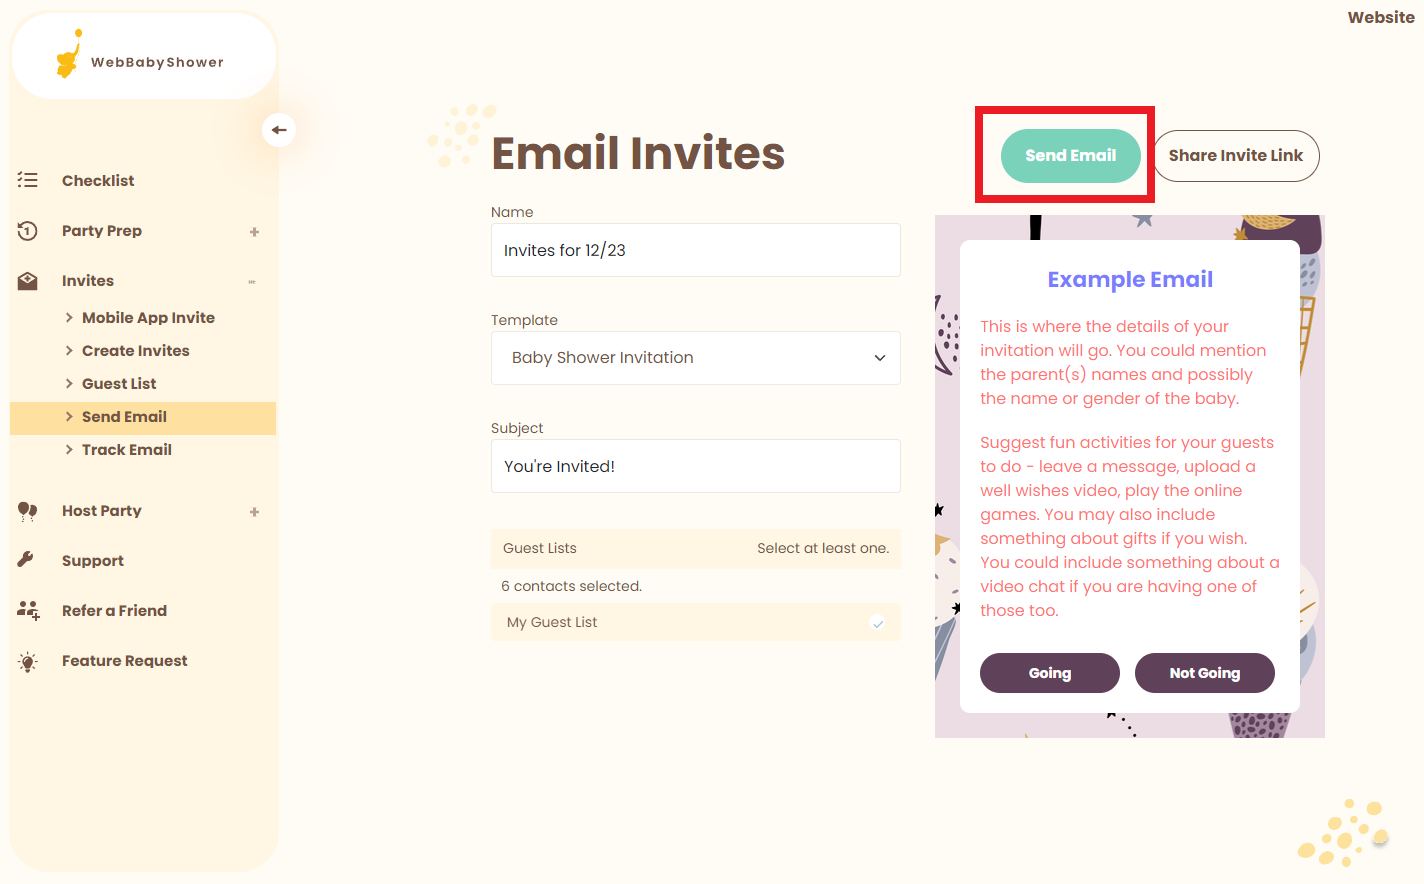
1. Go to Admin settings.

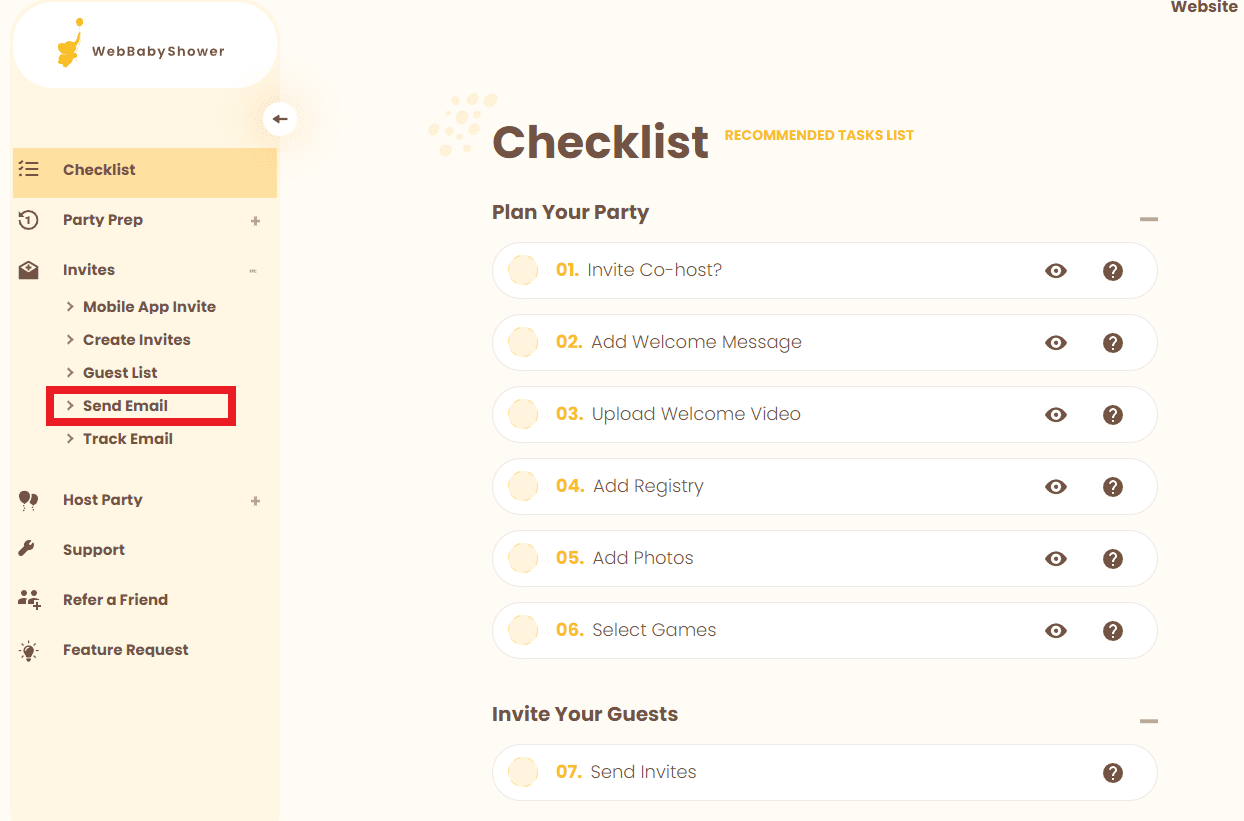
2. Go to Send Email.
Admin Settings > Invites (+) > Send Email
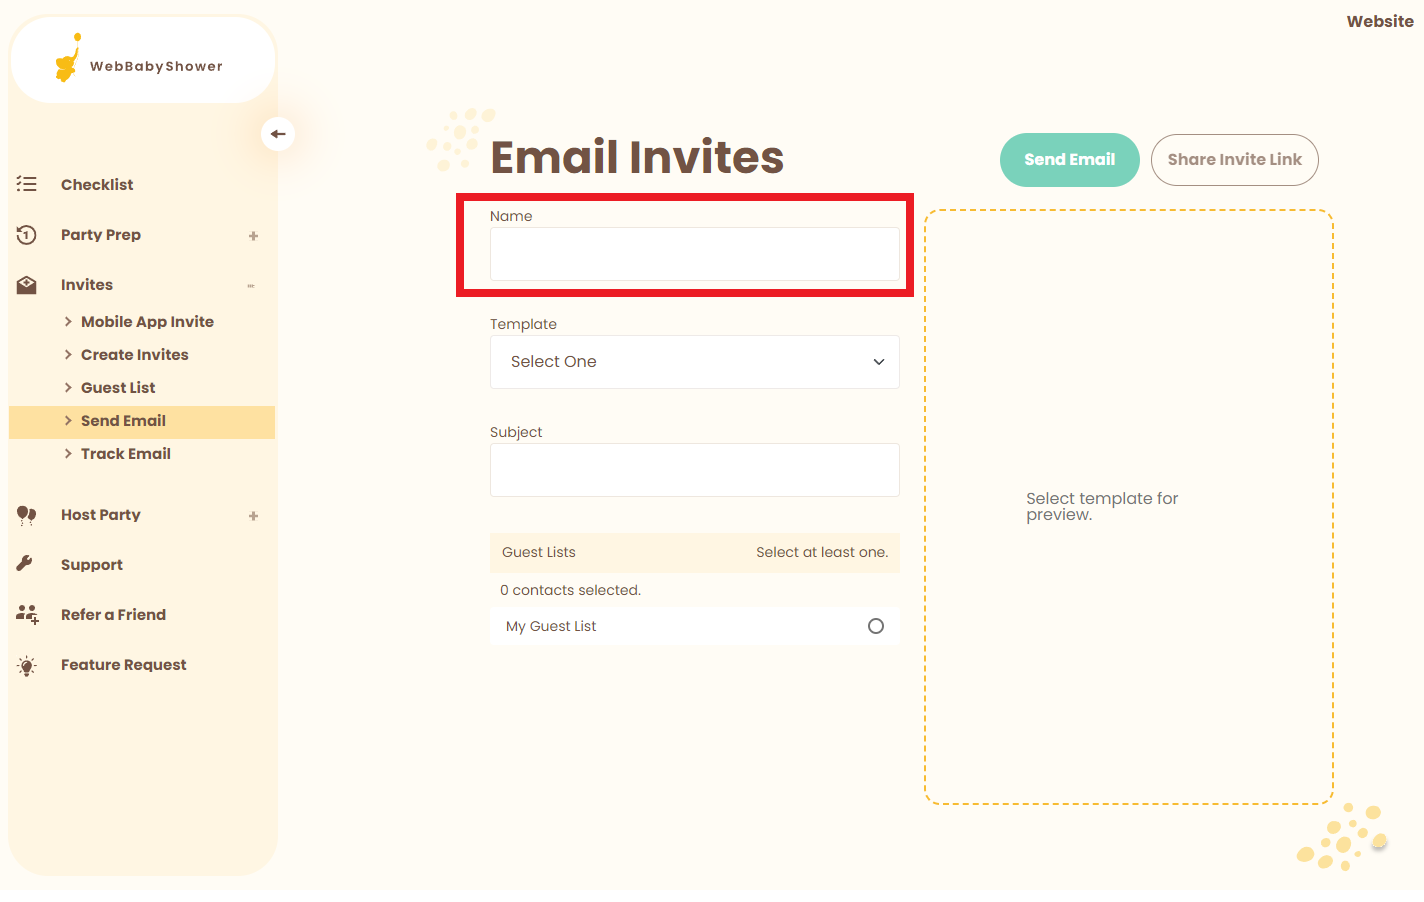
3. Name your email invite.
Your guests will not see this name, this is for you to distinguish between multiple emails sent out.
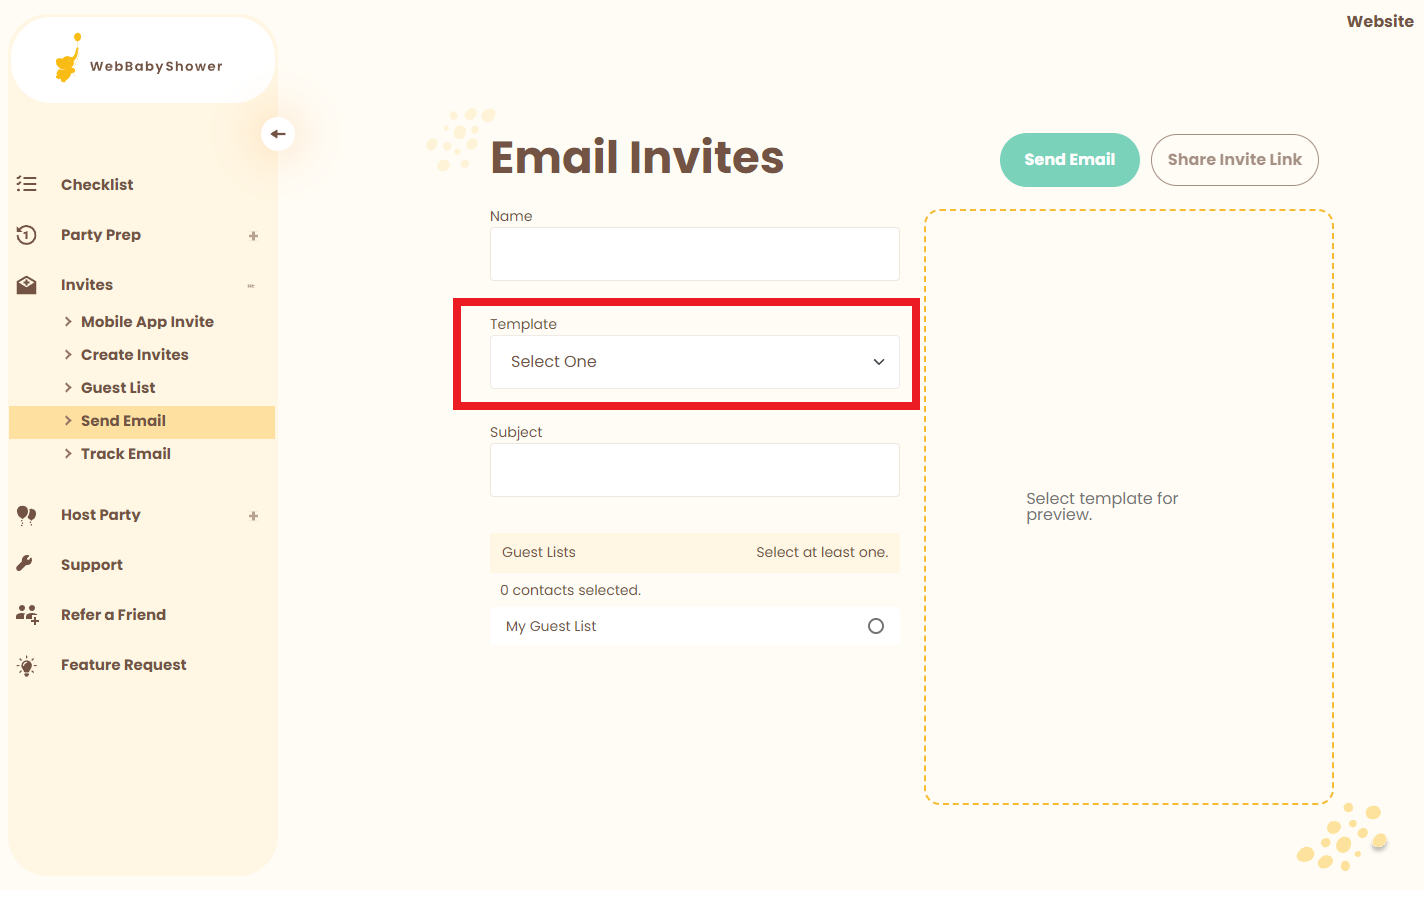
4. Select your template.
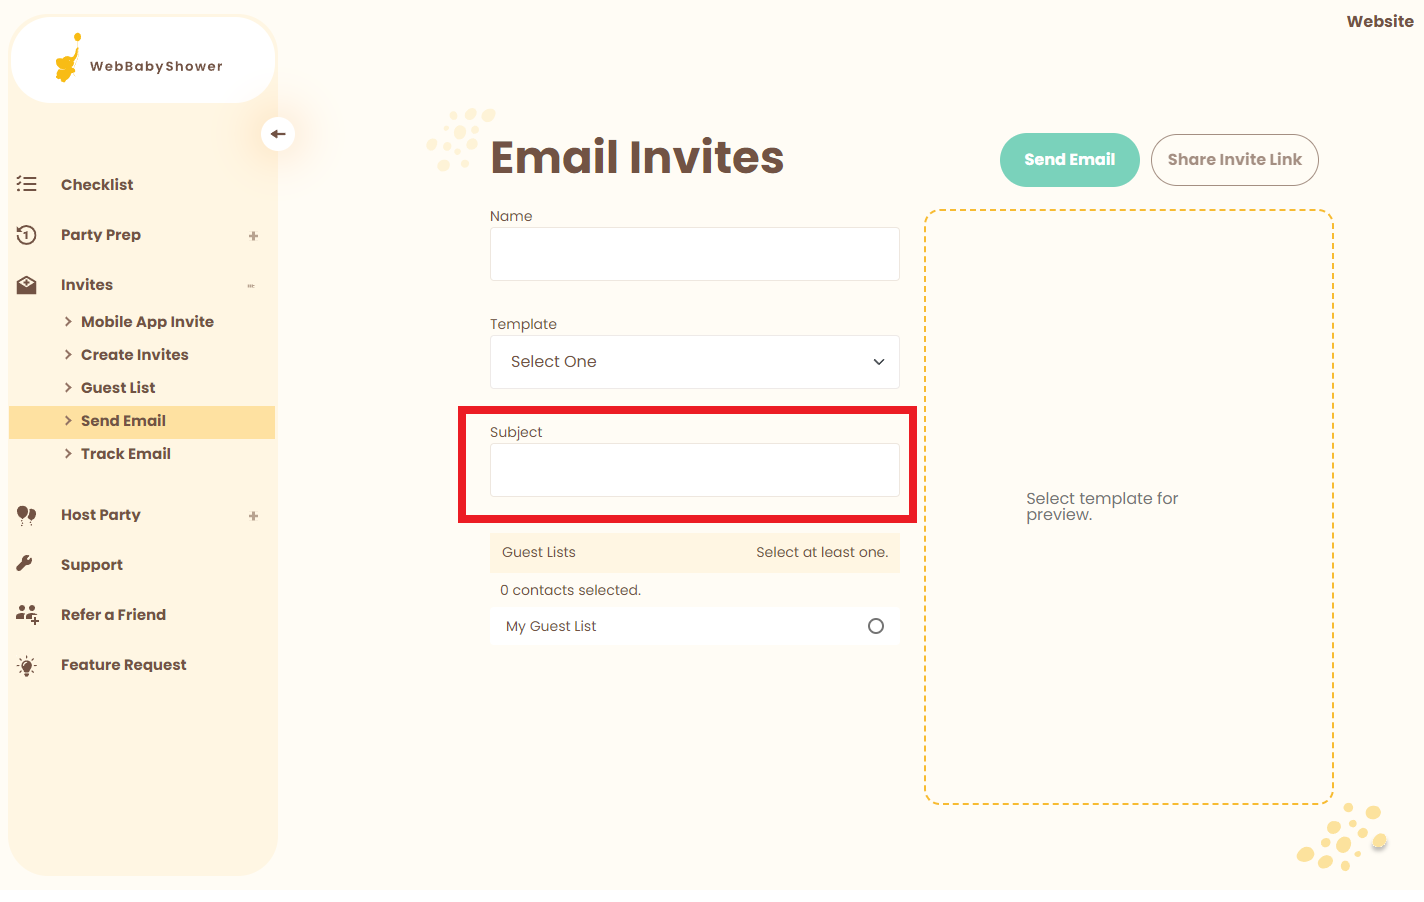
5. Add your Subject. This is what your guests will see when they receive the email in their inbox.
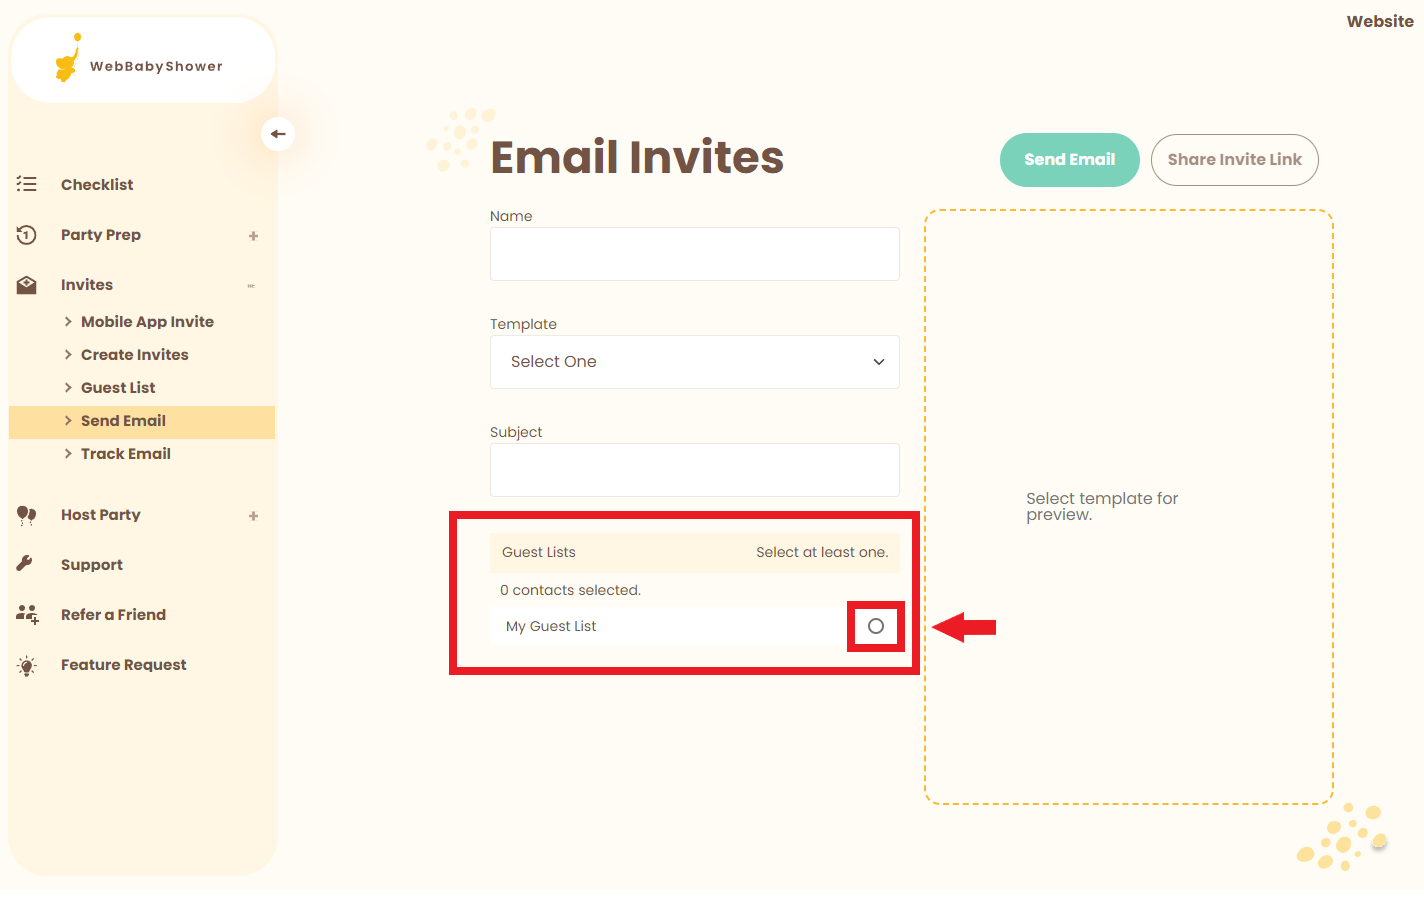
6. Select your guest list(s).
7. Double Check to make sure that you have chosen the right template and guest list(s).
When ready, click Send Email
Sharing Your Invite Link Without Email
(Click here to return to the Table of Contents)
Note: Invite links let guests view invitations via a web browser. RSVPing via invite links is not yet available.
You can also share your invitations without sending an email. Every time you create an invite, it will have a link automatically generated for you so you can share it easily on mobile, social or text messages.
There are two pages from your admin dashboard where you can get your invite links.
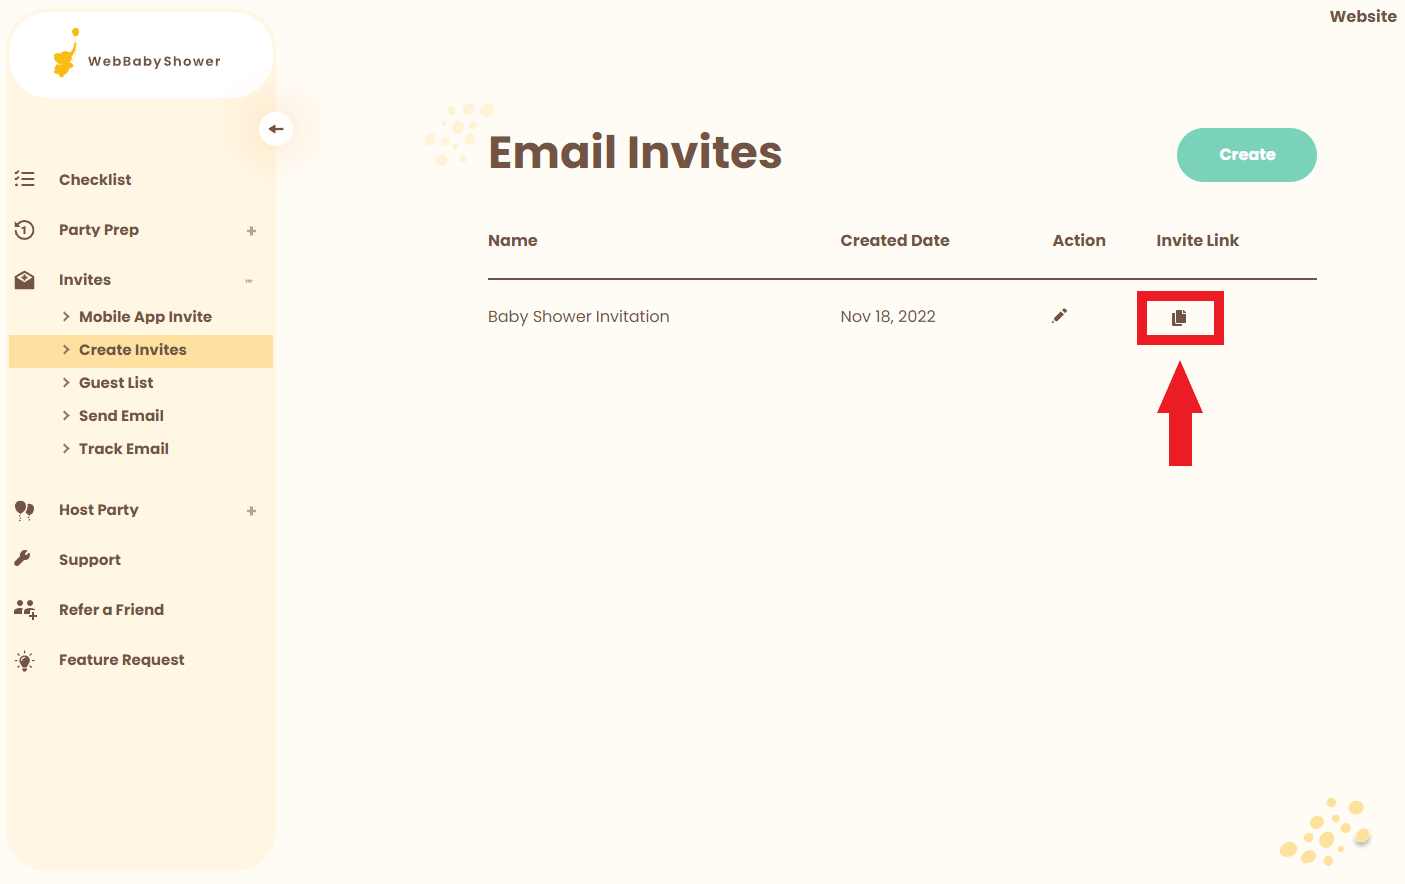
1. You can copy the invite link from Invites > Create Invites. After you save your invite, it will show in your email invites list. Click on the clipboard icon under the Invite Link column to copy your invite link.
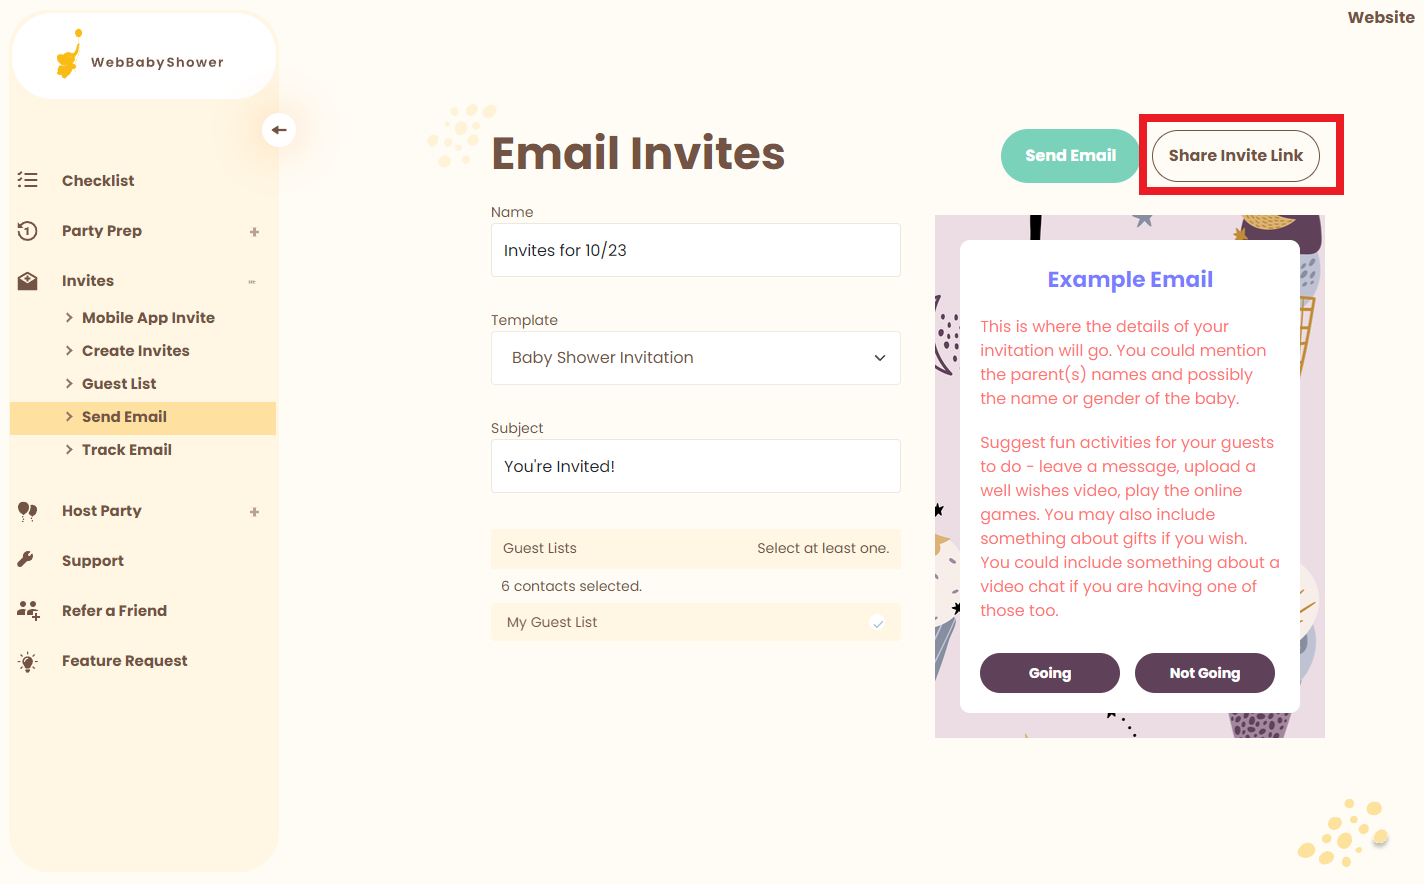
2. You can also get the link from Invites > Send Email.
First, select your invite from the Template dropdown. This will display a preview of your invite. Click on the Share Invite Link button in the upper right-hand corner of the page to open your invite link in a new tab.
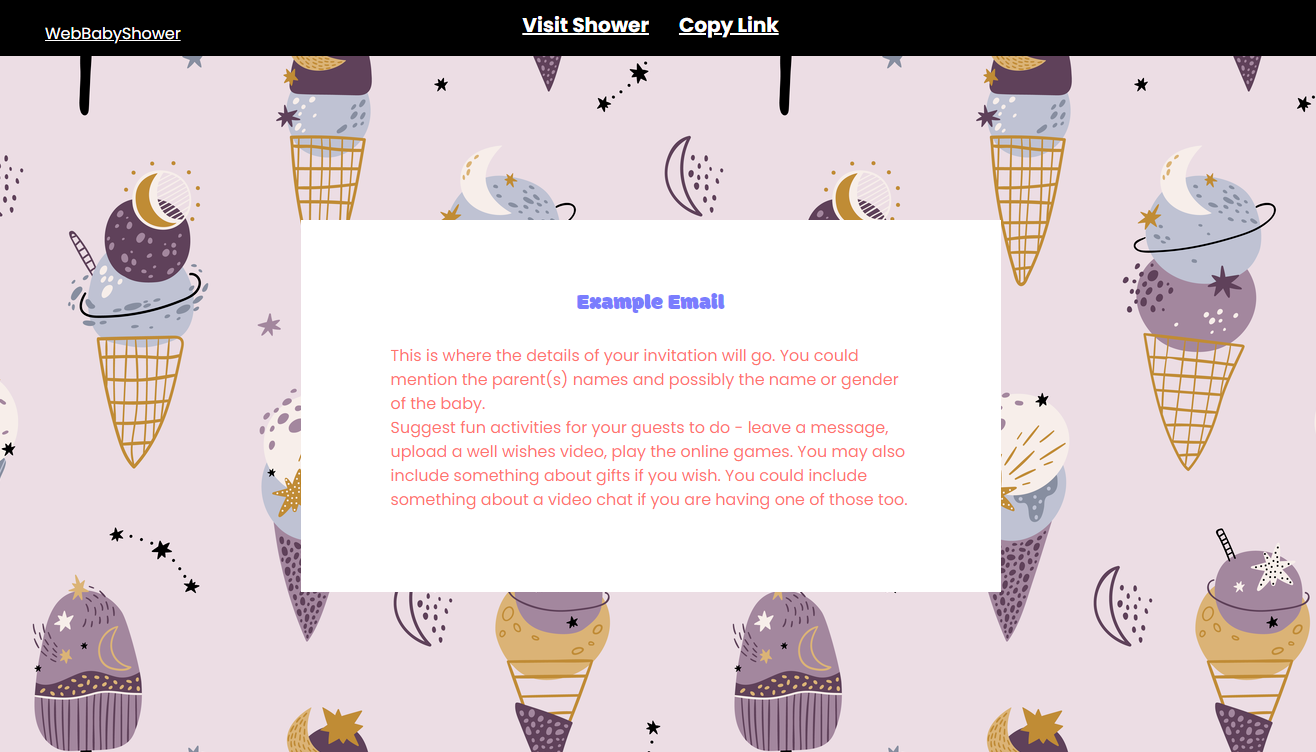
3. This is the view your guests will see when they open your invite link. At the top of the page, click the Copy Link button to copy your invite link.
You're now ready to share your invite link in your socials, through text messages, or any way you like.
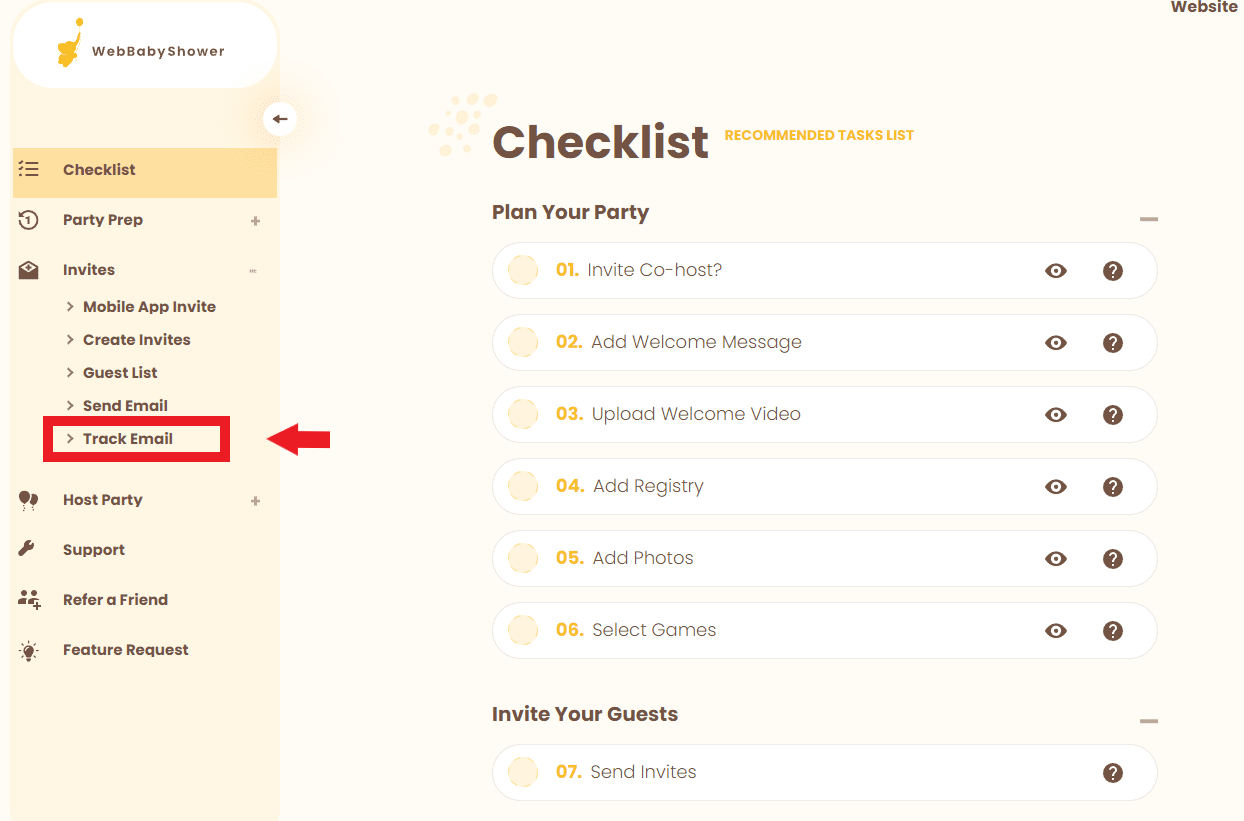
Tracking RSVPs
(Click here to return to the Table of Contents)
1. Click on Invites > Track Emails
2. On the Track Email page, you will see the list of all the email invites you've sent and the date they were sent.
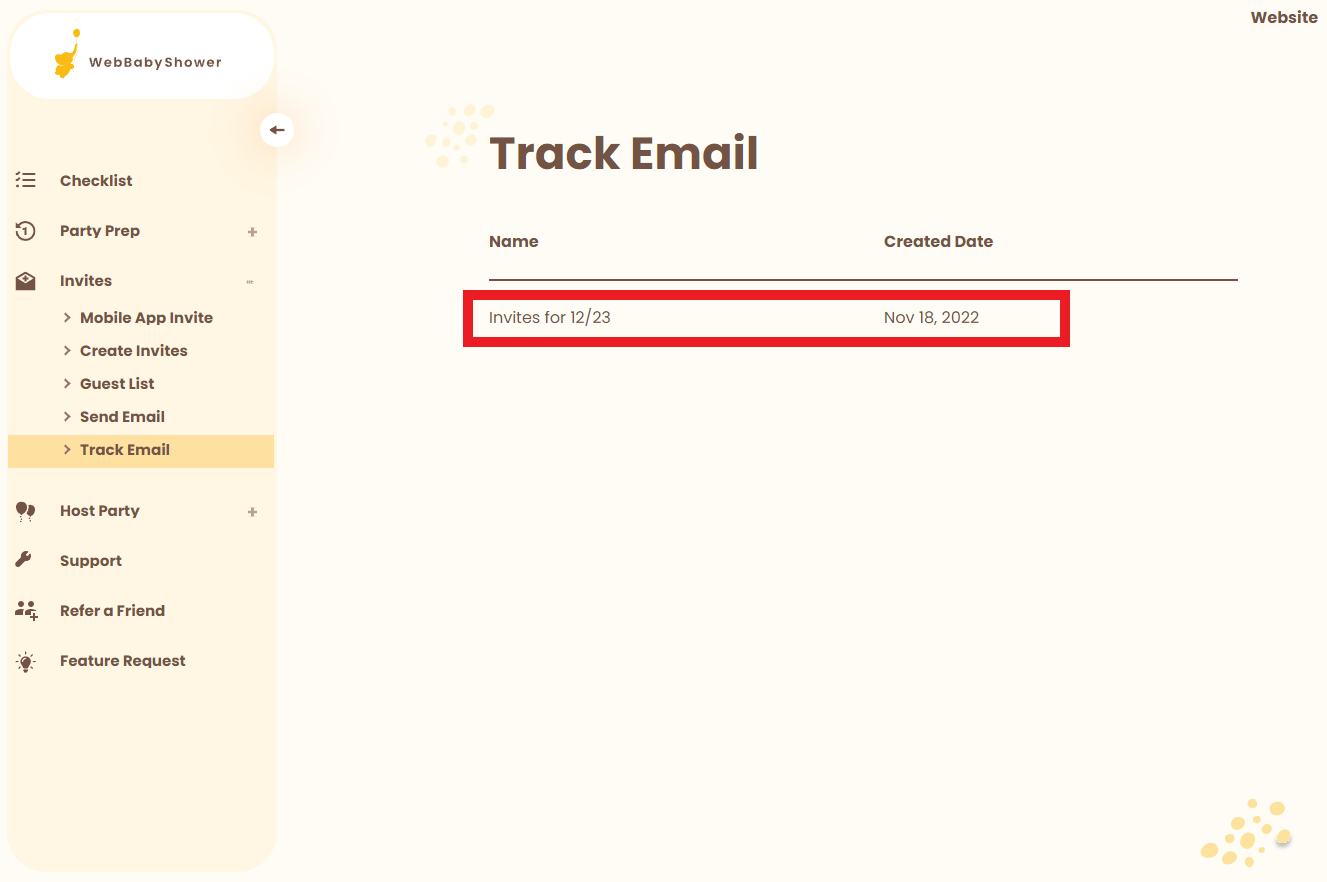
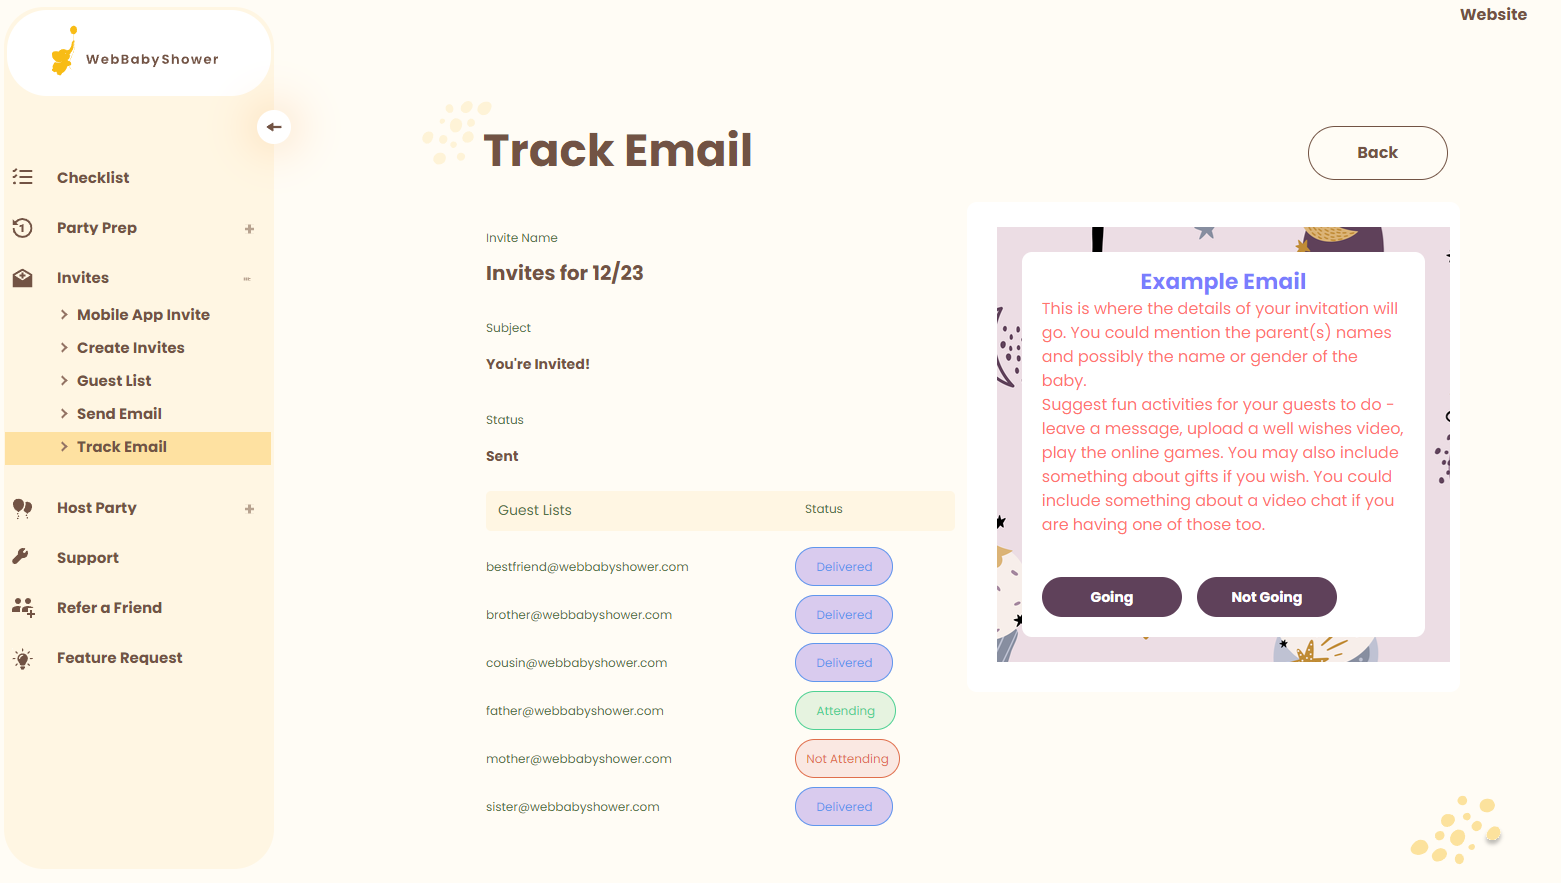
3. Click the name of the invite you want to track. You will see here the name of invite, the subject of your email, the invite template, and the responses of guests (if you sent an RSVP invite).
If you have any further questions or need further assistance, feel free to reach out to our support team.